Current Works Guide Service
  • (231) 883-8156
  • ted@current-works.com
  • Book a trip
  • Subscribe to Newsletter
  • Home
  • Guide Trips & More
    • Guide Trips & Pricing
    • Casting Lessons
    • Gift Certificates
    • Book a Trip
  • Fishing Report
  • Fish & Seasons
    • Steelhead
    • Trout
    • Smallmouth Bass
    • Salmon
    • Bluegill / Panfish / Bass
    • Golden Bones / Carp
  • Rivers & Hatches
    • Upper Manistee River
    • Lower Manistee River
    • Betsie River
    • Boardman River
    • Hatch Chart
  • Fly Tying
  • Articles
  • Gallery
  • About
    • About Your Guide
    • Testimonials
    • Newsletter
    • Area Information

Fly Tying

Clumsy Brown Stone

Posted by Ted Kraimer - December 22, 2024
Clumsy Brown Stone

Clumsy Brown Stone Dry Fly

The Midwest isn’t known for stoneflies – especially in comparison to the western rivers, but don’t let the western anglers have all the fun, especially in late May and June.

There are a few different stoneflies here in northern Michigan that conveniently get lumped into the name “Medium Brown Stonefly.” While not an impressive Latin name, it is refreshingly descriptive and easy to remember.

When flying, these big, clumsy bugs look like a Chinook helicopter that is having mechanical problems. And when the female stoneflies do crash to the water, they wiggle and shake their abdomen on the surface to release their eggs.


Clumsy Brown Stone and Natural

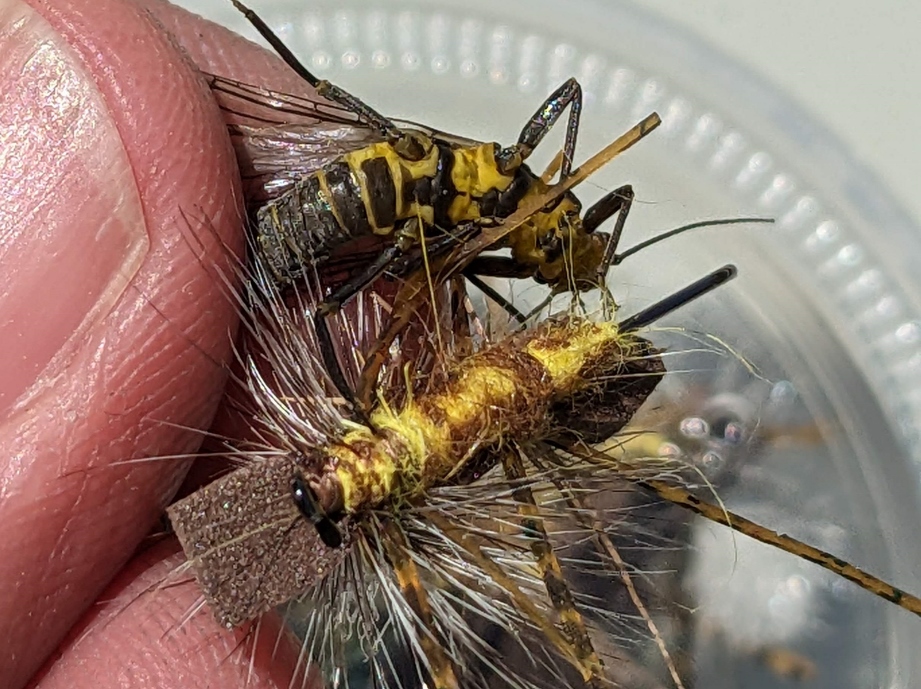
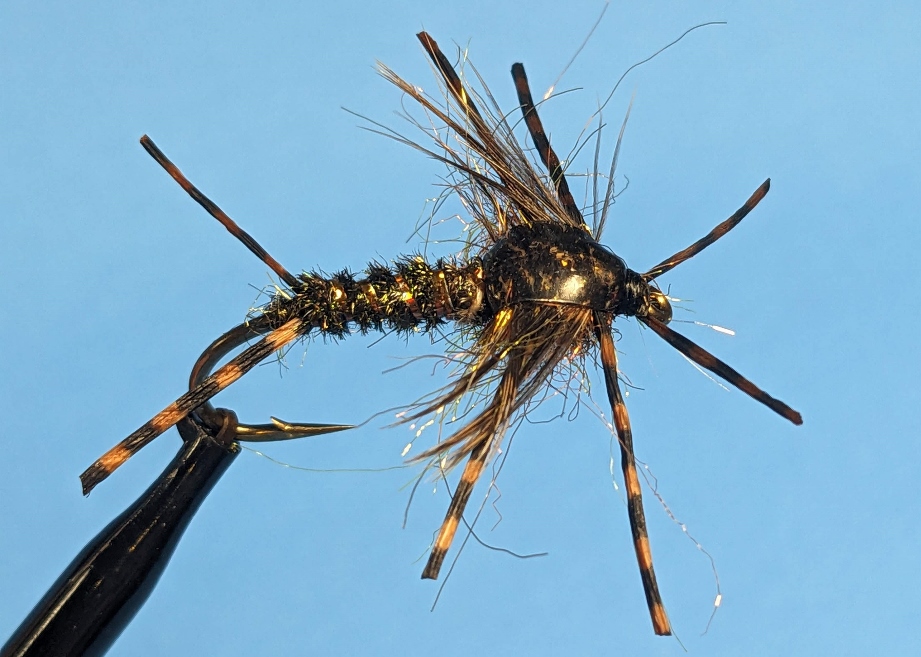
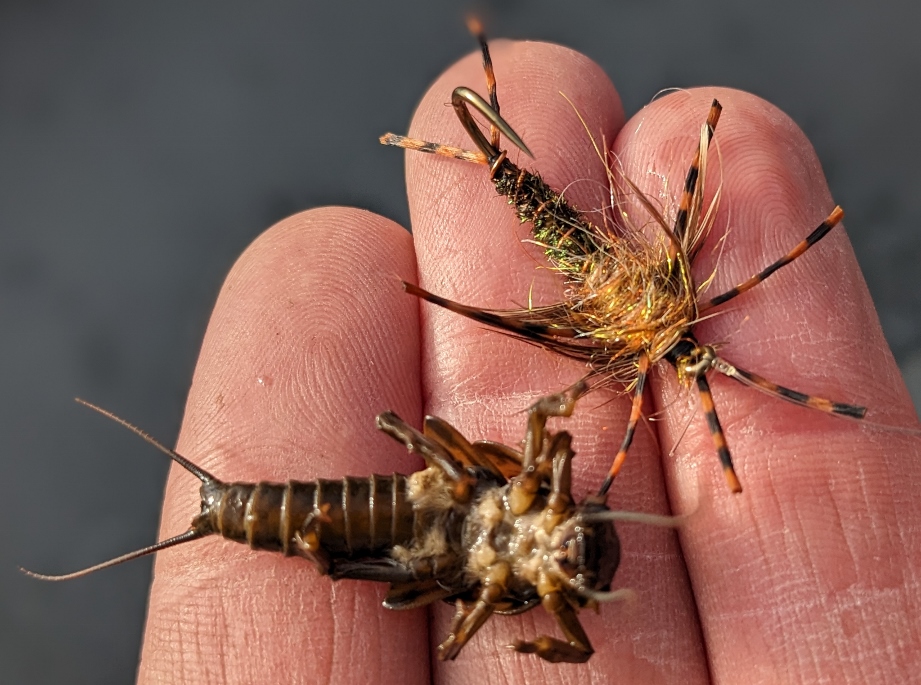
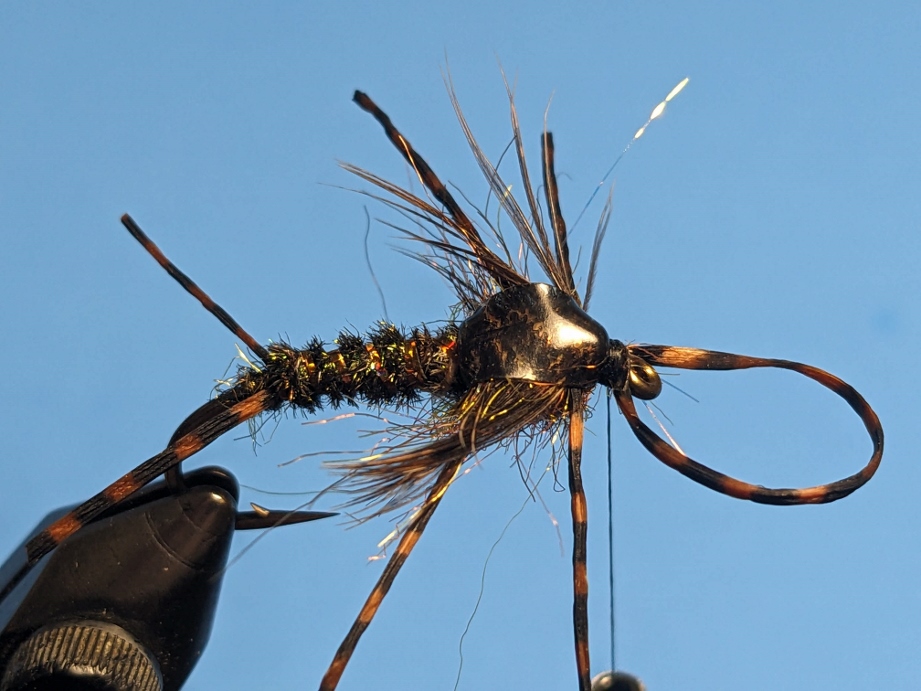
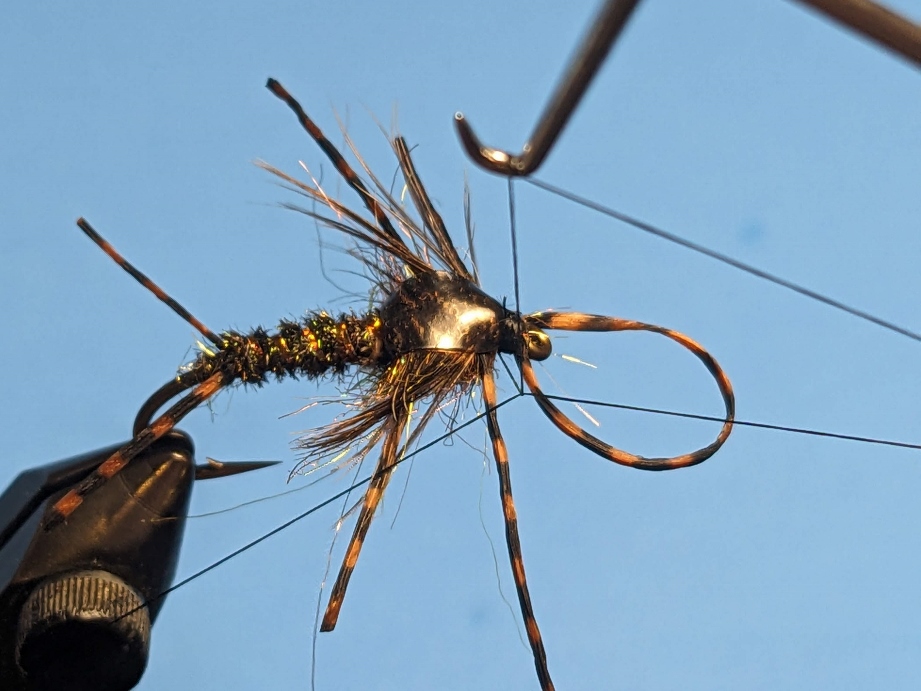
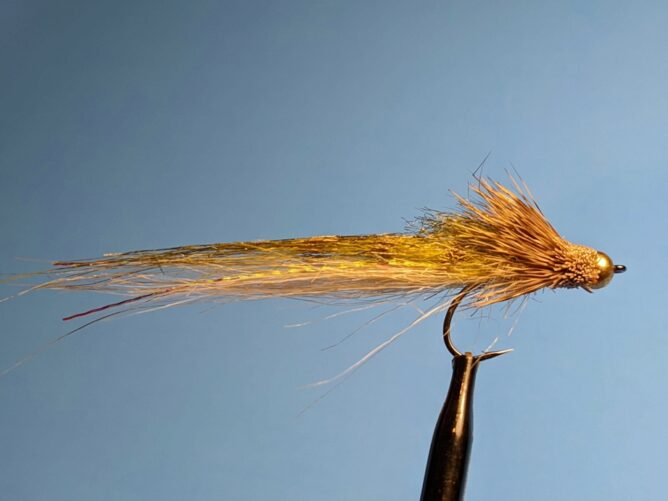
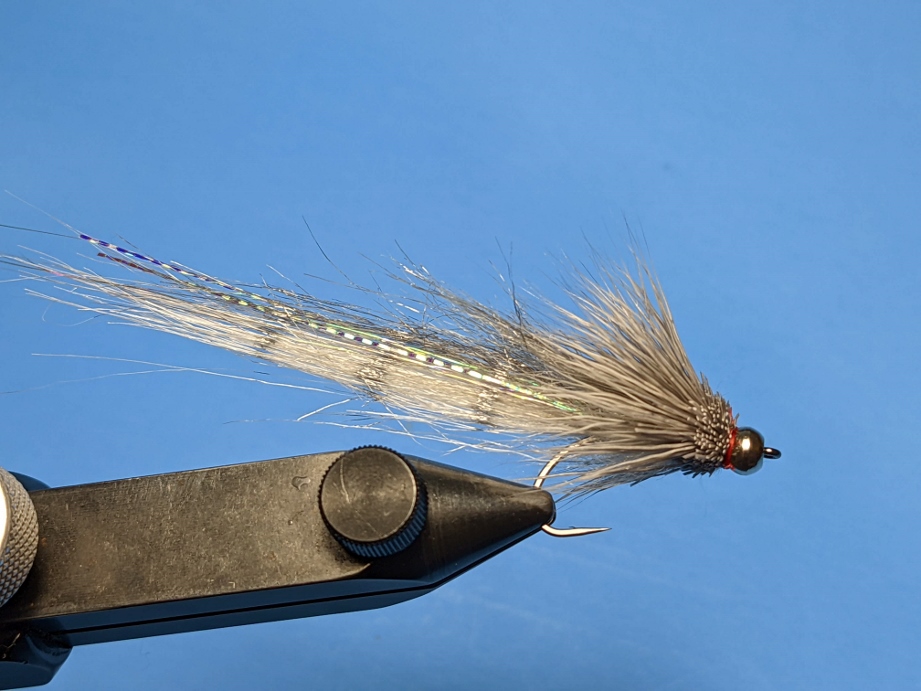
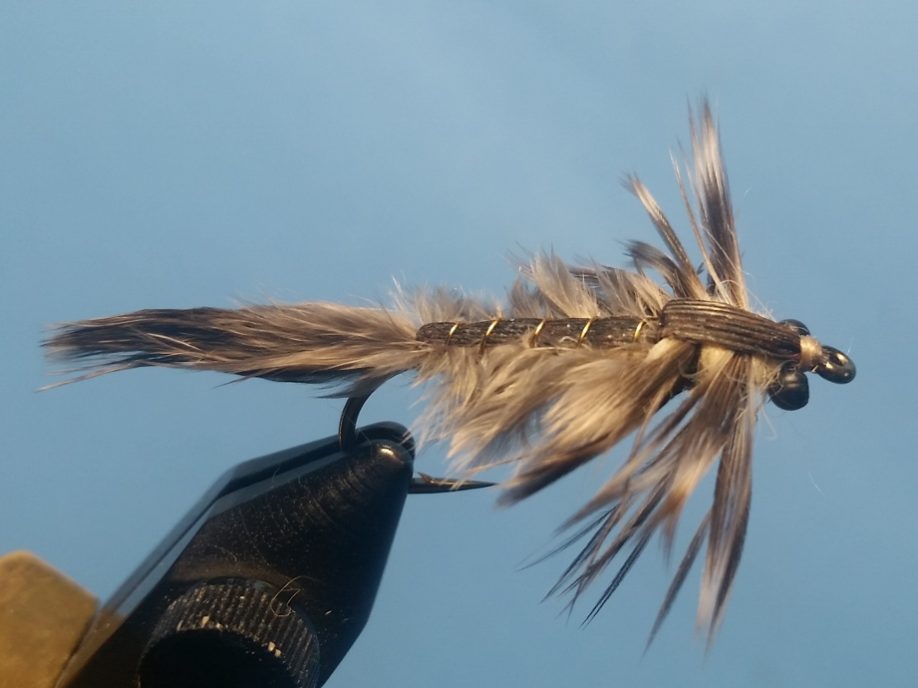
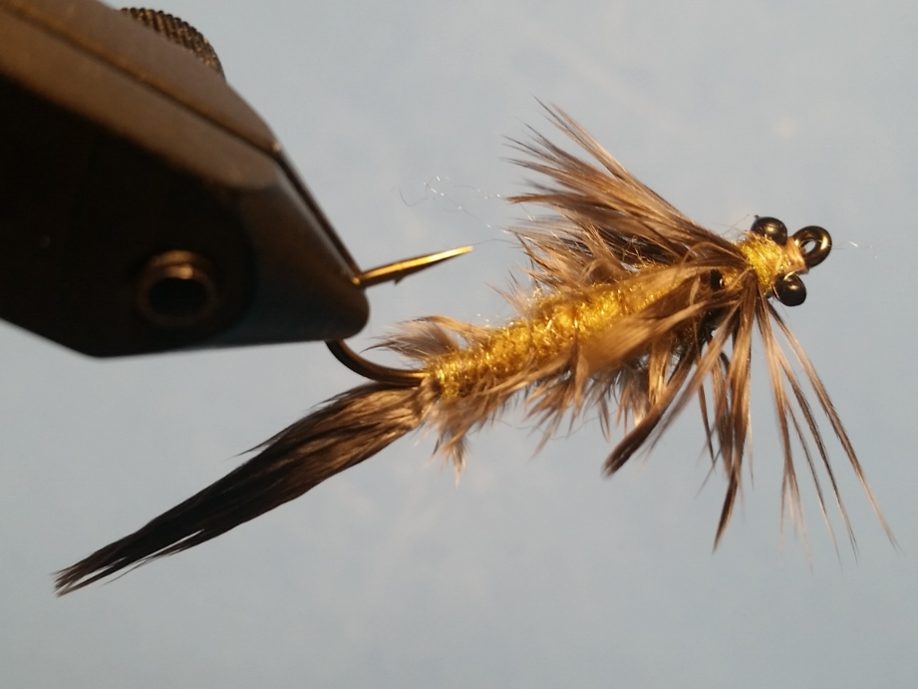
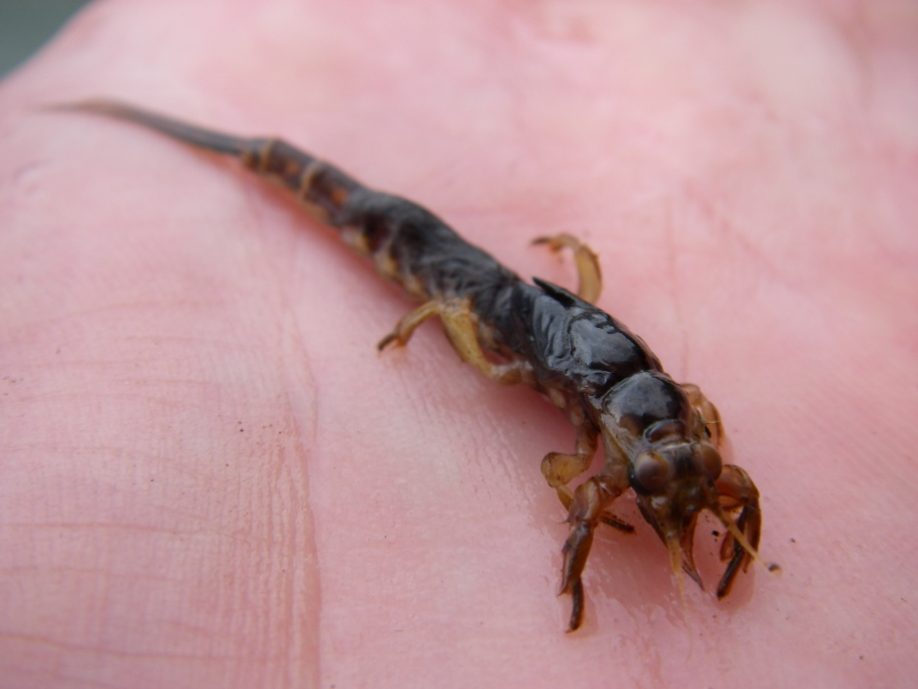
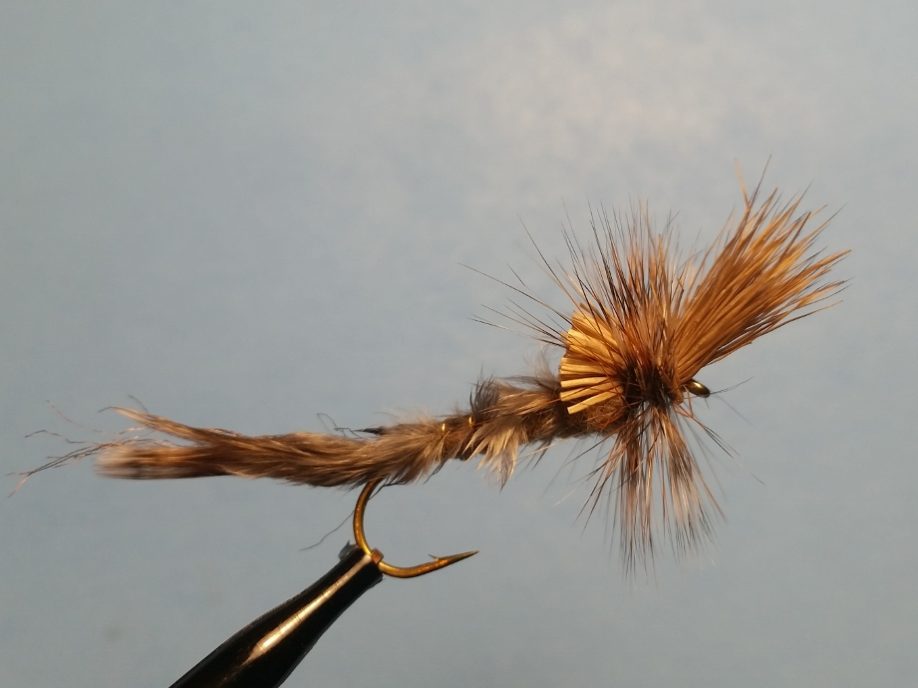
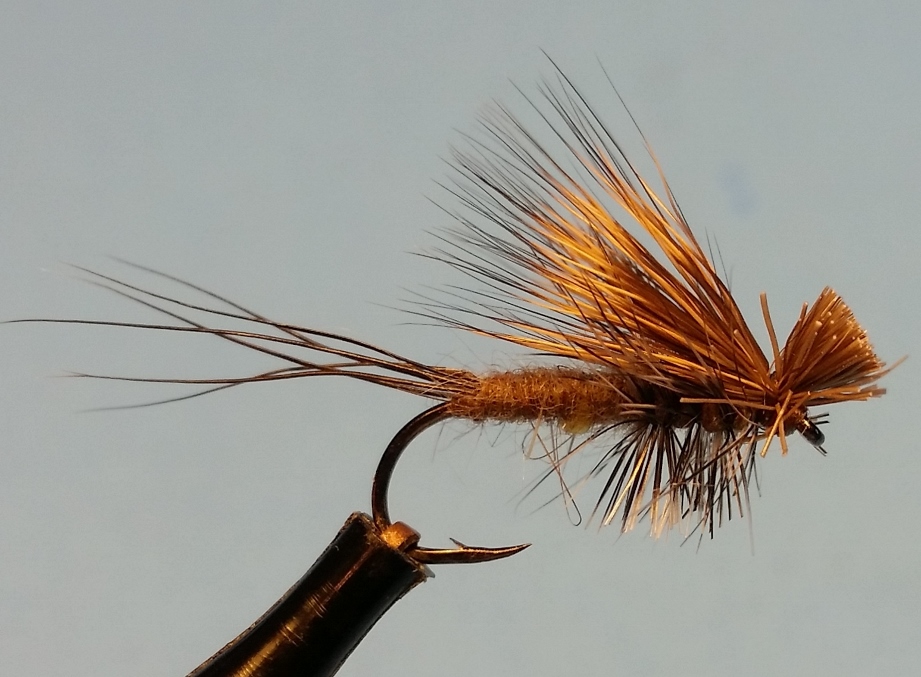
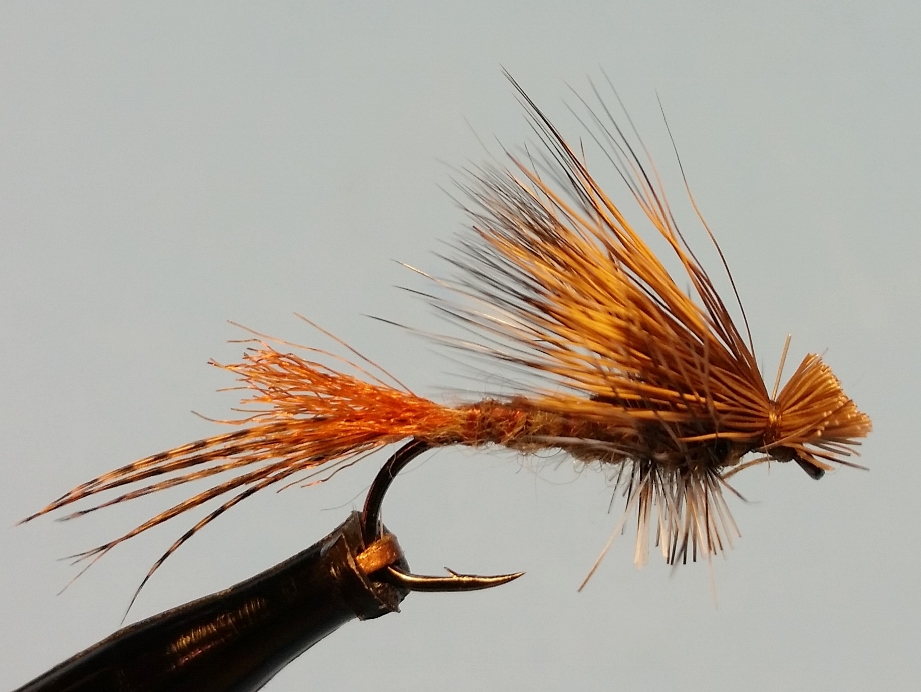
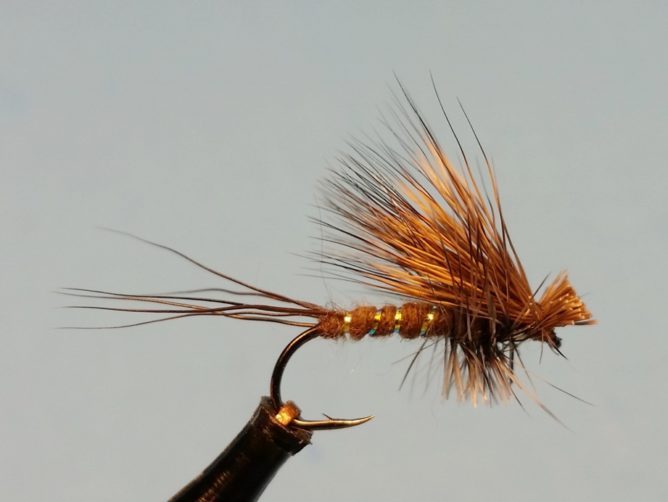
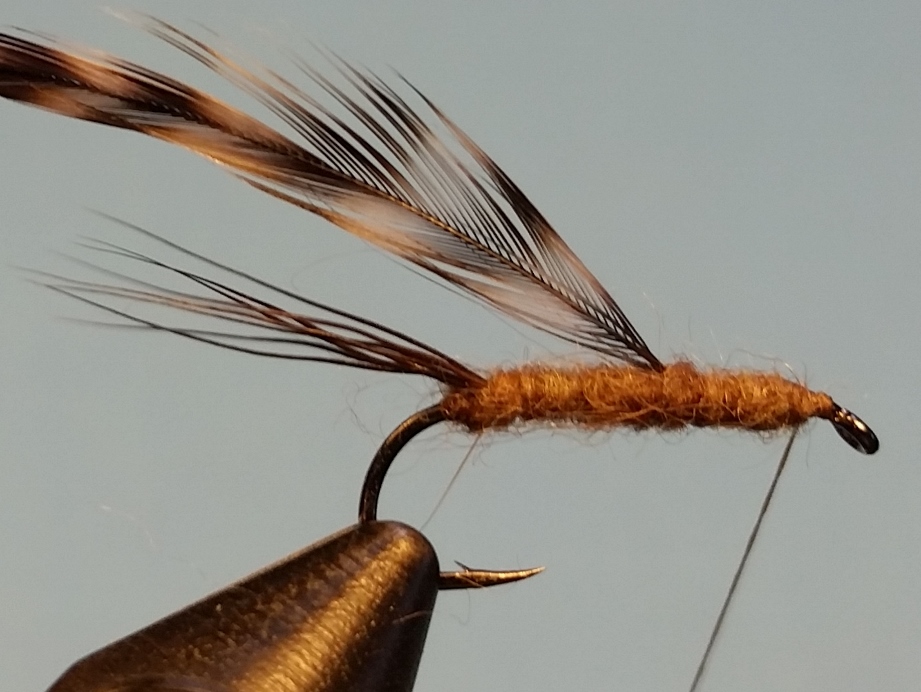
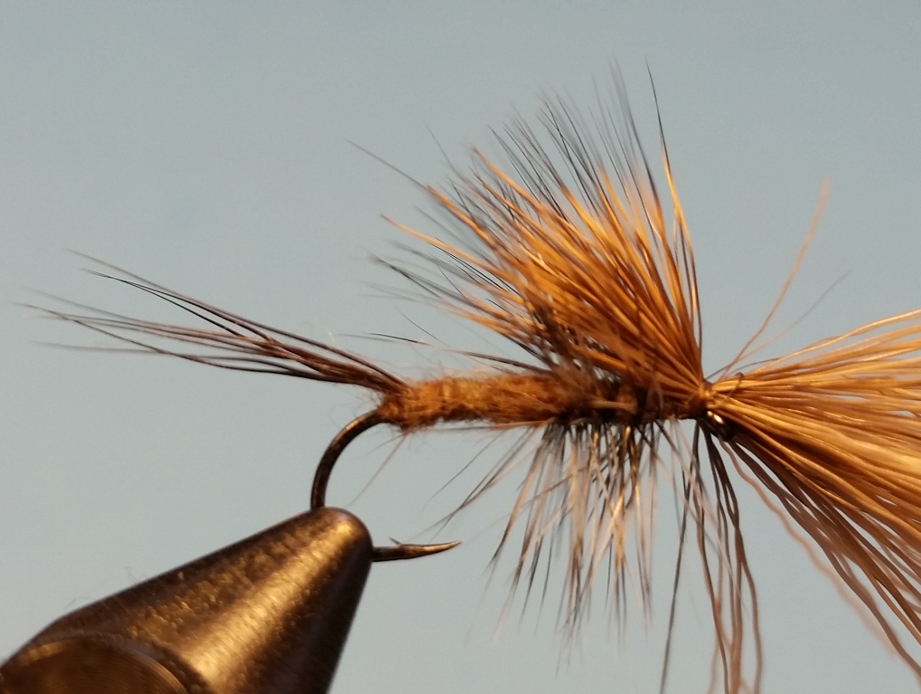
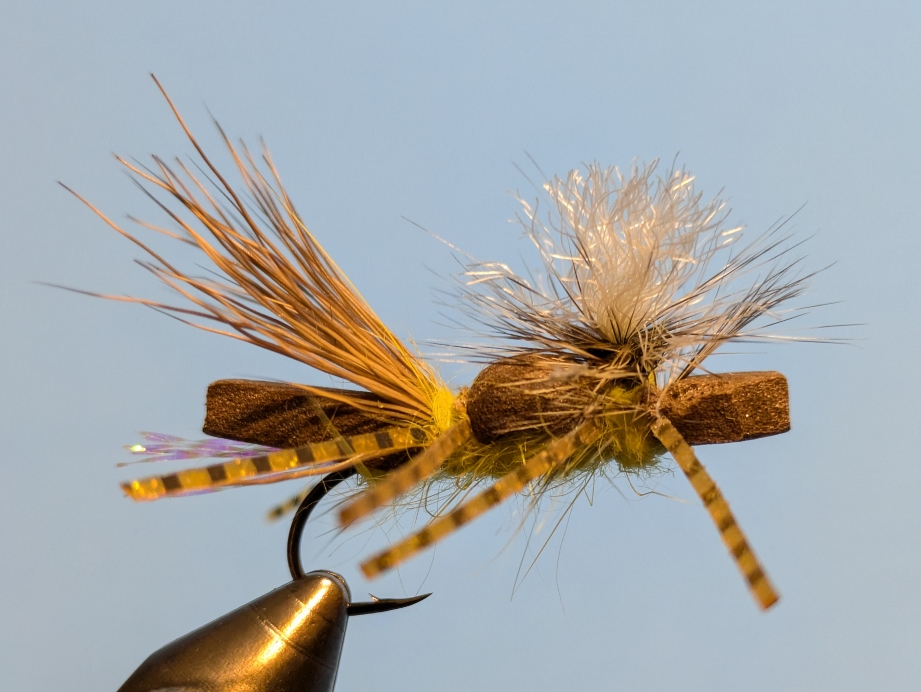
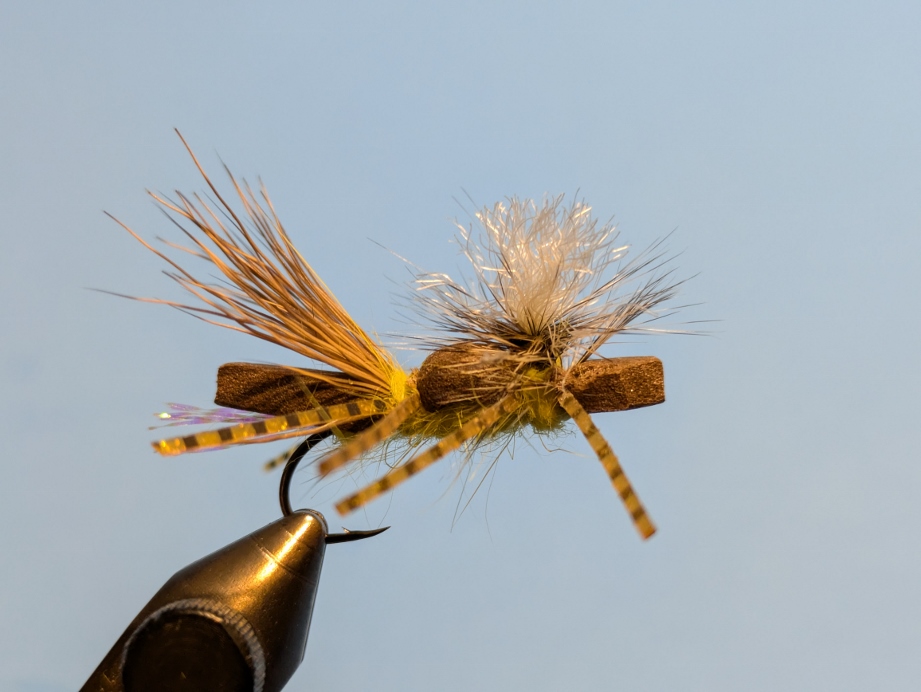
Clumsy Stones – A natural and pattern

This disturbance is much different than that of a natural drag-free drifting mayfly and often gets the attention of fish when a hatch/emergence isn’t taking place. Because of their size, they are worth rising to, often aggressively, before the bug gets away.

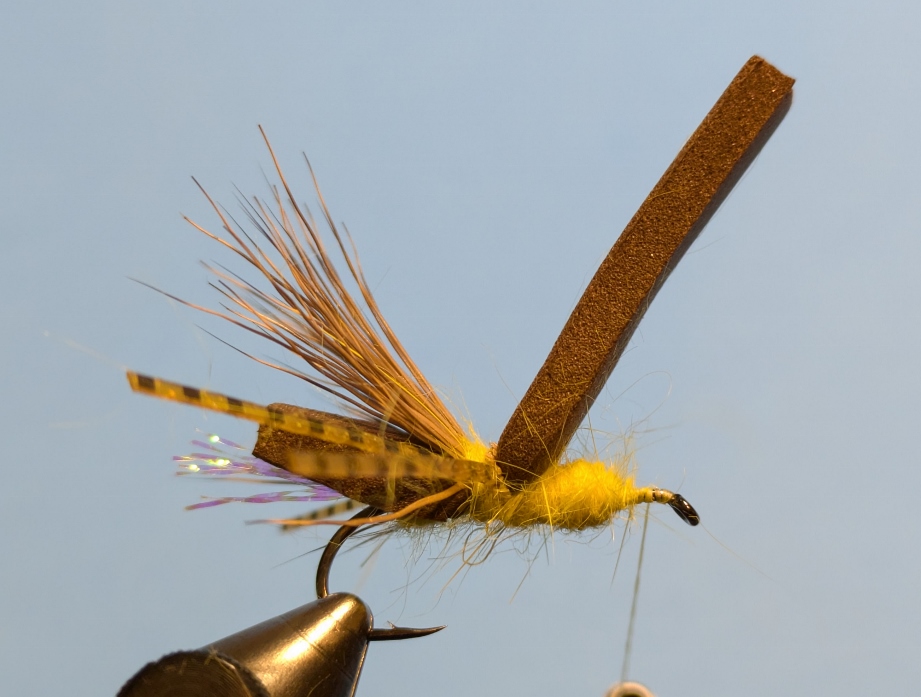
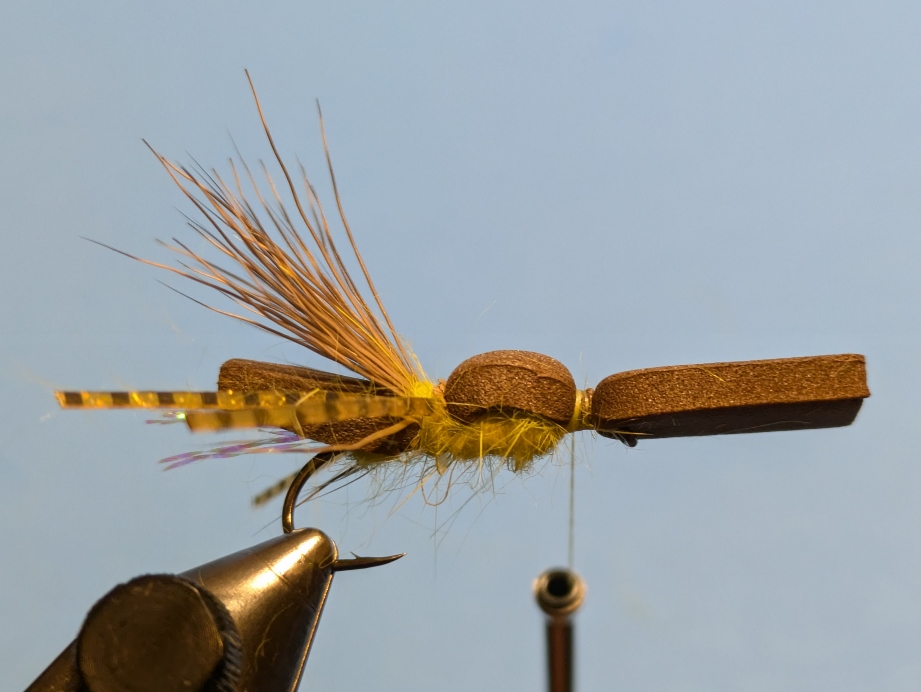
While there are plenty of stonefly patterns hailing from the west, I simply modified the Chubby Chernobyl and added some elements of the Fuzzy Wuzzy to come up with the Clumsy Brown Stone. The foam not only helps this fly float as you skitter and twitch it on the surface, but also provides a nice contrast to the yellow dubbed underside that is mottled by a marker.

Stoneflies prefer rocks and gravel, but a lot of our rivers like the Manistee and Au Sable have a mix of gravel and sand. Like mayflies, a lot of the egg laying takes place in riffle sections, however I have caught plenty of fish in slow moving water without a stone or any gravel around. Tie and try the Clumsy Brown Stone the next time you are waiting for a mayfly hatch in those special six weeks of dry fly fishing we experience every late spring.


Clumsy Brown Stone and Brown Trout

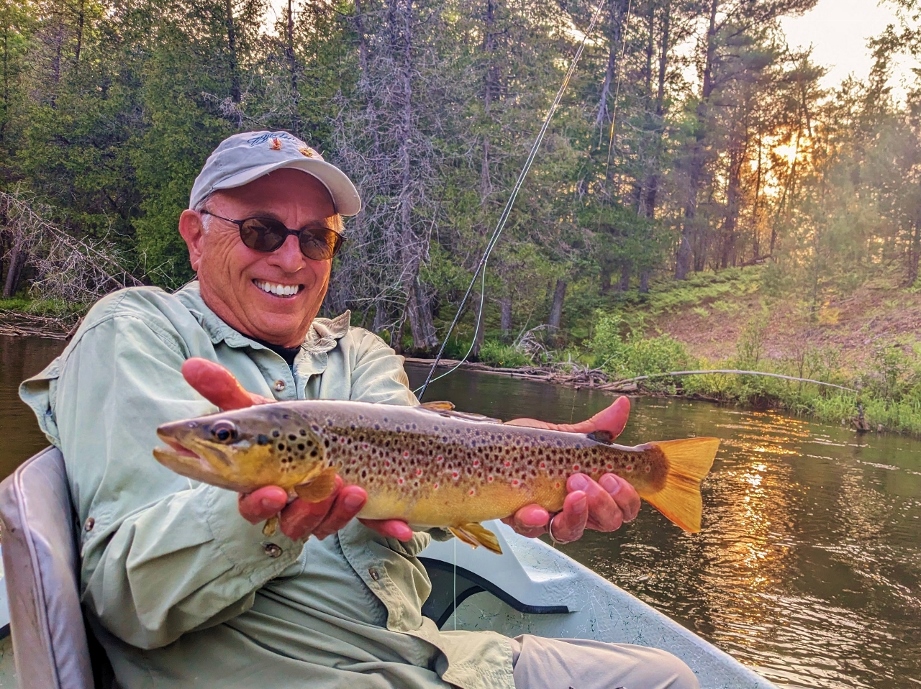
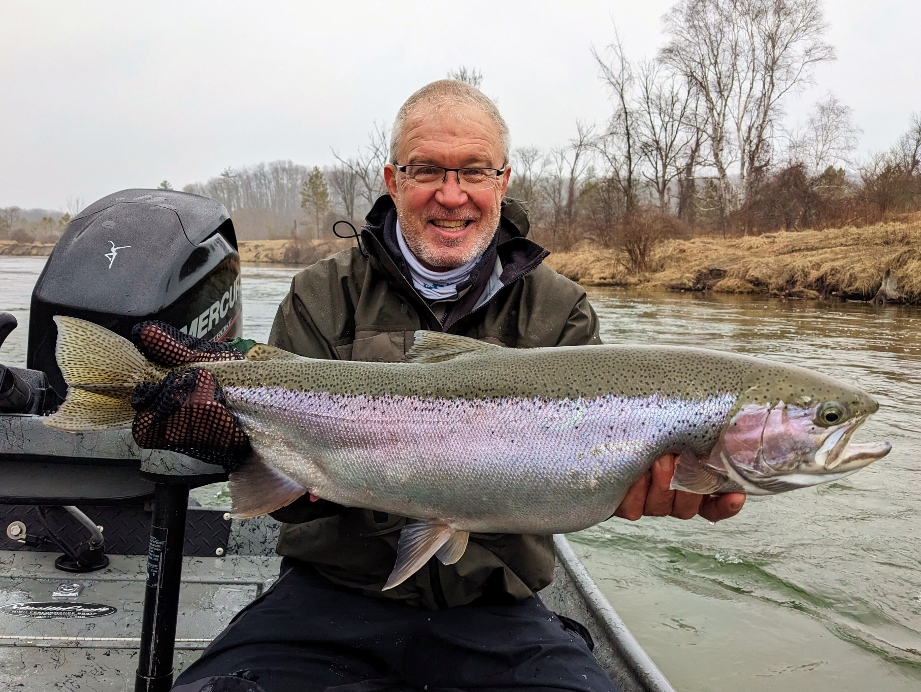
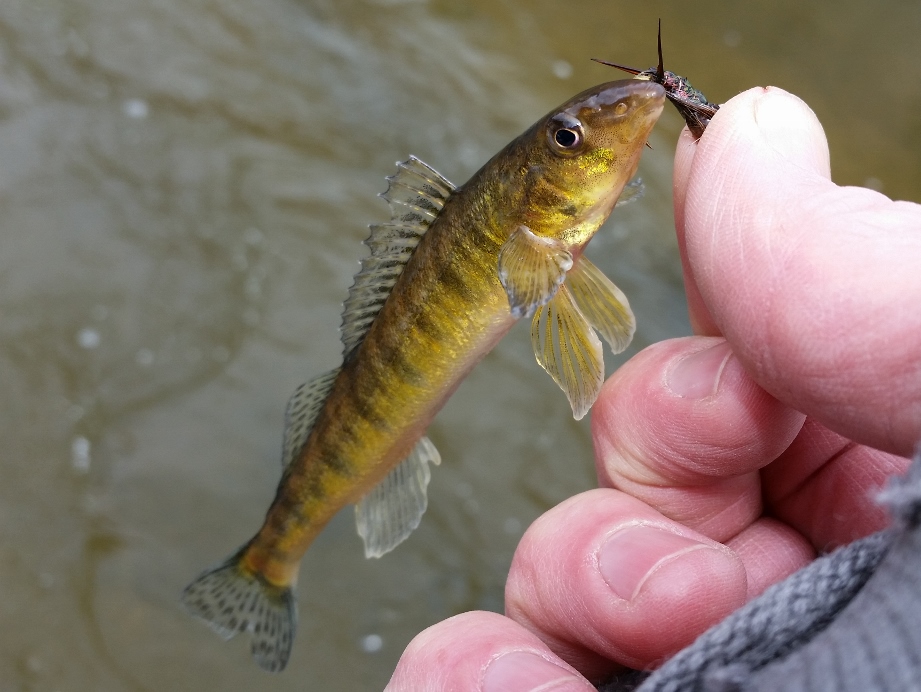
Manistee Brown Trout caught on a Clumsy Brown Stone

Recipe

Hook: Gamakatsu S10 – #10
Thread: Uni 6/0 – Lt. Cahil
Tail: Krystal Flash – Grey Ghost
Dubbing: Rabbit – Yellow
Foam back: Chocolate/Dark Brown 3 mm
Wing: Deer Body Hair – Tan
Legs: Sili Legs Perfectly Barred Brown
Post: Strung Fuzzy Fiber – White
Hackle: Grizzly Rooster


Tying Instructions

Clumsy Brown Stone Step 1
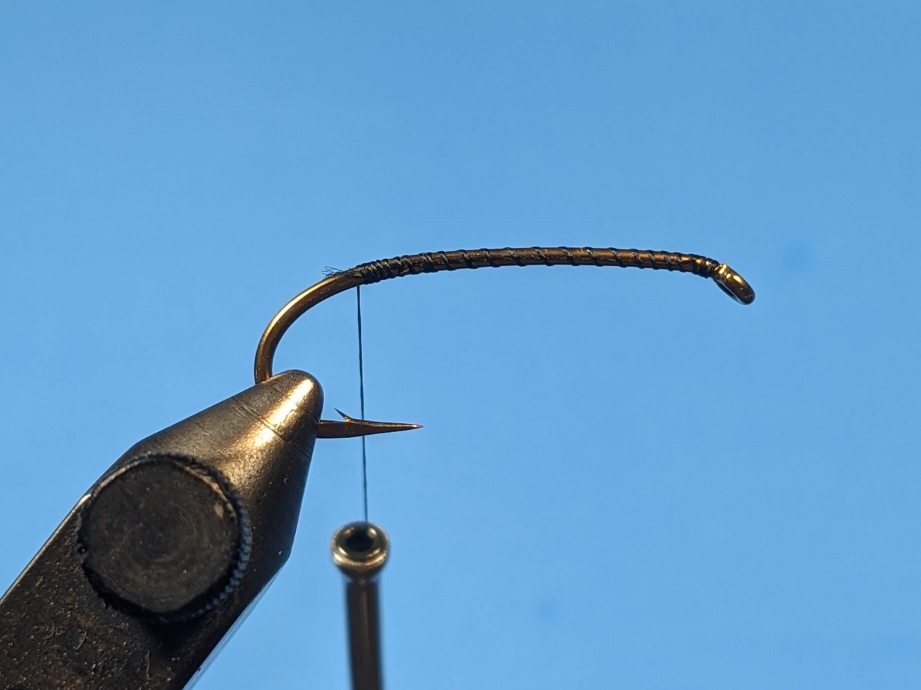
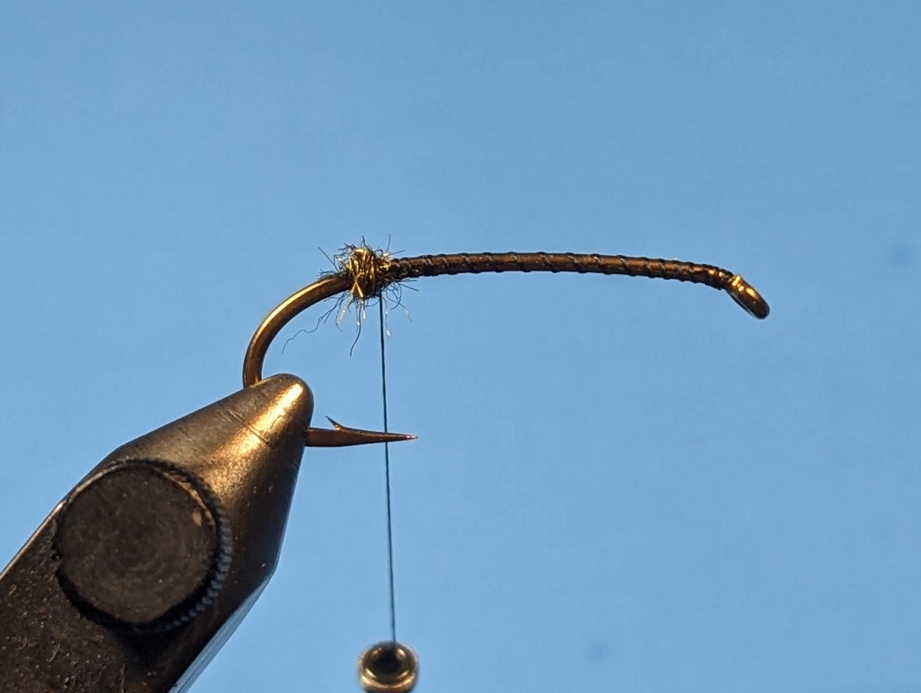
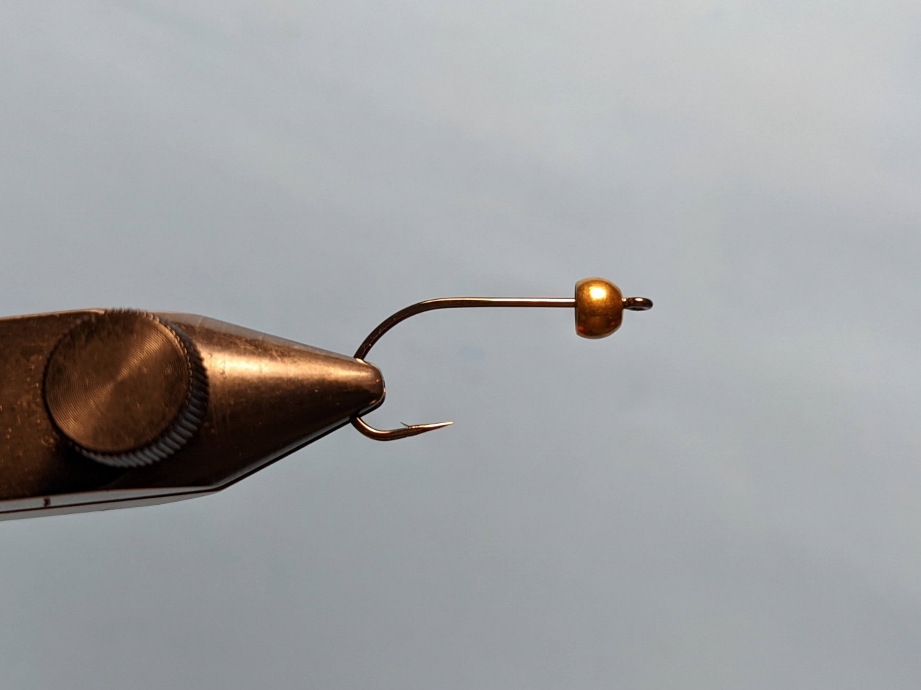
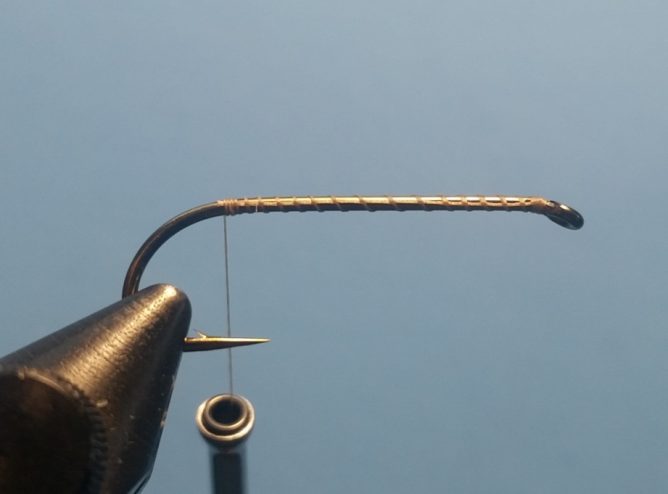
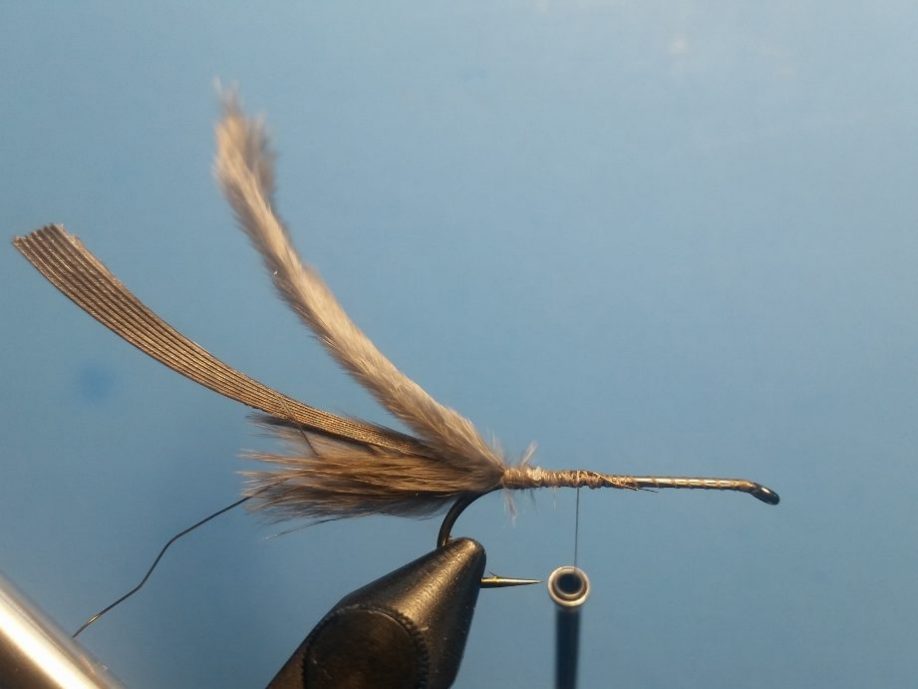
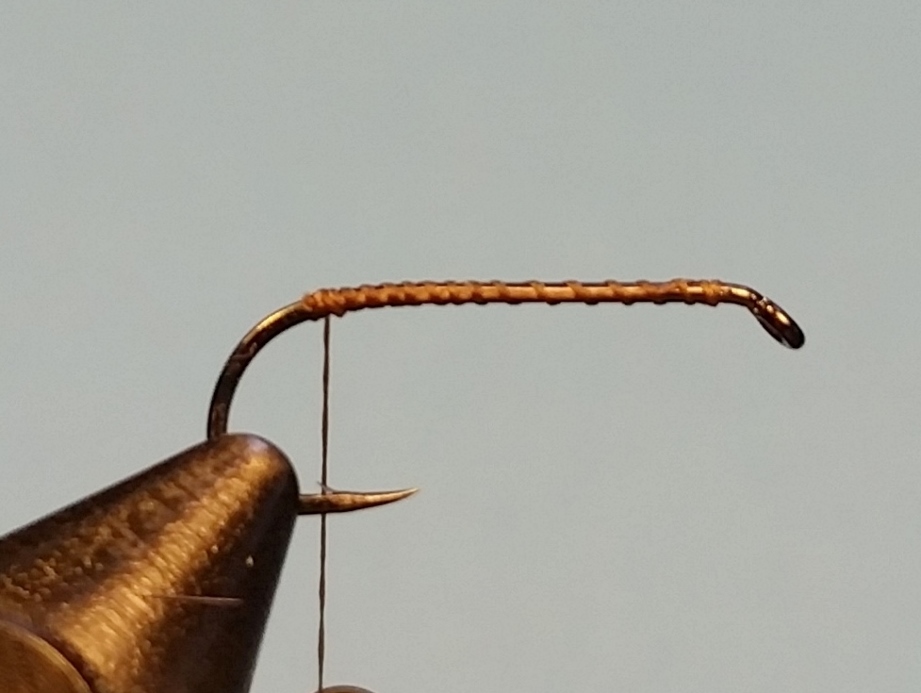
Step 1. Wrap a thread base from behind the eye to above the barb of the hook.

Clumsy Brown Stone Step 2

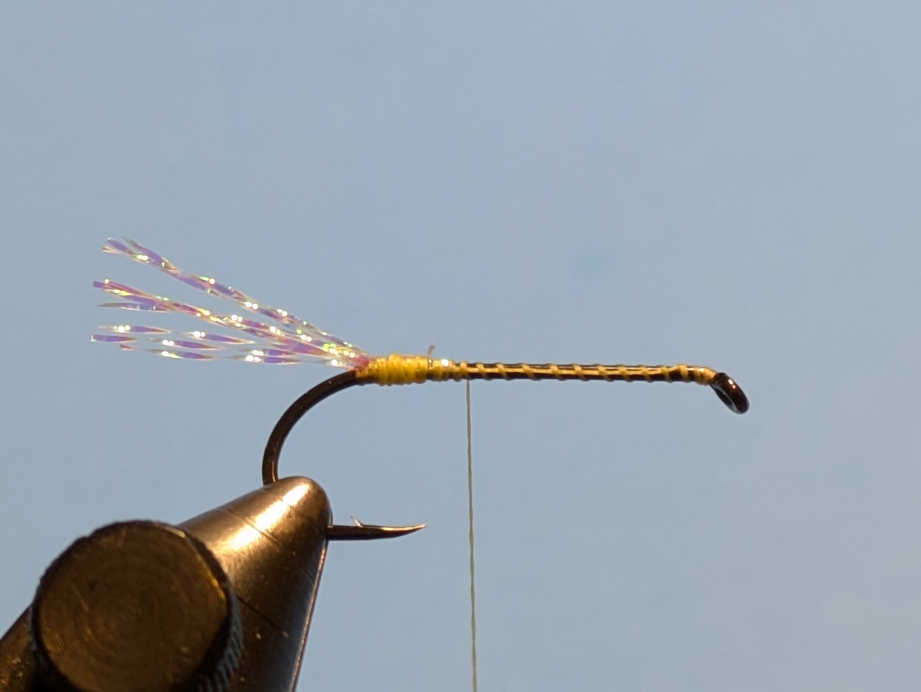
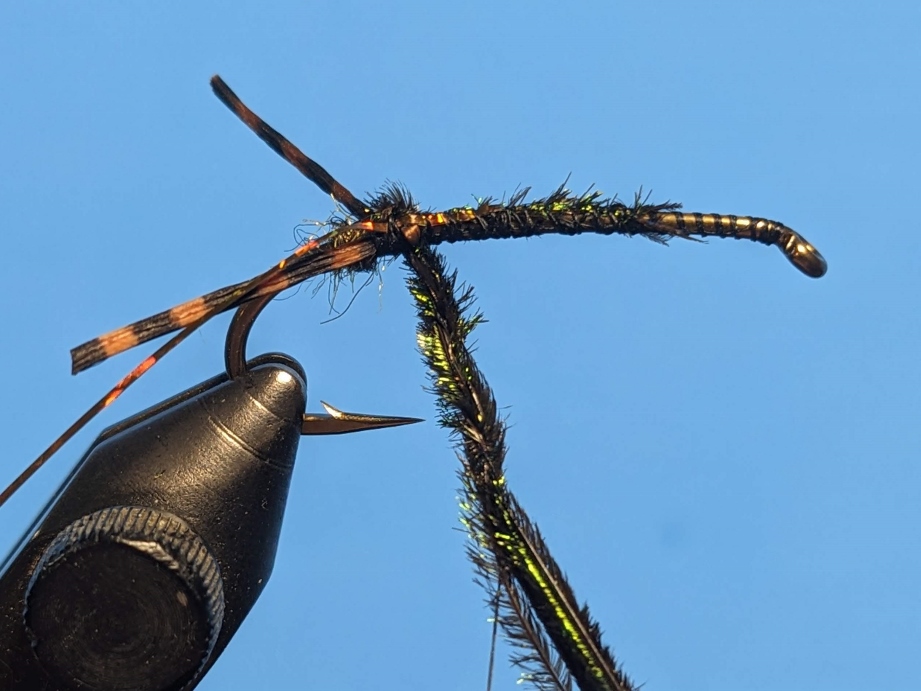
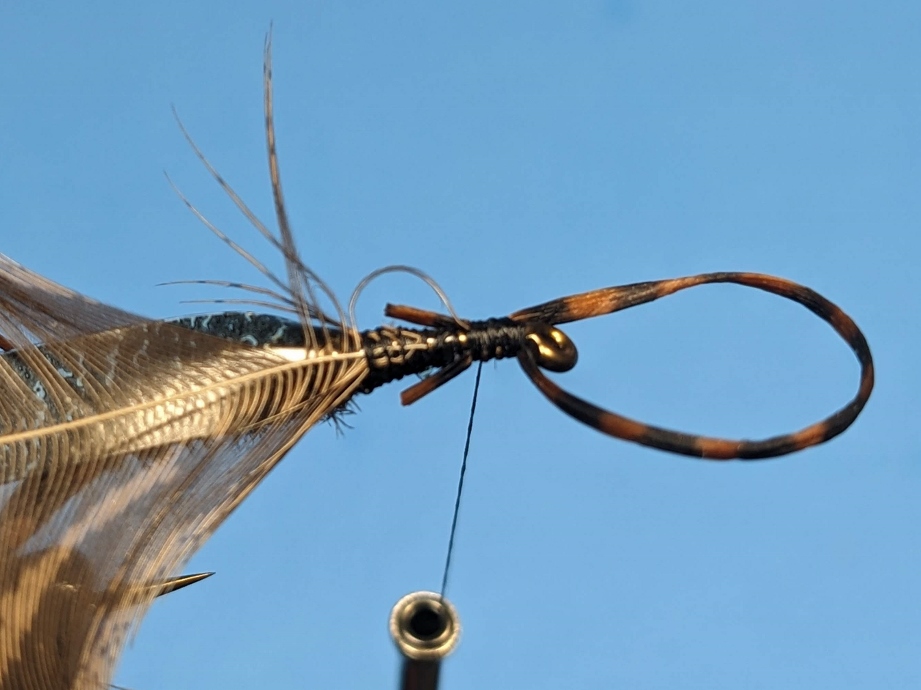
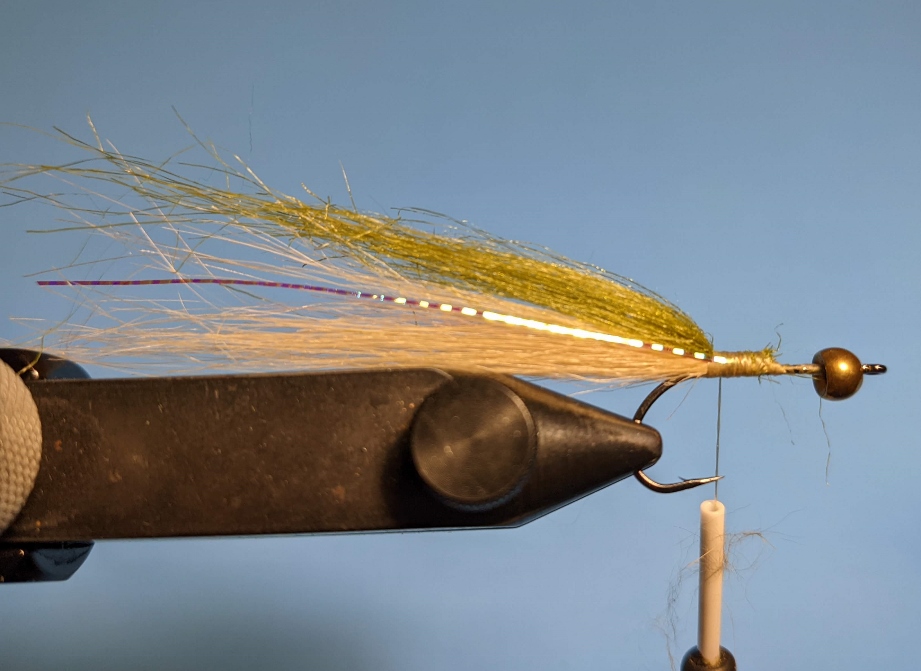
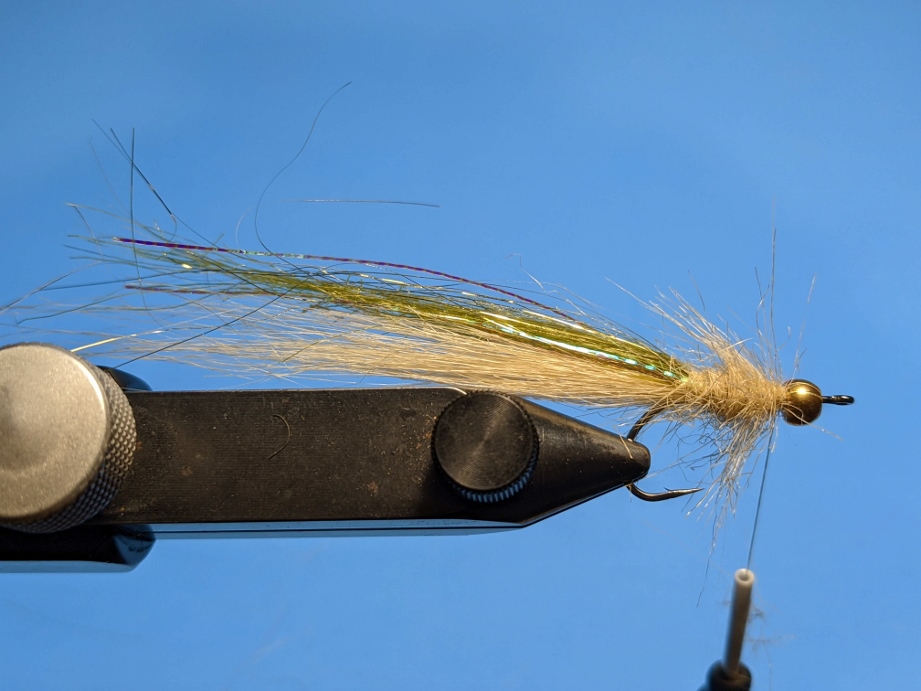
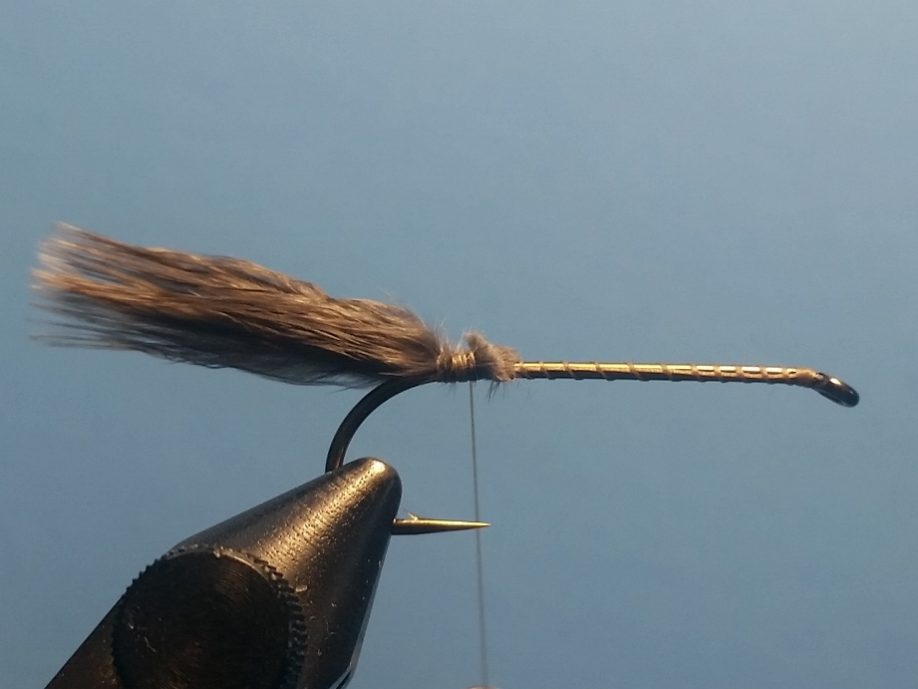
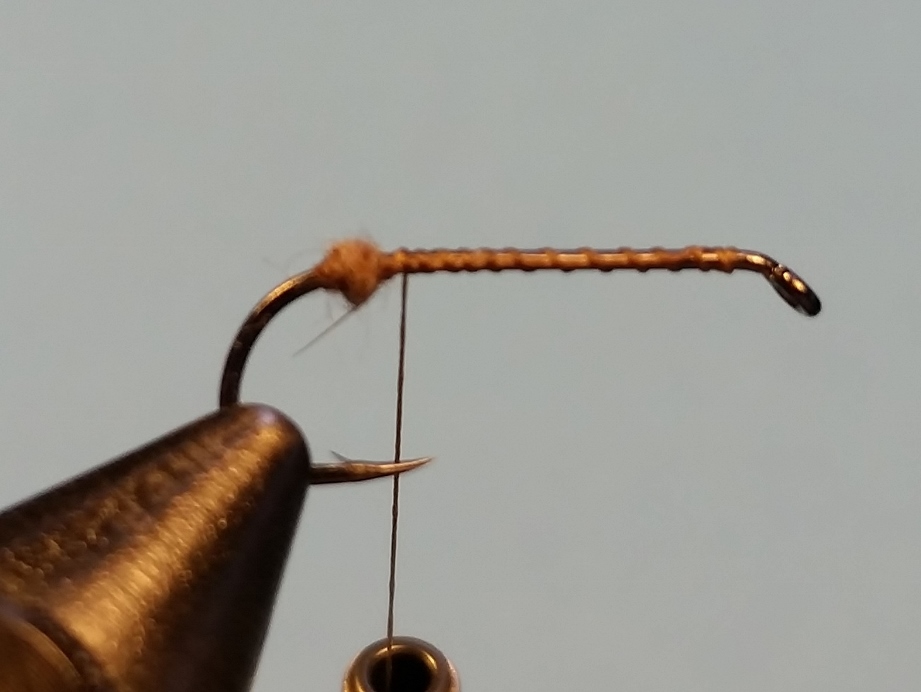
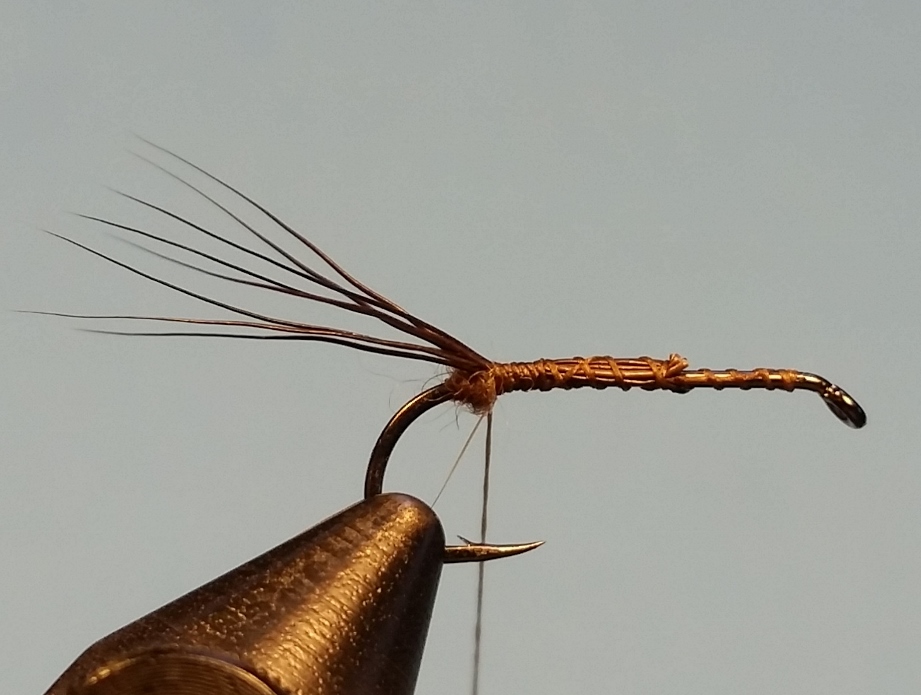
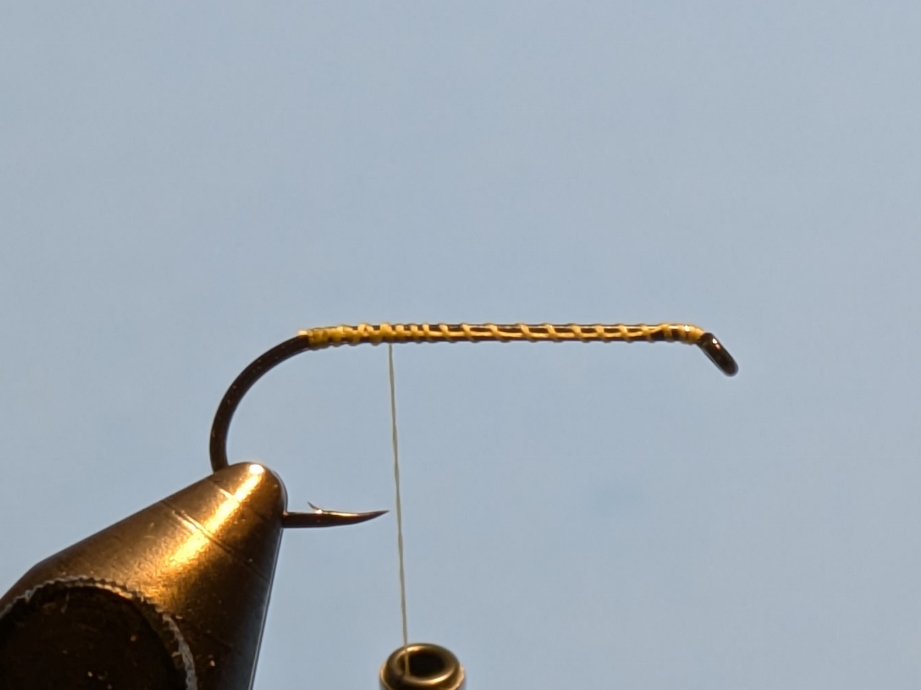
Step 2. Tie in about 10 strands of Krystal Flash above the barb, extending about one hook length backwards.

Clumsy Brown Stone Step 3

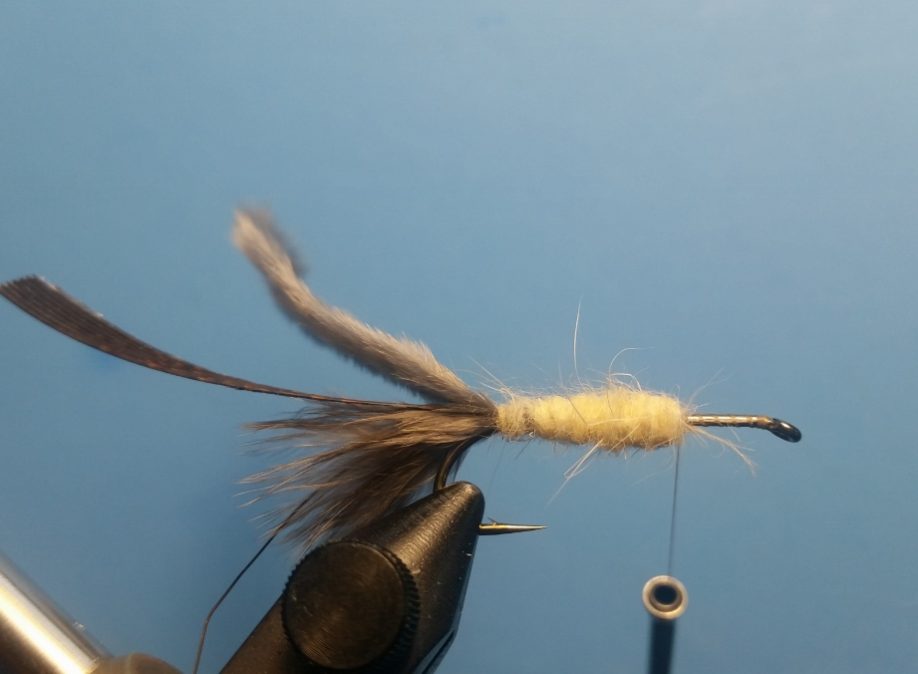
Step 3. Dub over the Krystal Flash to above the hook point.

Clumsy Brown Stone Step 4

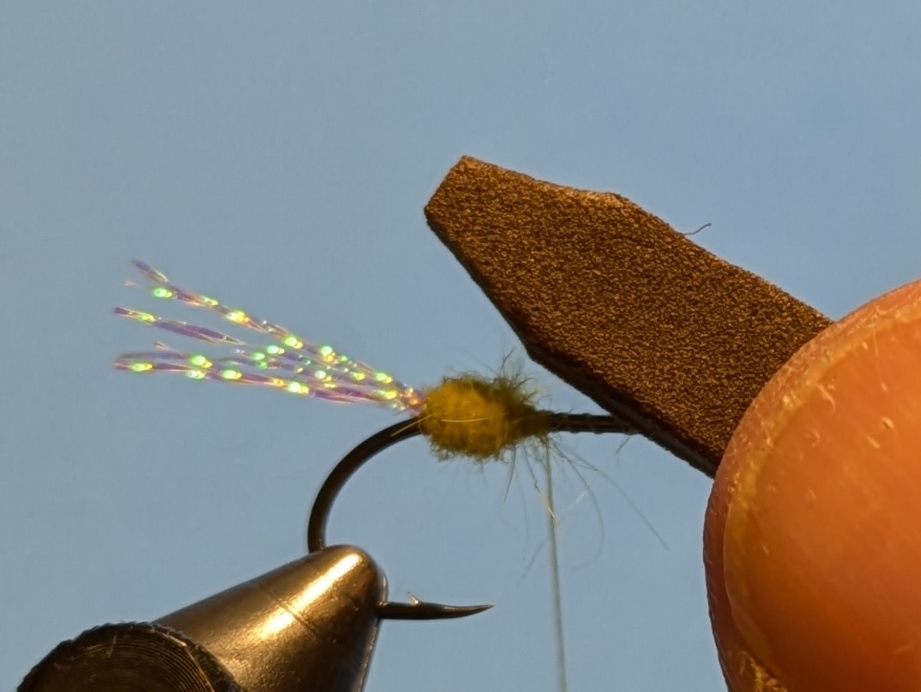
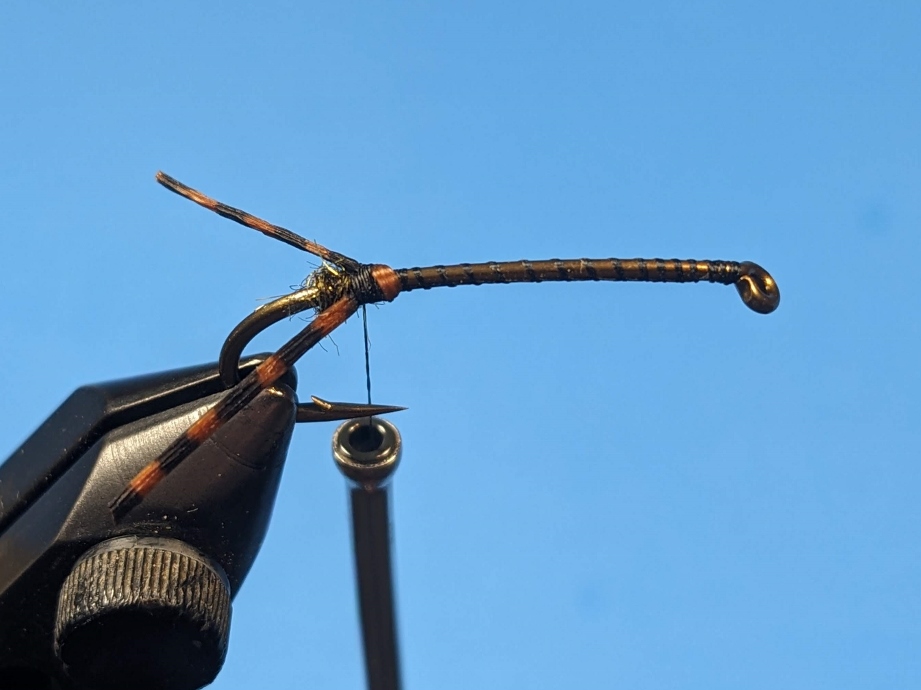
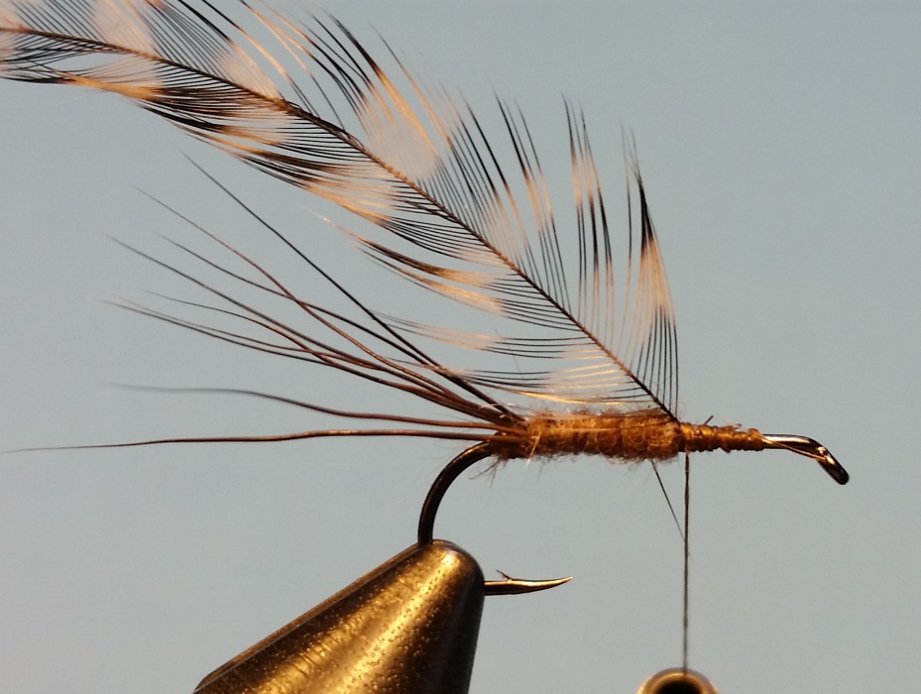
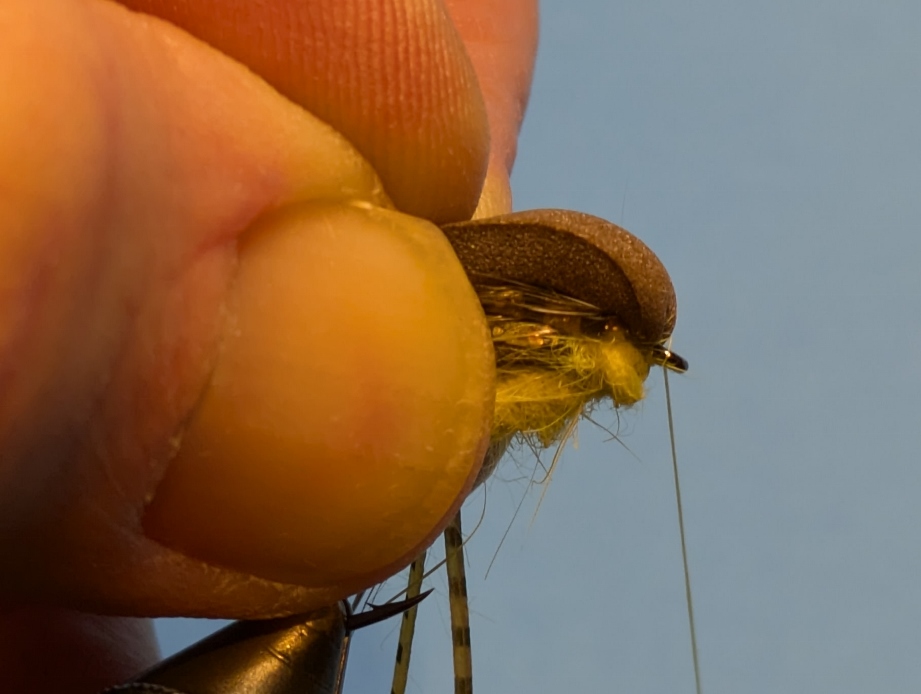
Step 4. Cut a piece of foam about 1/4” wide. Knock off the edges, making a somewhat tapered rear abdomen.

Clumsy Brown Stone Step 5

Step 5. Tie the foam – tapered part extending rearwards – where dubbing ends.  To prevent cutting the foam with the thread, start with loose wraps and over a somewhat wide tie in area and increase pressure.

Clumsy Brown Stone Step 6
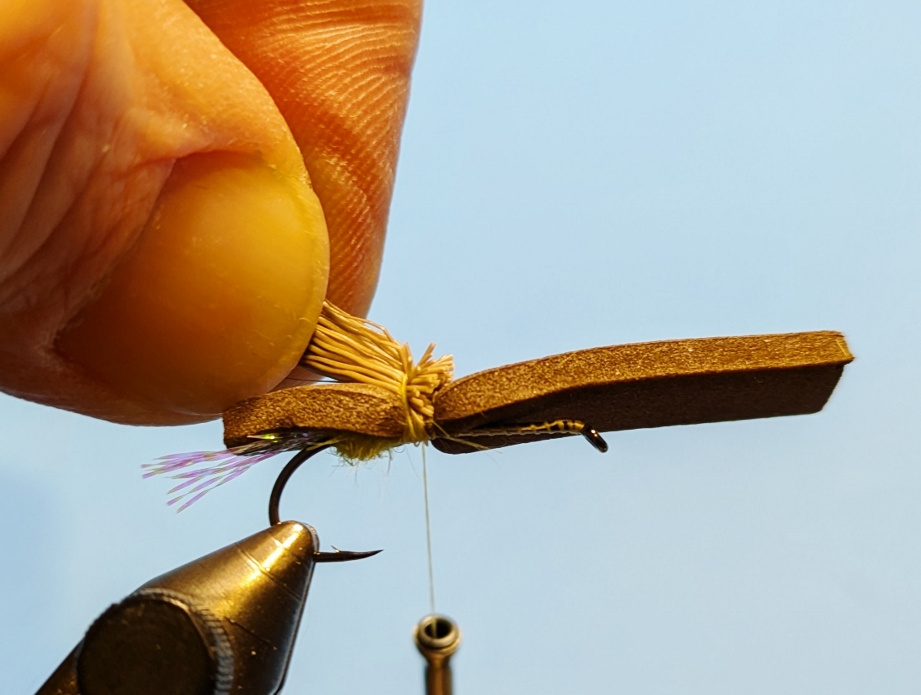
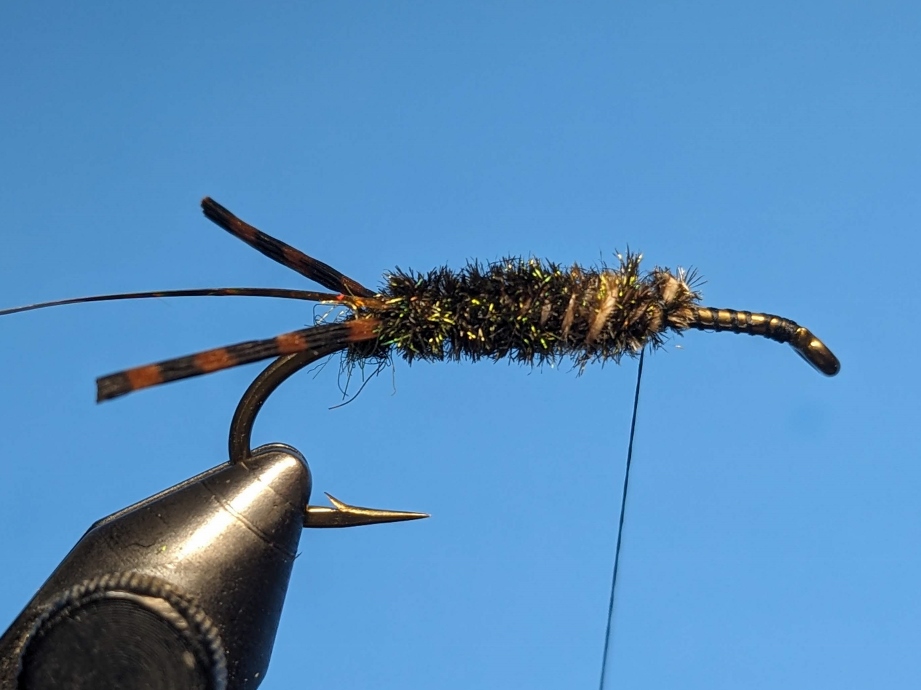
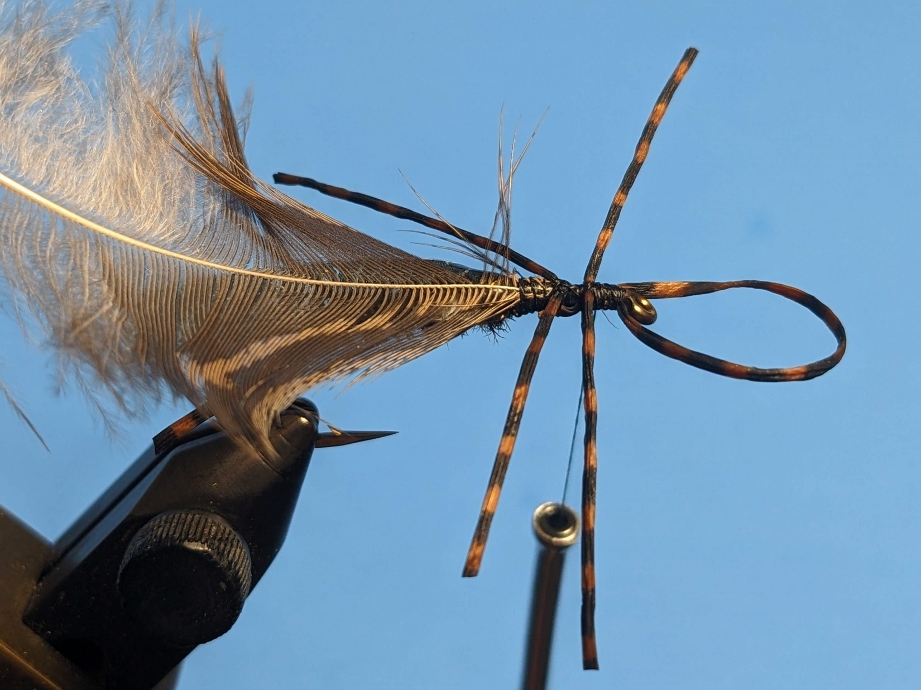
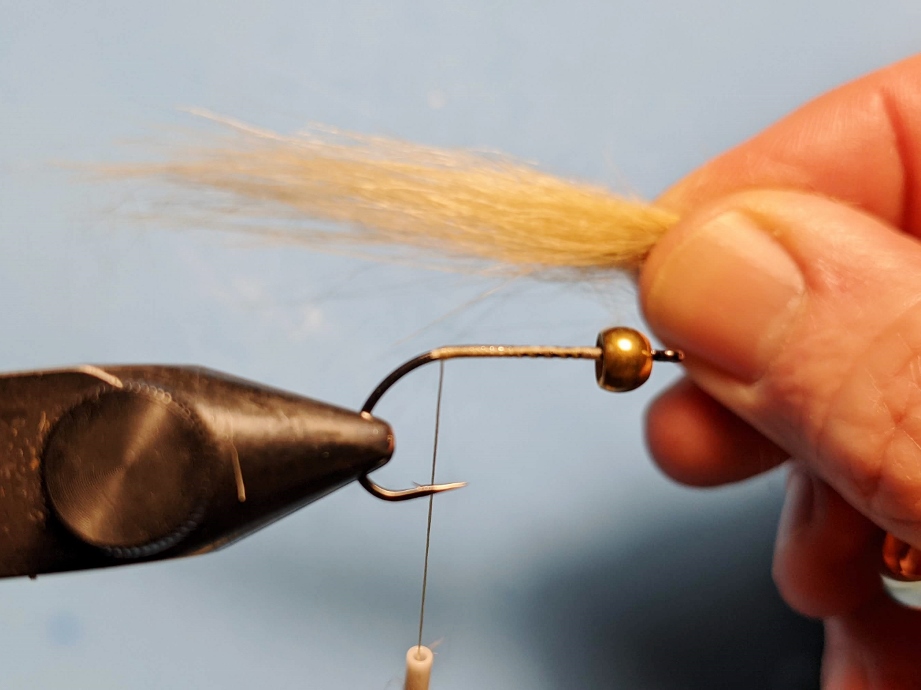
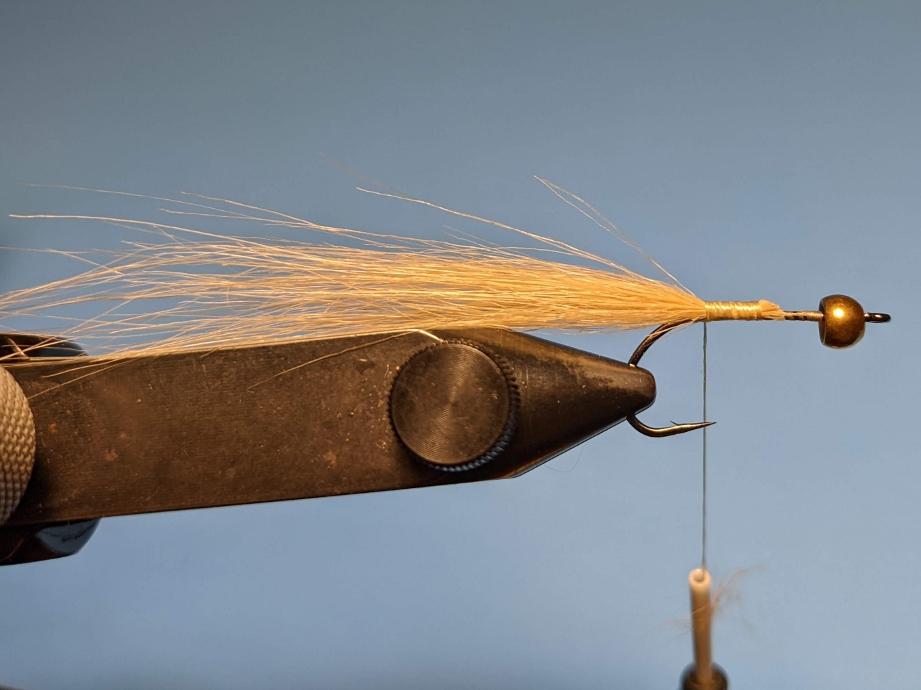
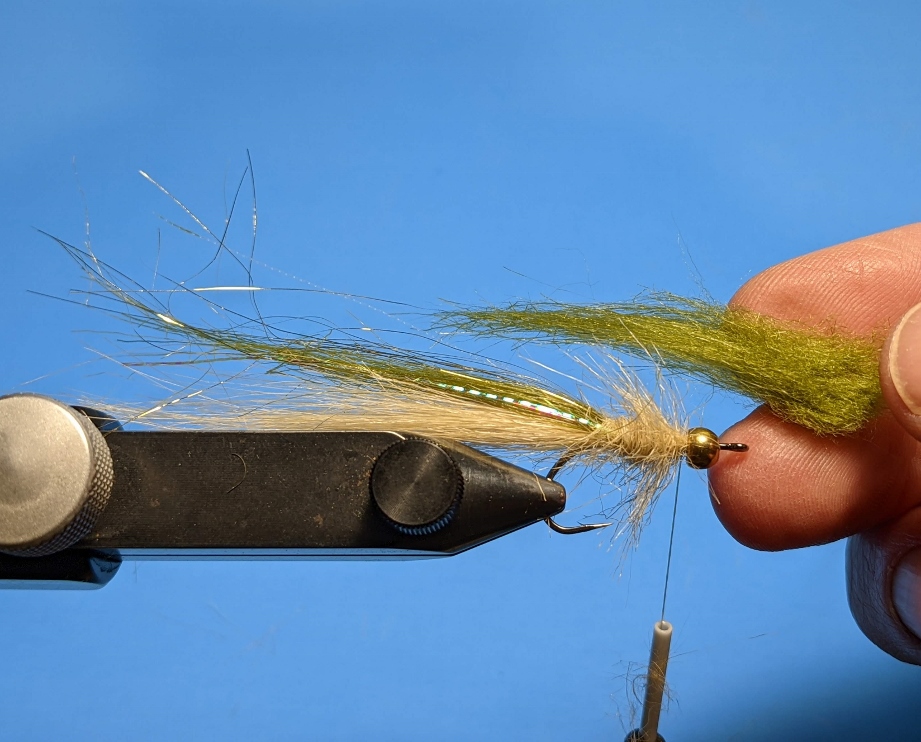
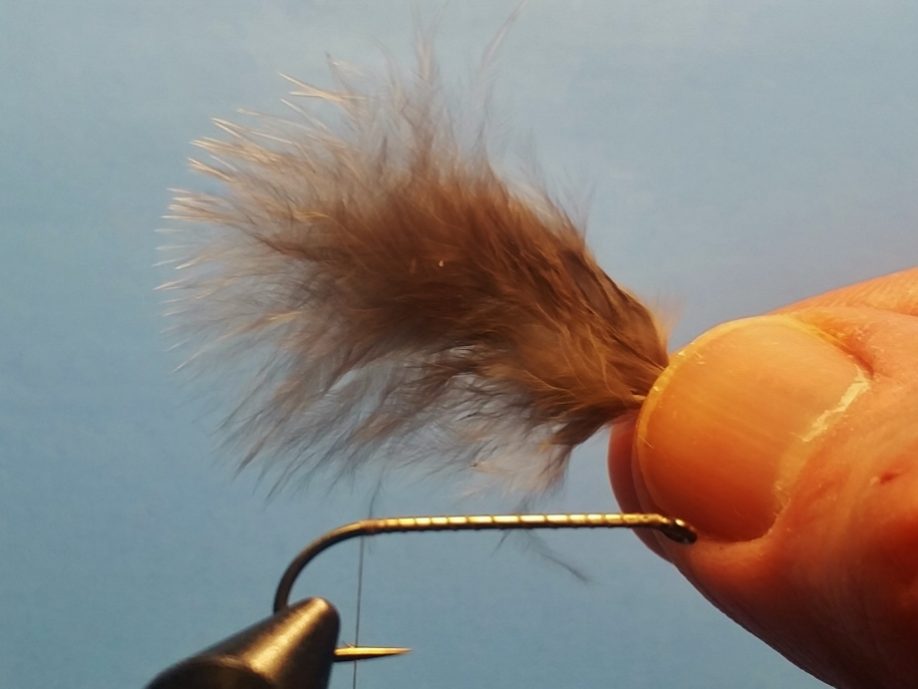
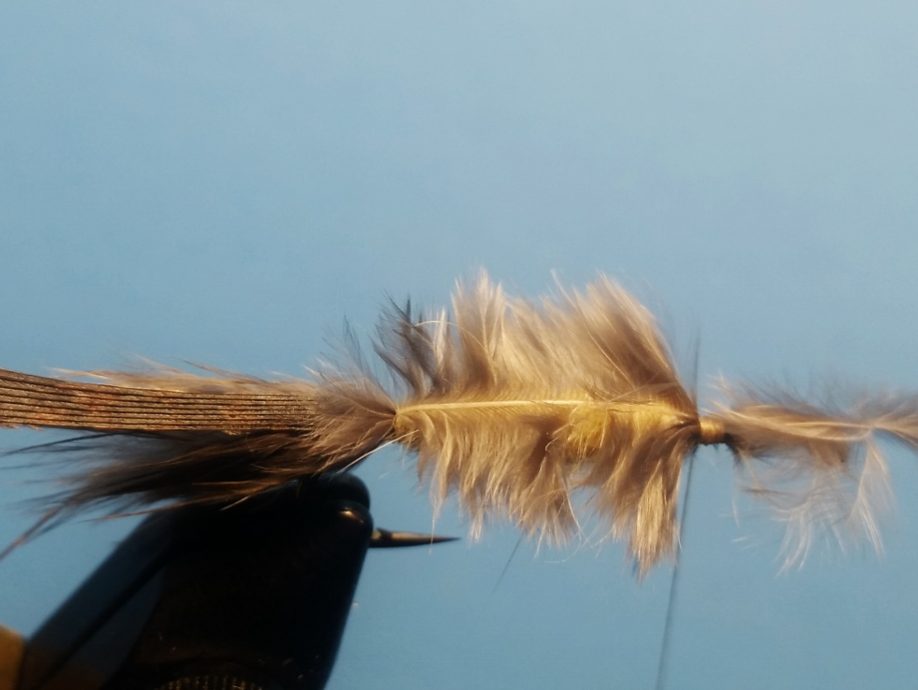
Step 6.
Tie in about half of a pencil’s diameter of deer hair so the tips extend – when pressed flat along the foam – to the same length of the Krystal Flash.  I like to measure the hair, then cut the butts off, then tie in.

Clumsy Brown Stone Step 7

Step 7. Cover the thread securing the deer hair with a little dubbing.

Clumsy Brown Stone Step 8

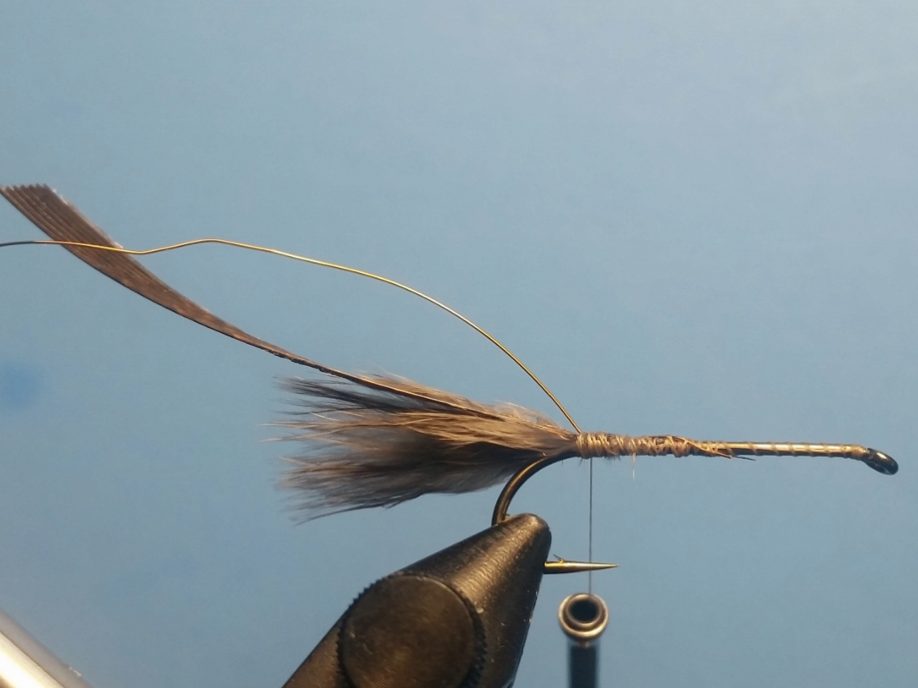
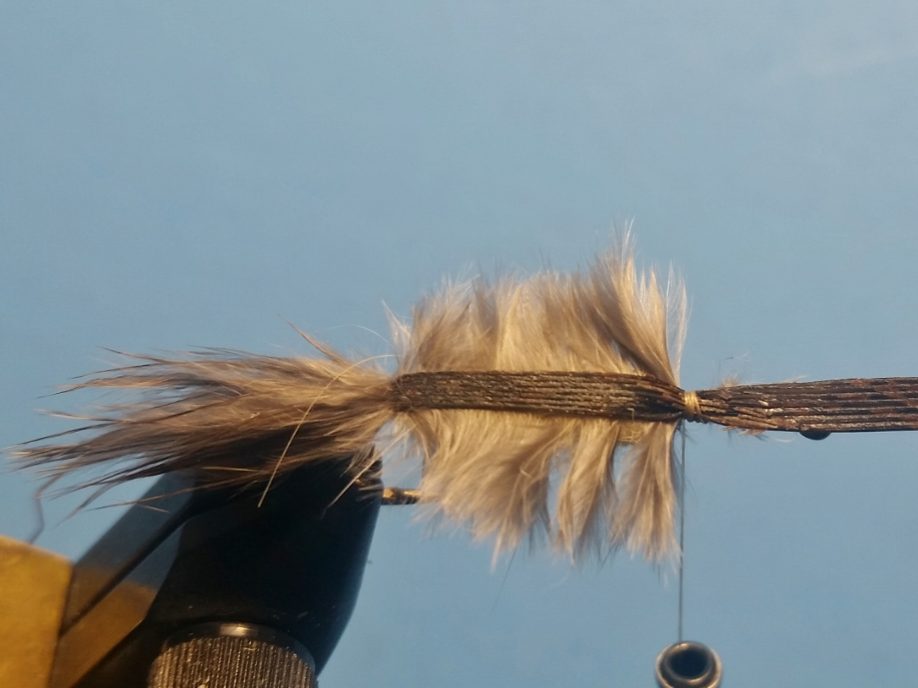
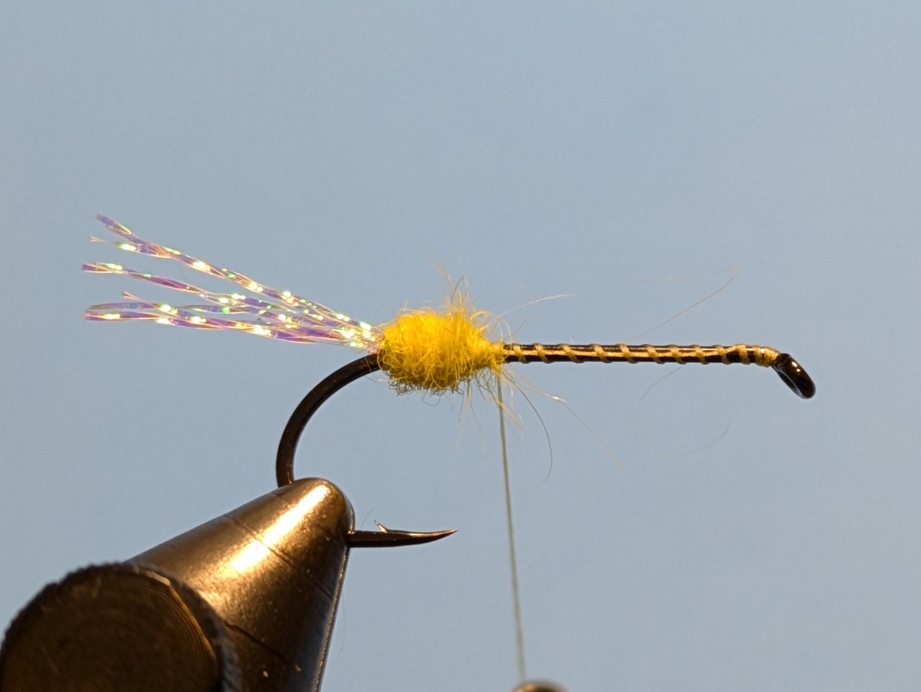
Step 8. Tie in rubber legs on each side of the body forming an “X”.

Clumsy Brown Stone Step 9

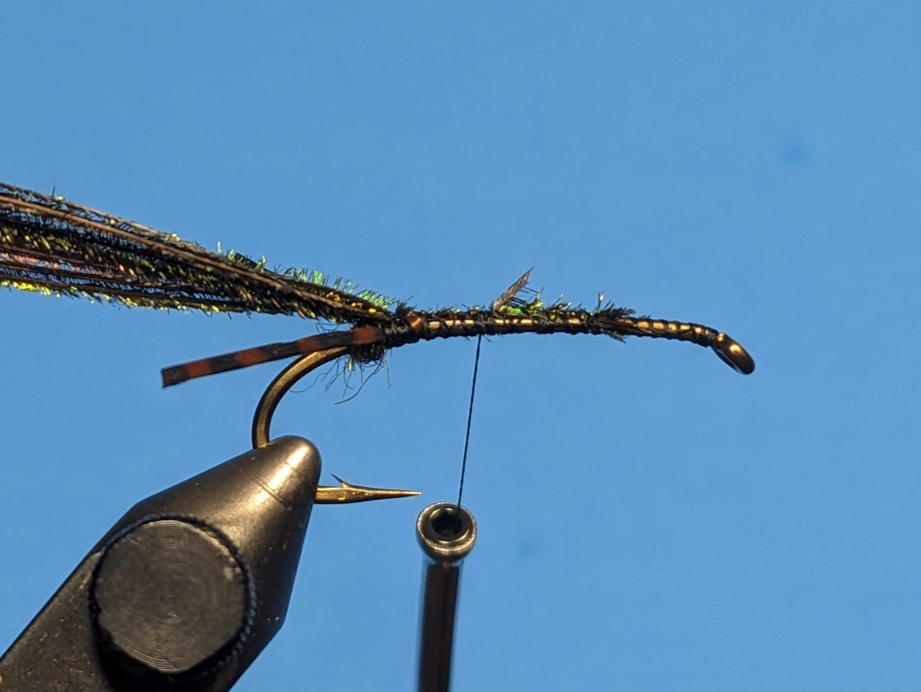
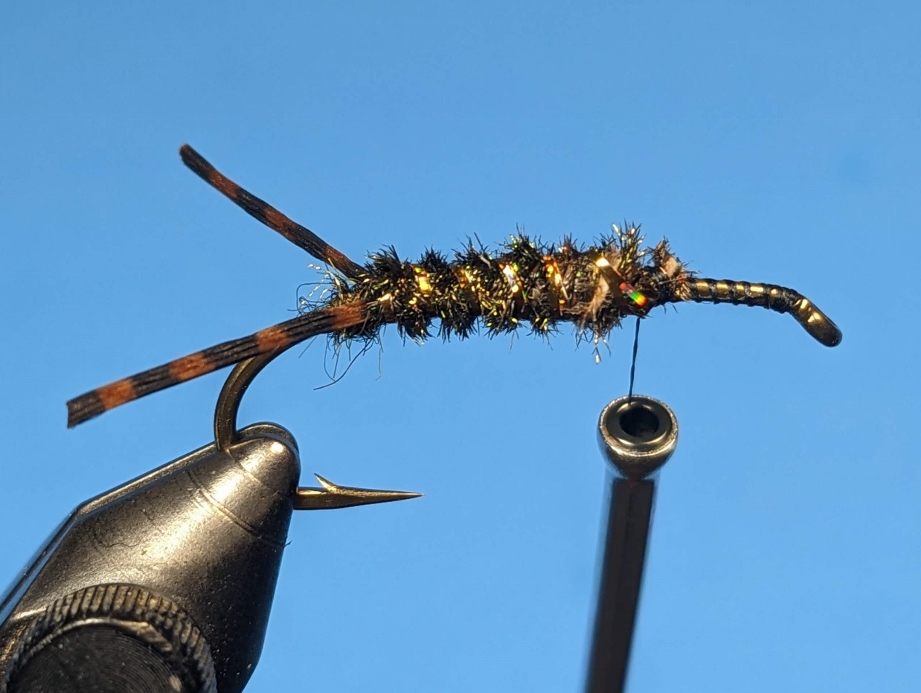
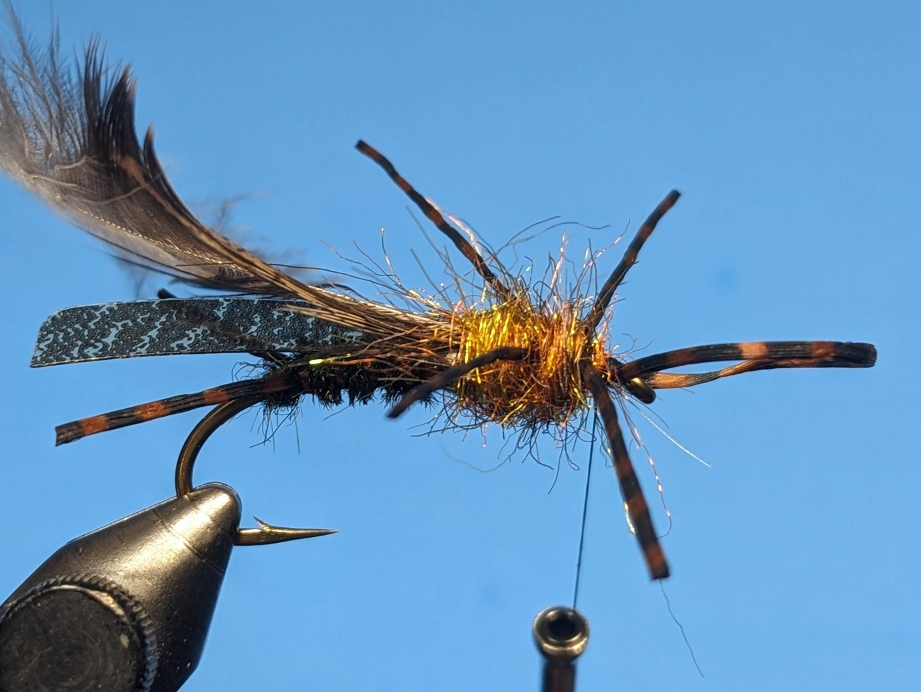
Step 9. Dub over the tie in area.

Clumsy Brown Stone Step 10

Step 10. Continue to dub a body under the foam, stopping two eye lengths back behind the hook eye.

Clumsy Brown Stone Step 11

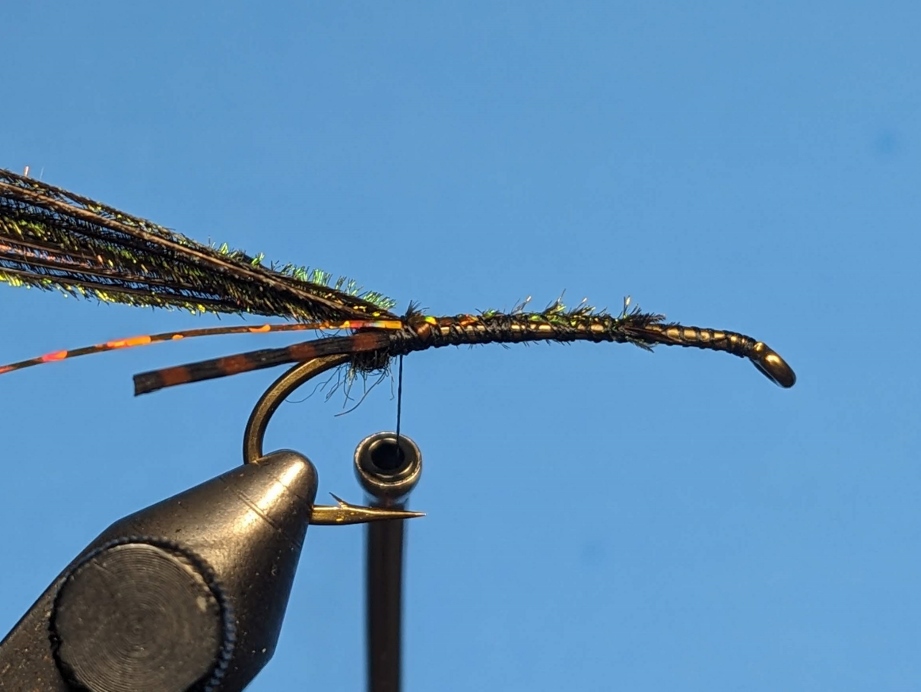
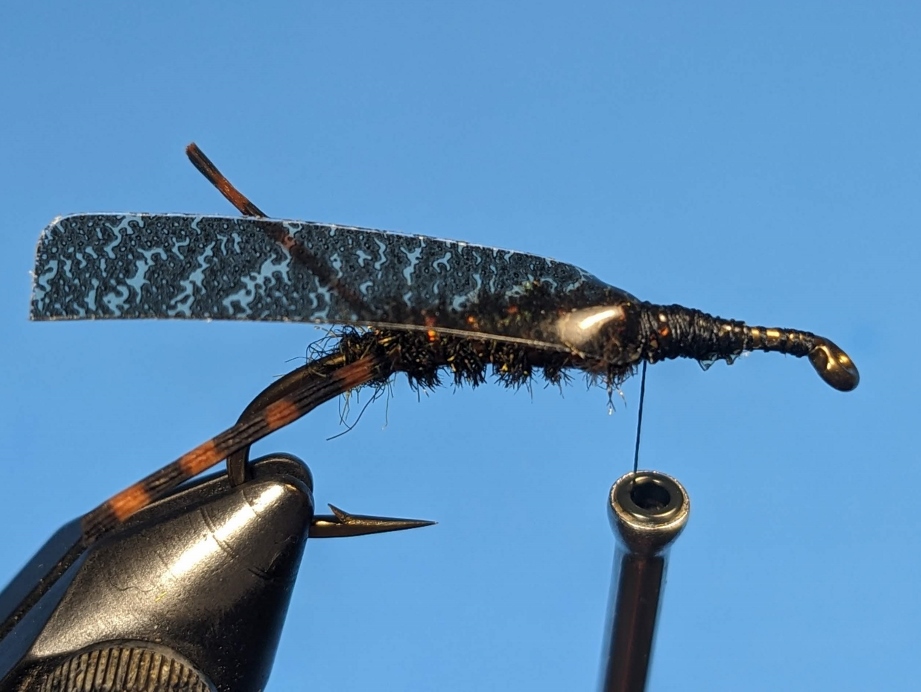
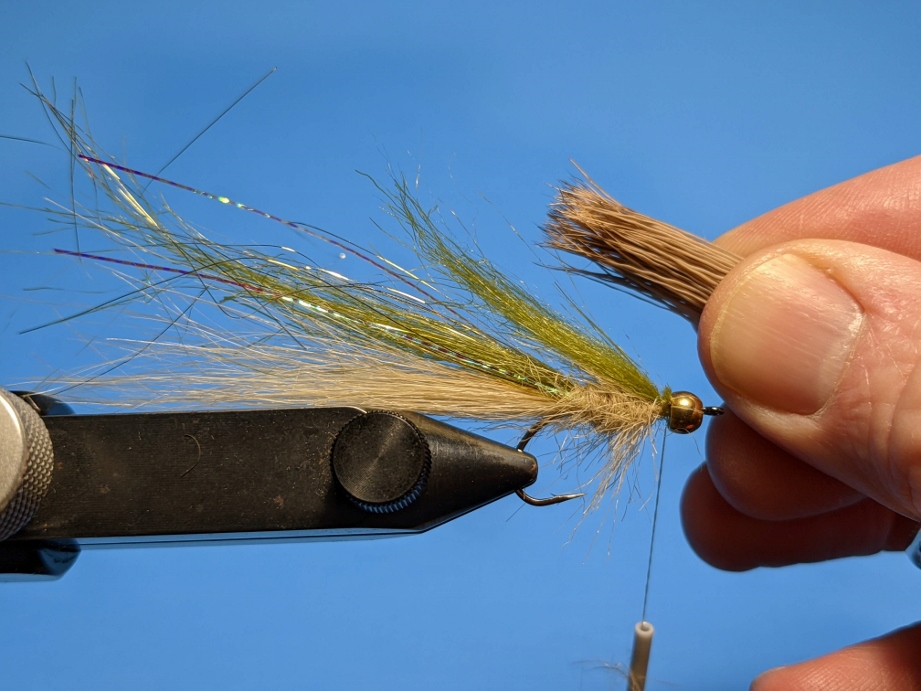
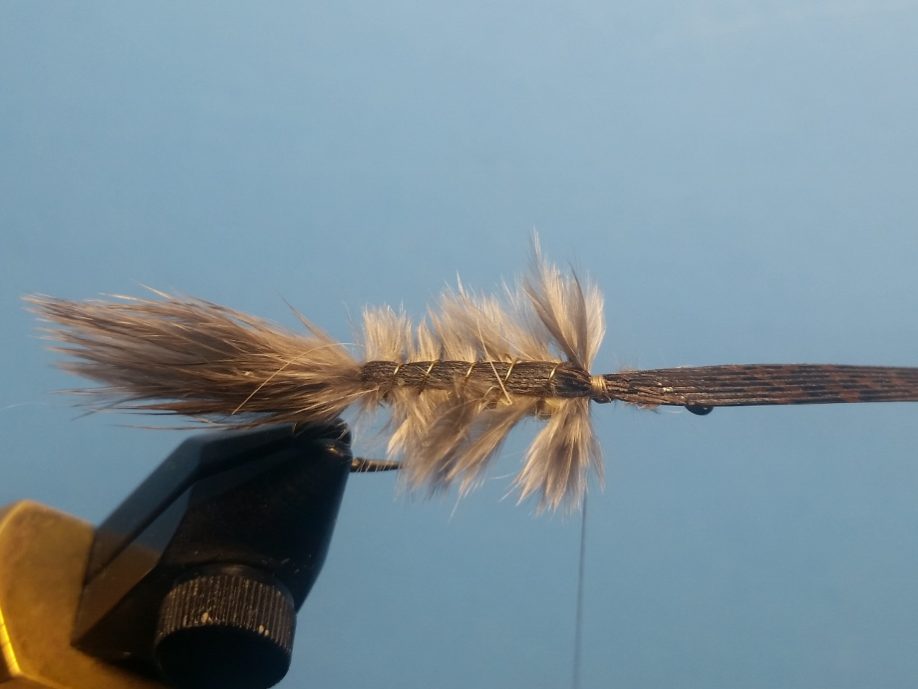
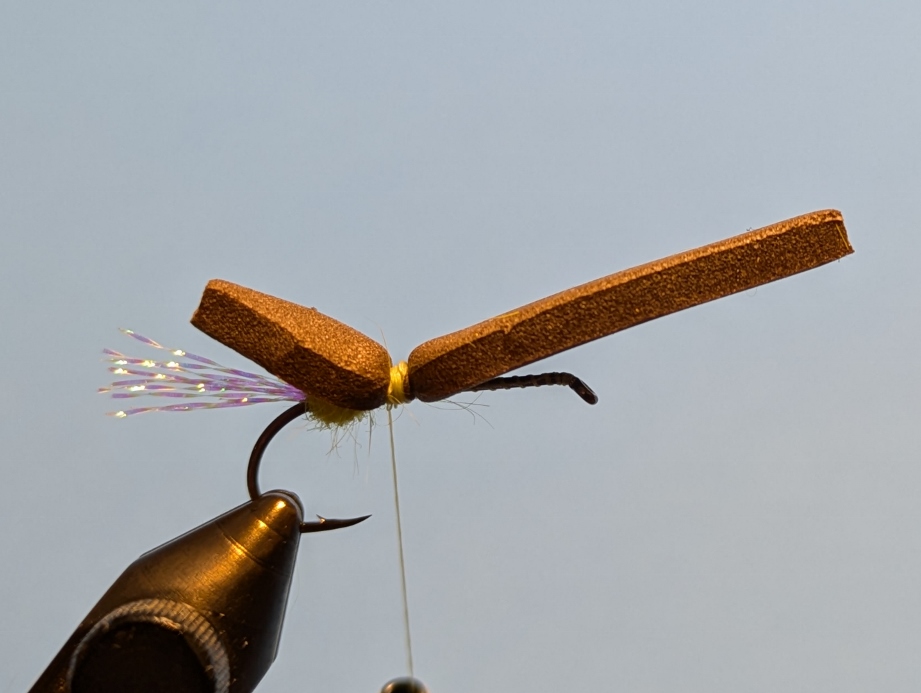
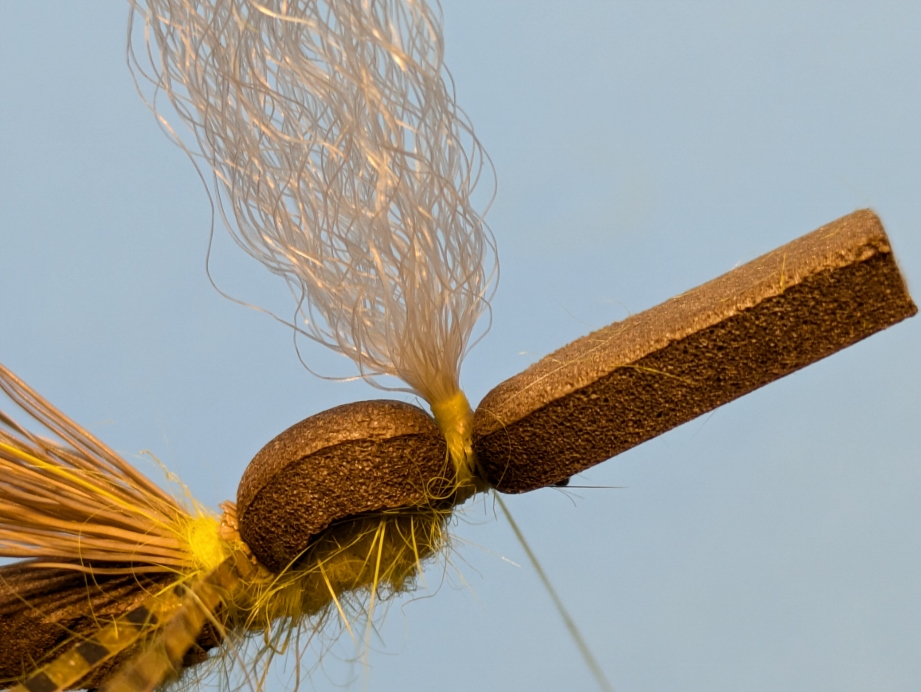
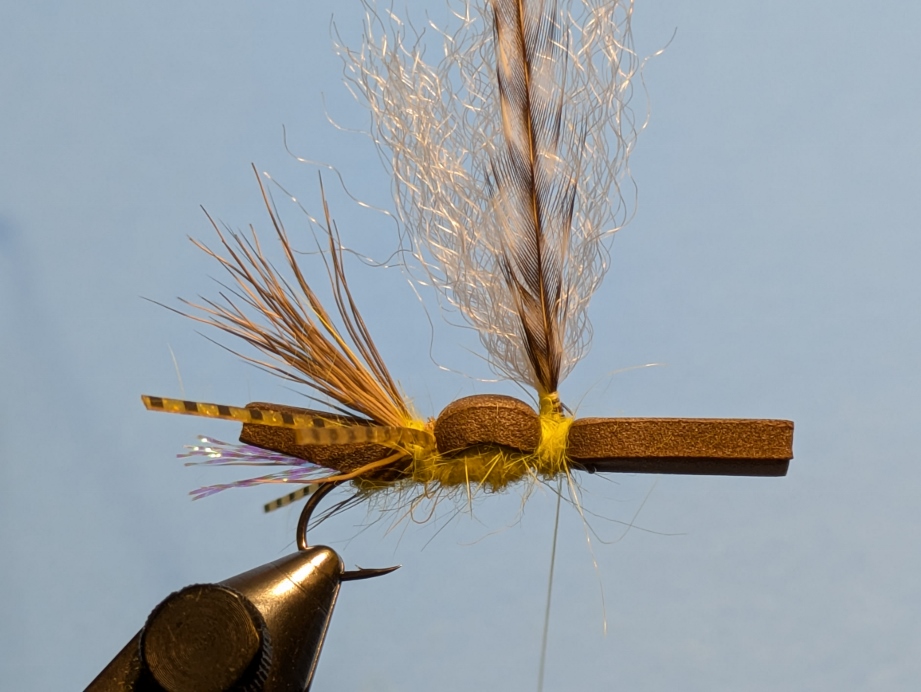
Step 11. Lay the foam over the dubbed abdomen/body and tie down, again using light wraps at first.

Clumsy Brown Stone Step 12 Clumsy Brown Stone Step 12.5


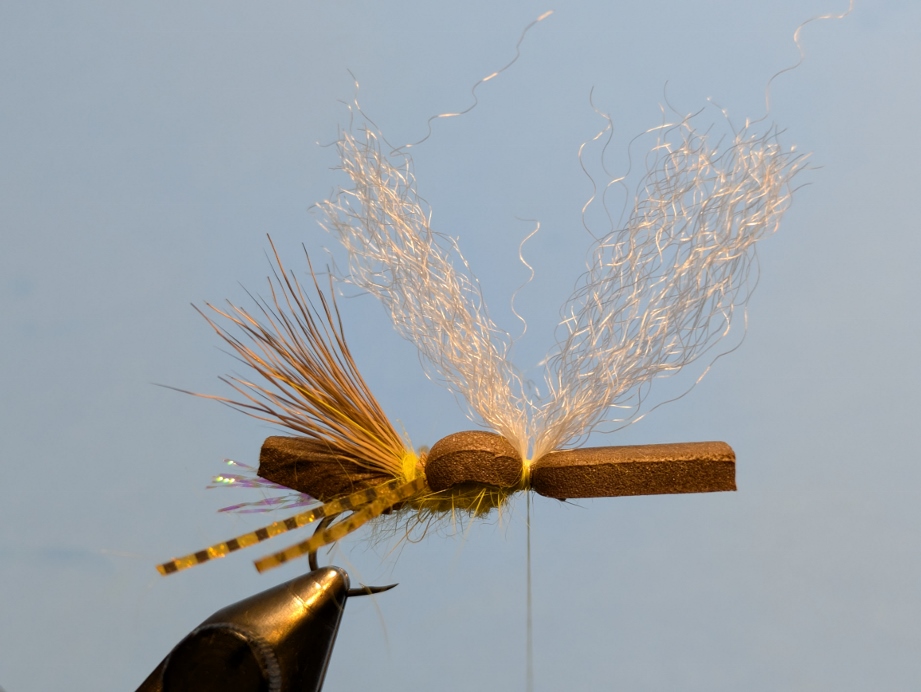
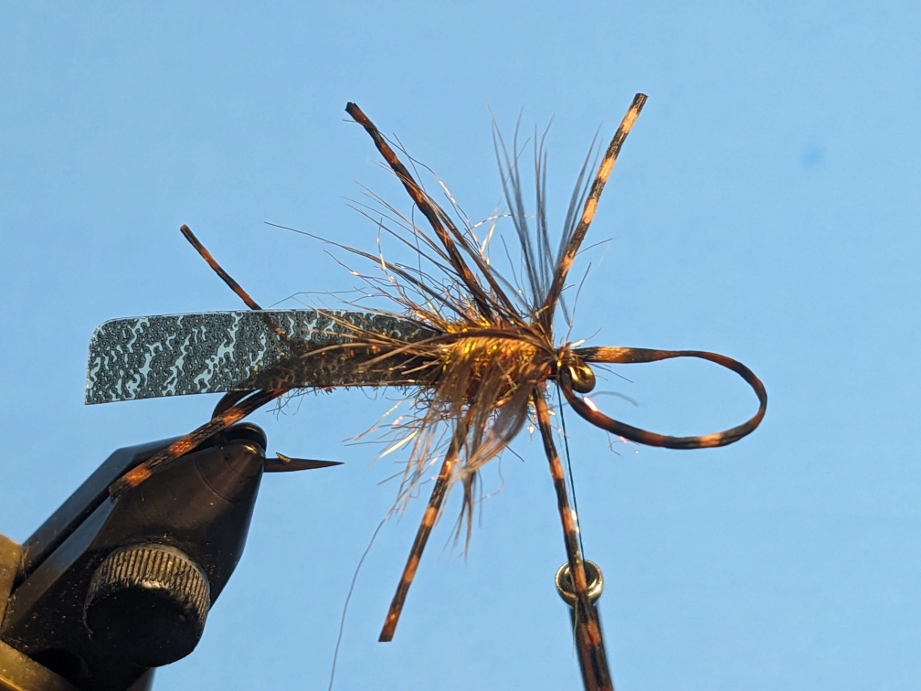
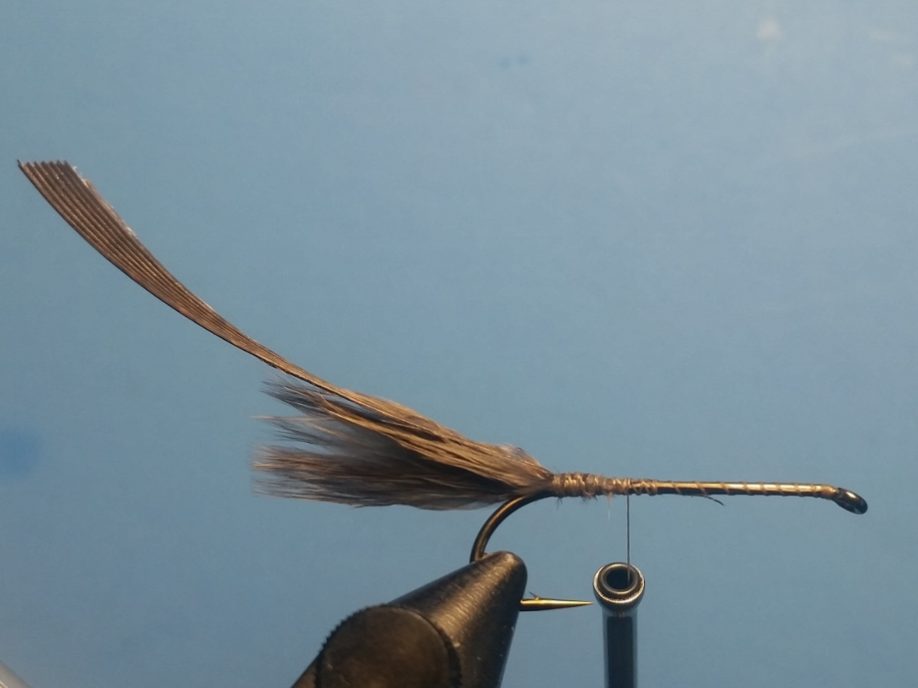
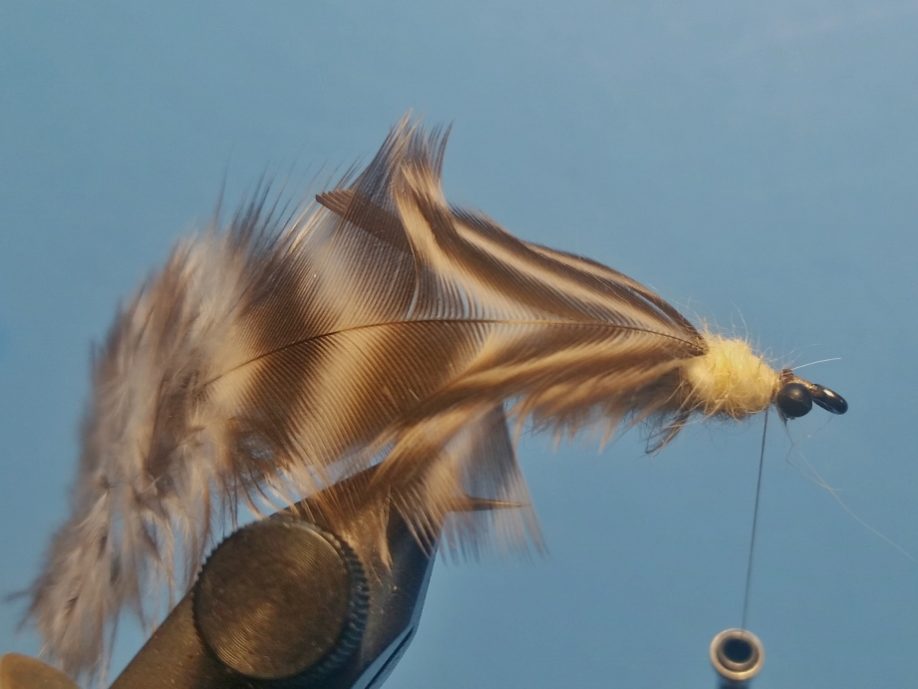
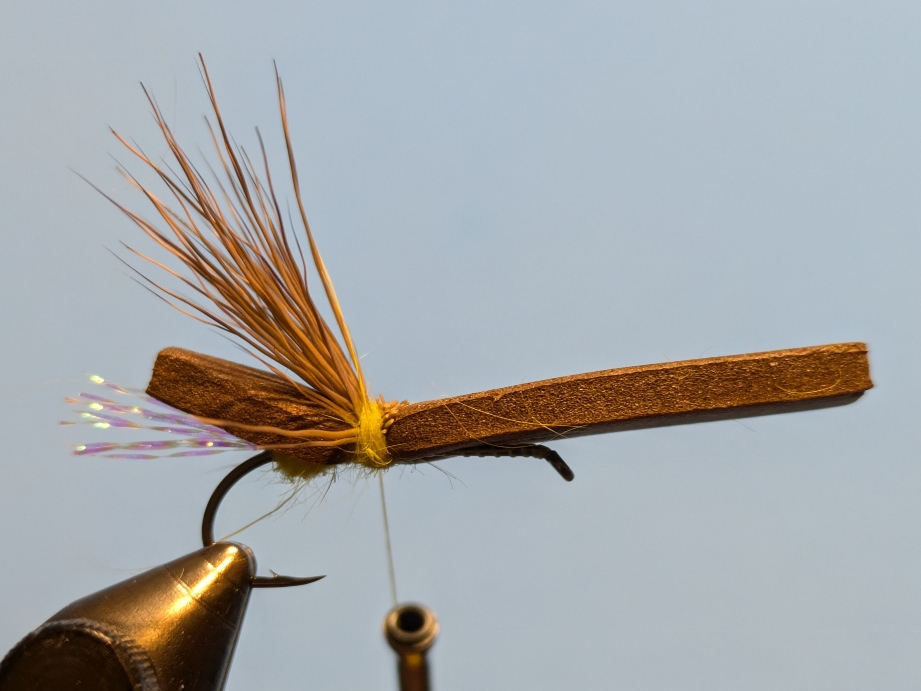
Step 12. Prepare a wing post and tie parallel to the hook shank, then bring both ends upward before
horizontally wrapping thread from the base upward then down to the hook.

Clumsy Brown Stone Step 13 Clumsy Brown Stone Step 13.5


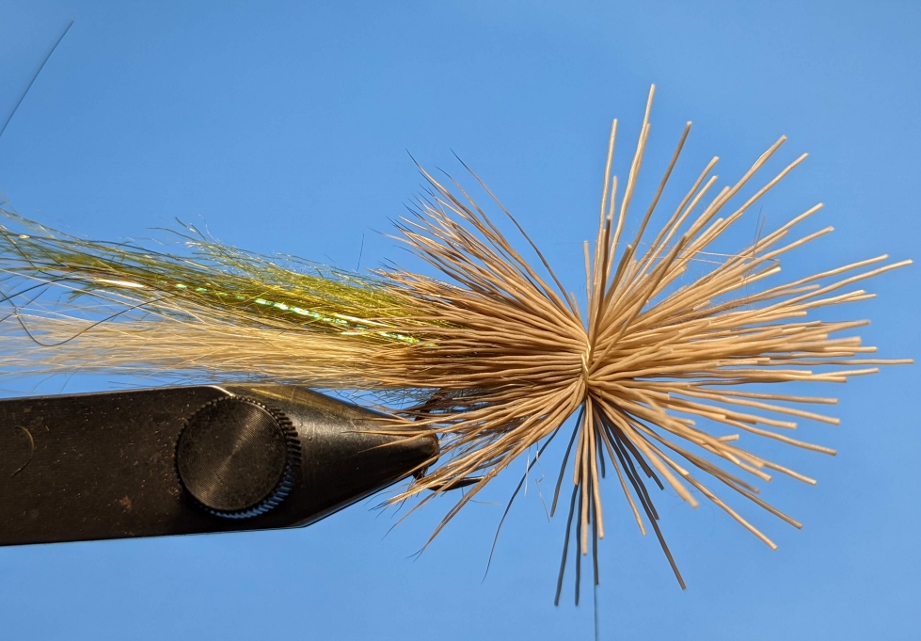
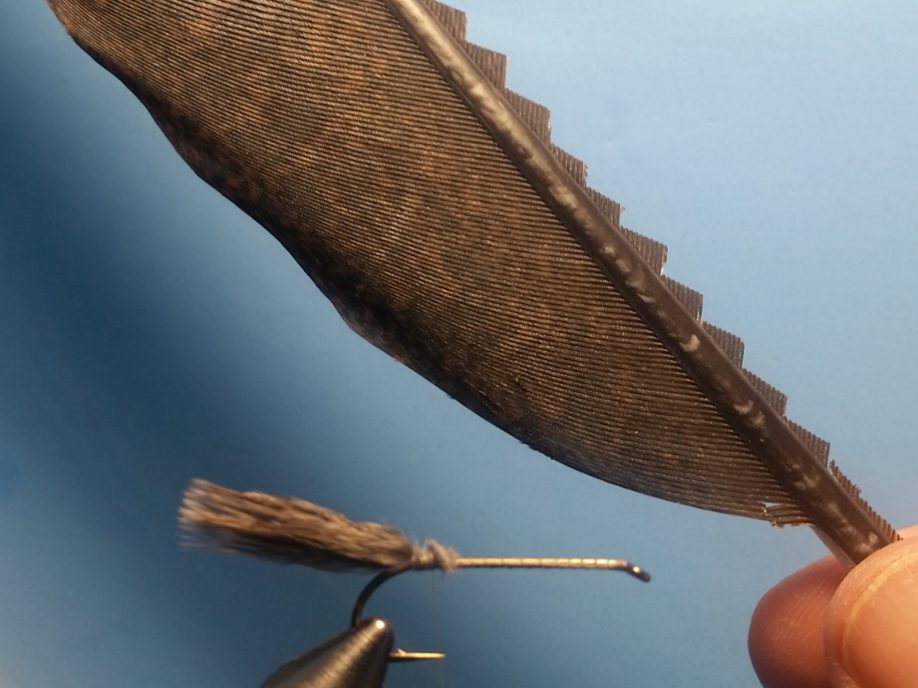
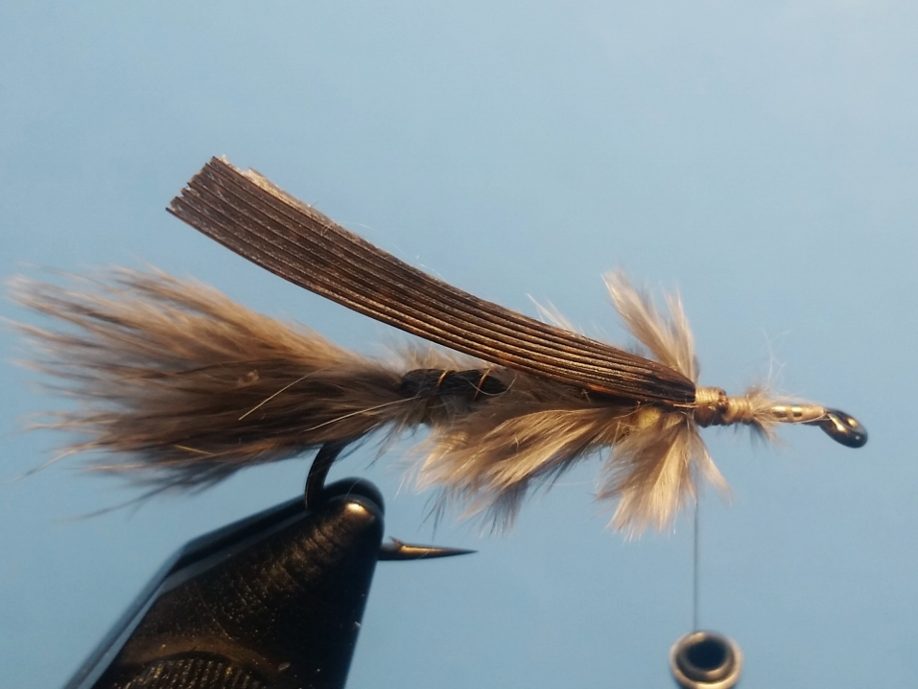
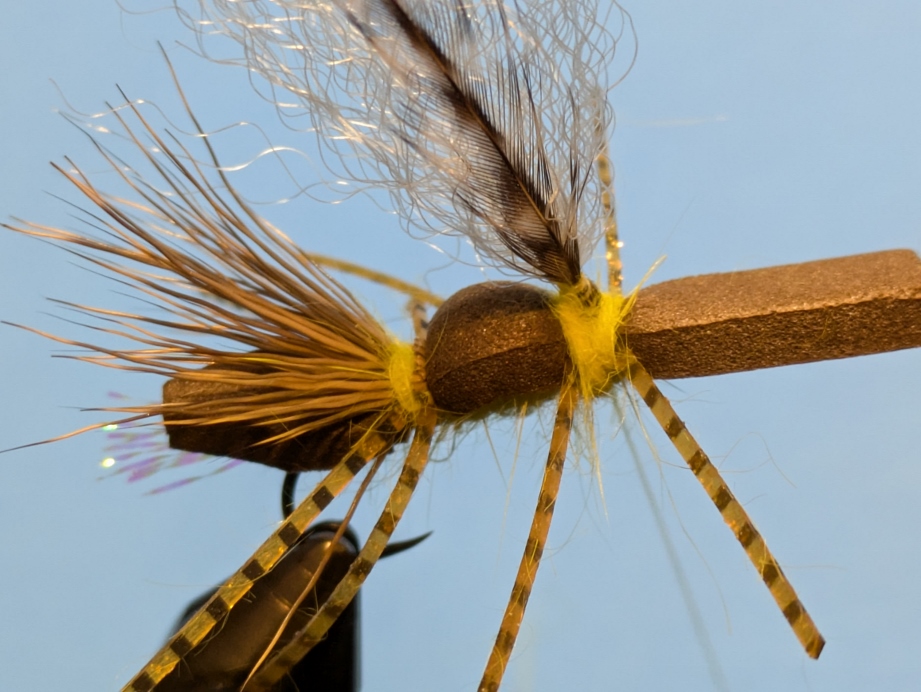
Step 13. Prepare a hackle feather by trimming some of the barbs off of the stem
and tie in feather, wrapping up the post, then down again.

Clumsy Brown Stone Step 14

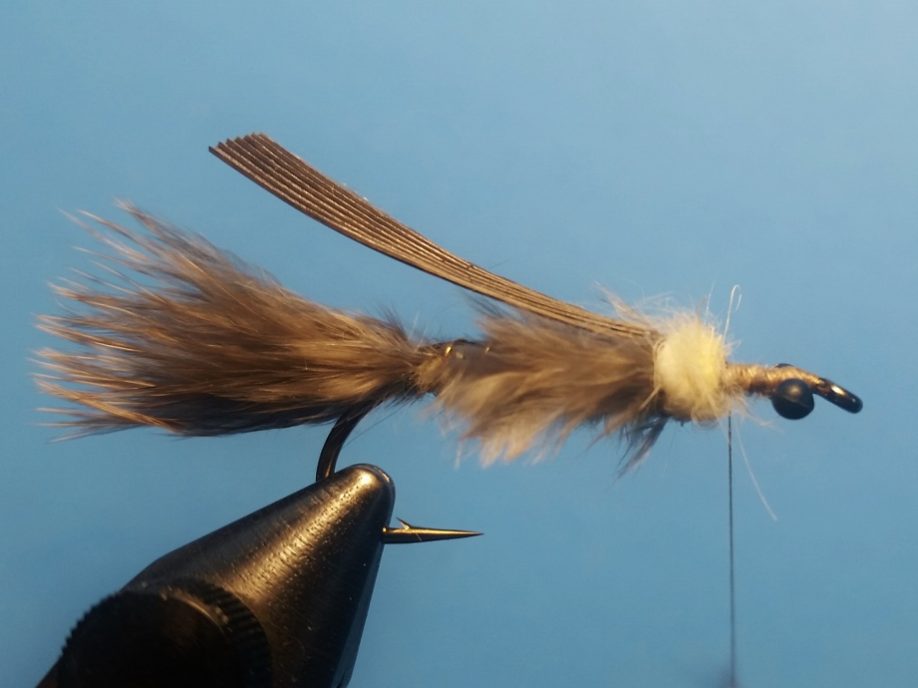
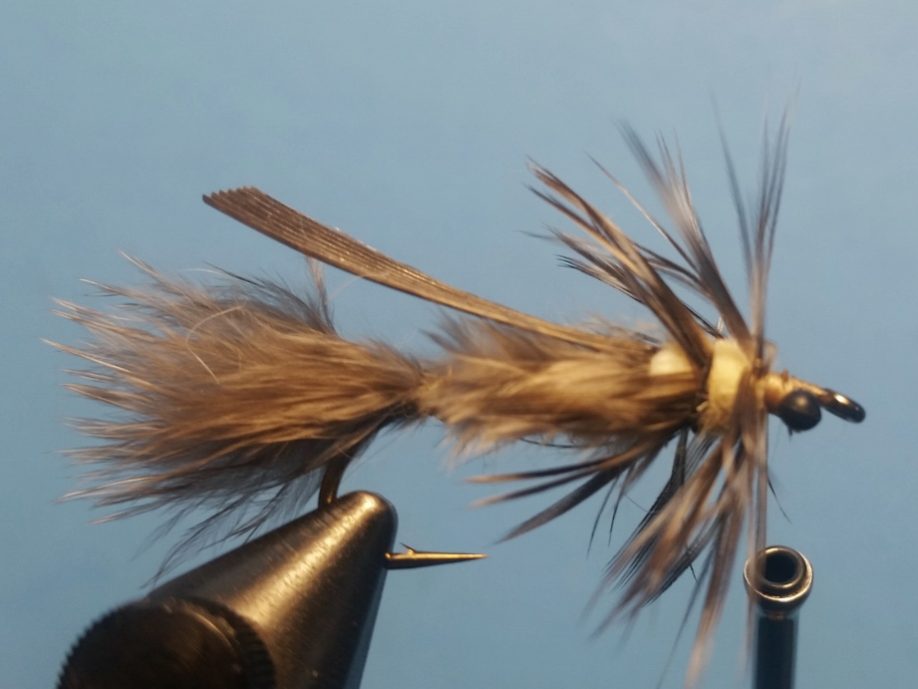
Step 14. Lightly dub the region around the post.

Clumsy Brown Stone Step 15

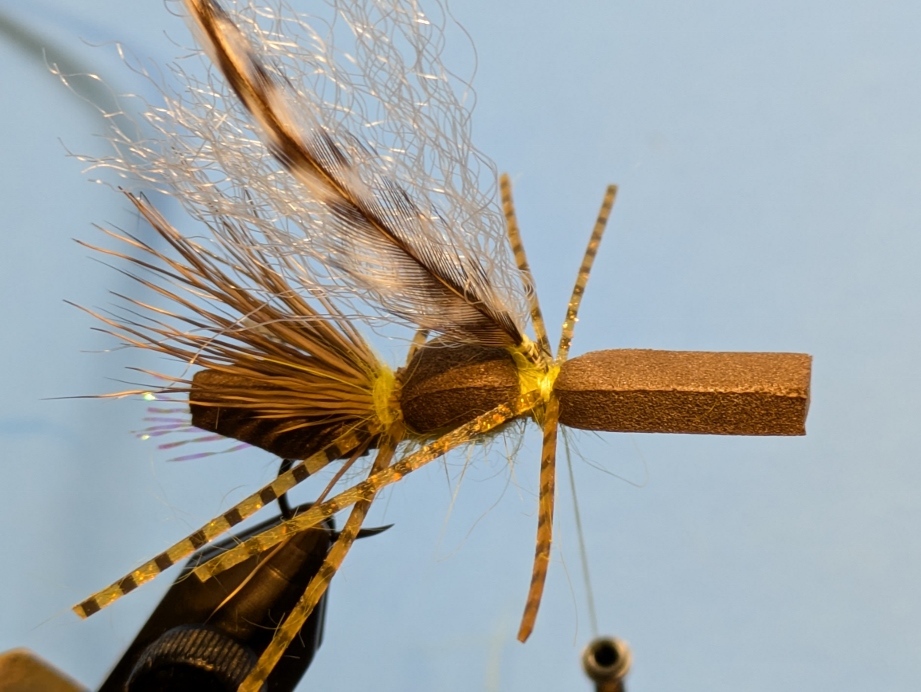
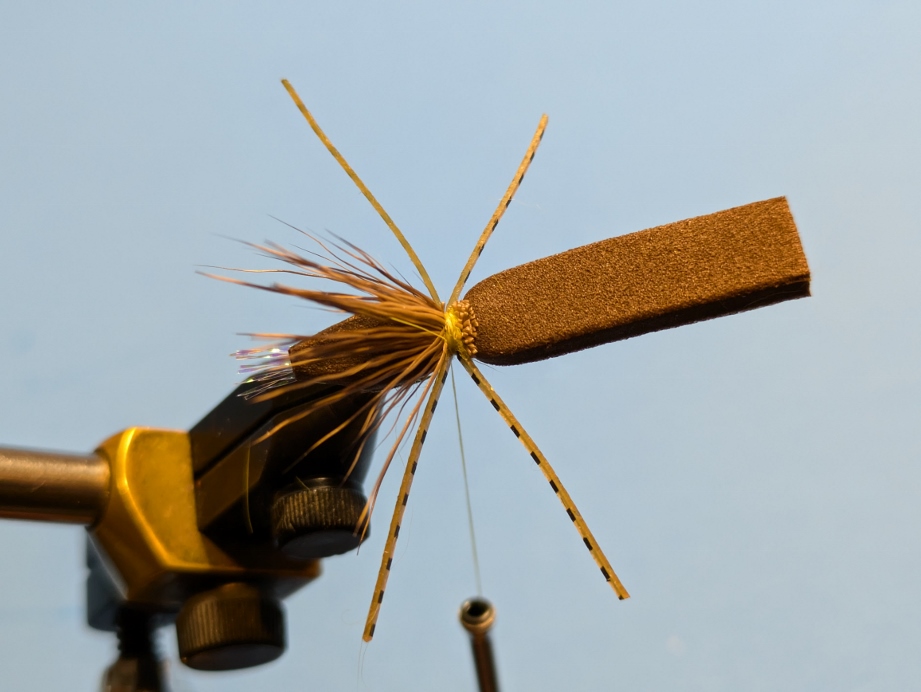
Step 15. Tie in rubber legs on each side of the body forming the forward “X”.

Clumsy Brown Stone Step 16

Step 16. Add more dubbing around over the leg tie in region maintaining a nice, thick and uniform body profile.

Clumsy Brown Stone Step 17

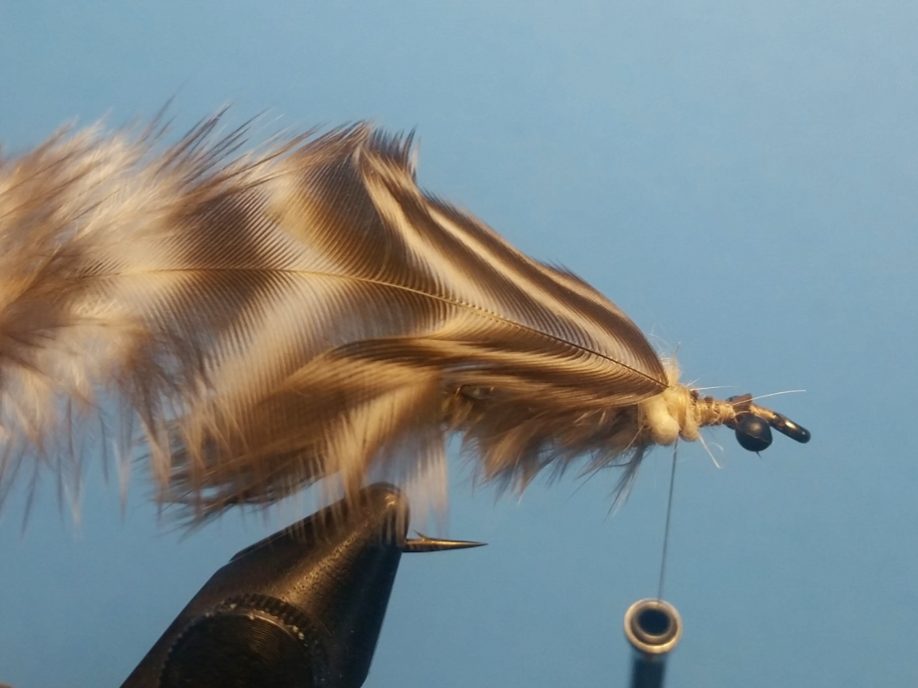
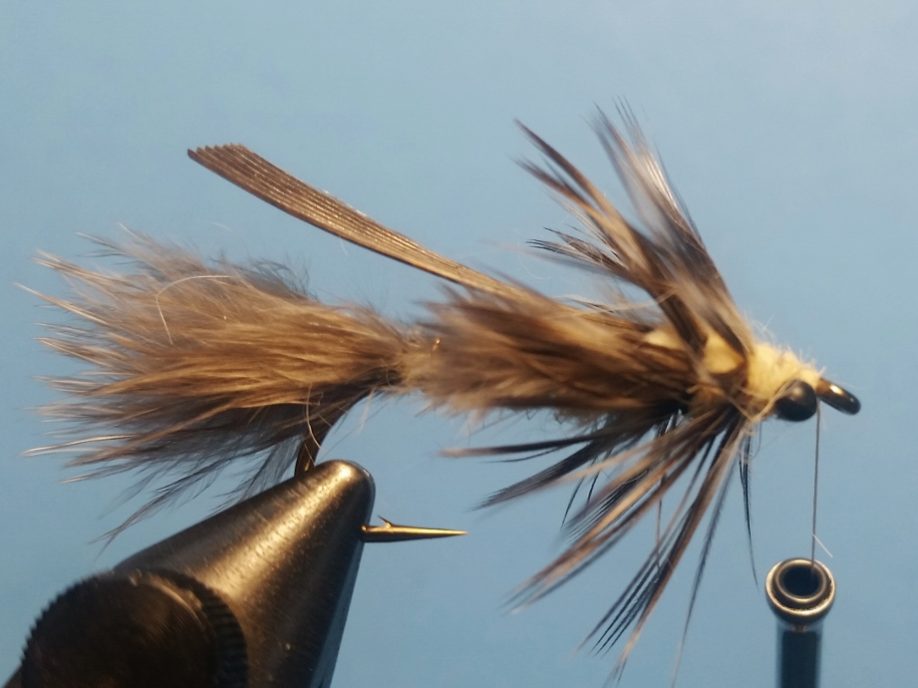
Step 17. Wrap the hackle downward to the dubbing before tying off.   A little super glue on the thread,
which is then wrapped into the dubbing, helps secure the hackle without having to whip finish.

Clumsy Brown Stone Step 18

Step 18. Advance your thread under the foam towards the eye of the hook and build a head, then whip finishing.

Clumsy Brown Stone Step 19 Clumsy Brown Stone Step 19.5


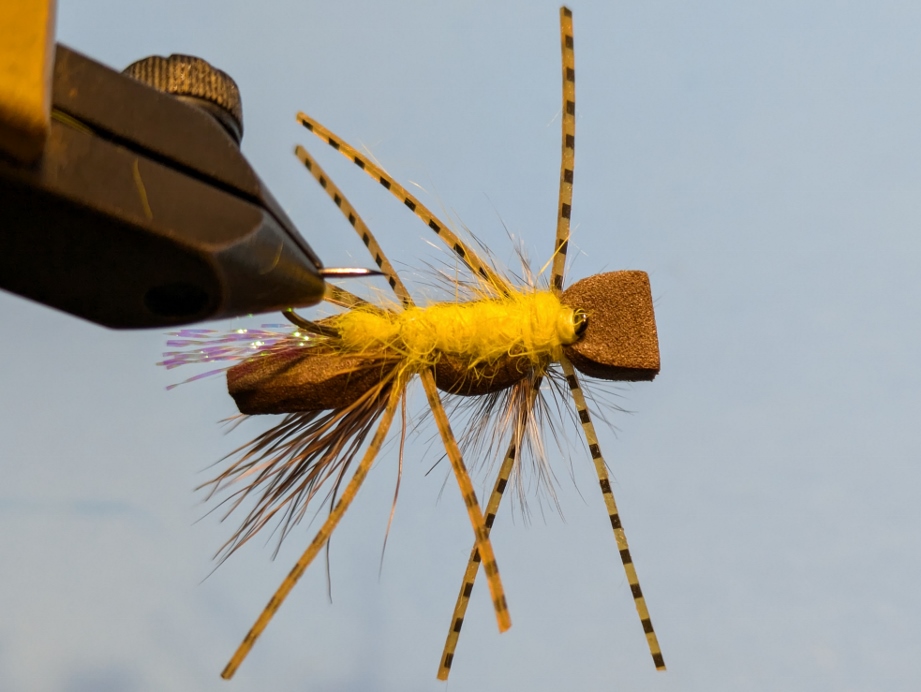
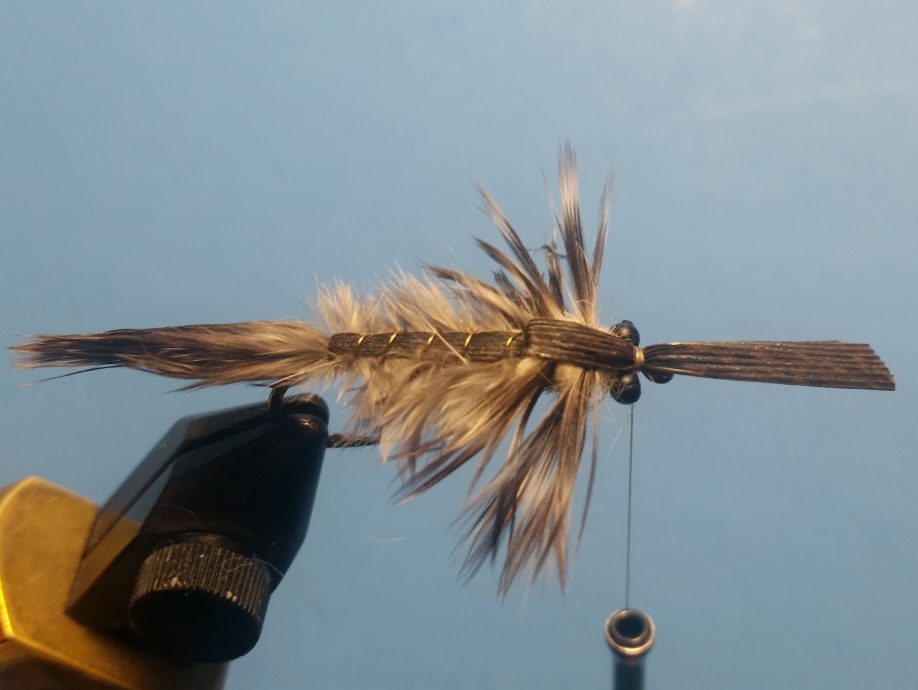
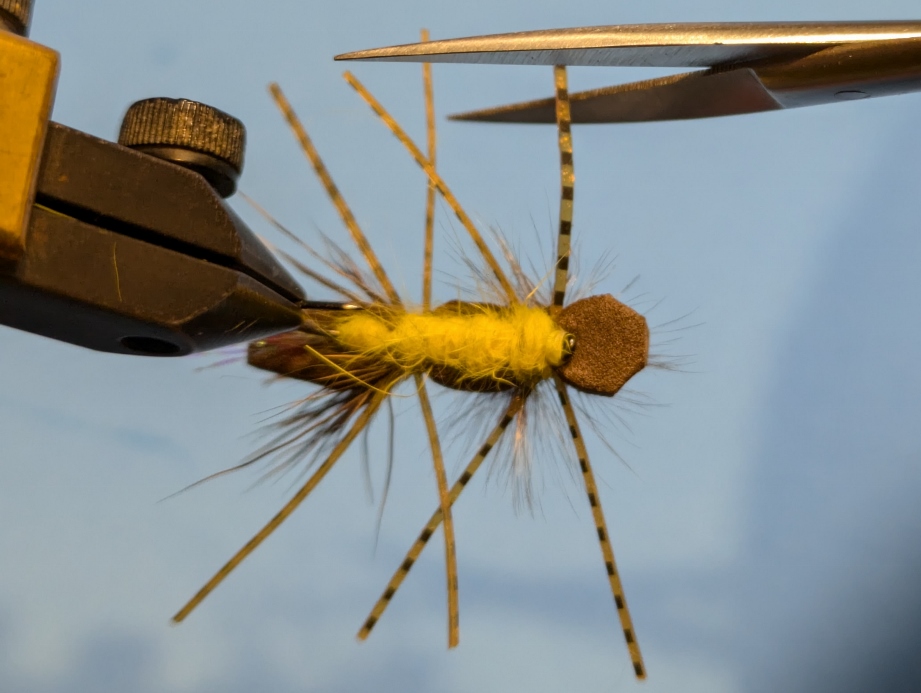
Step 19. Knock the corners of the foam off with your scissors.

Clumsy Brown Stone Step 20

Step 20. Trim the legs so they are equal on each side where each leg is about half of the fly’s length.
If you find these are too long when fishing due to fouling in the hook bend or simply
appear too long, you can trim streamside with your line nippers.

Clumsy Brown Stone Step 21

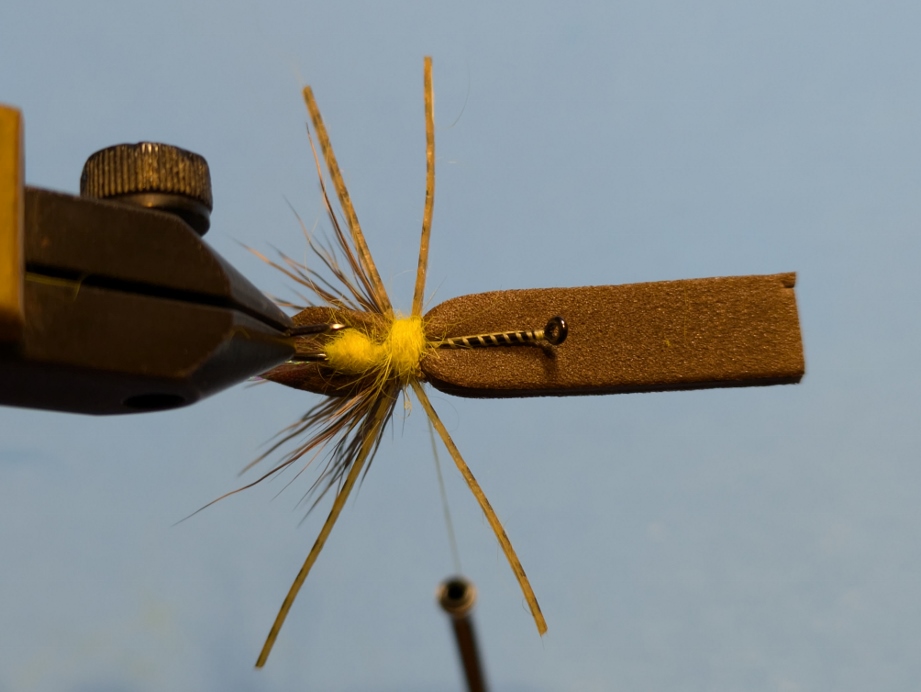
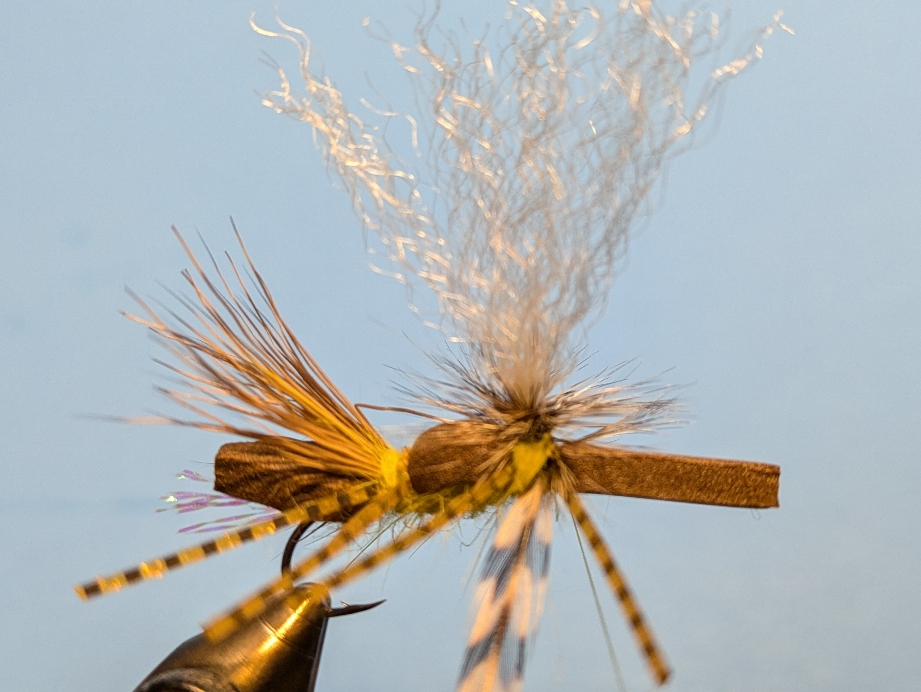
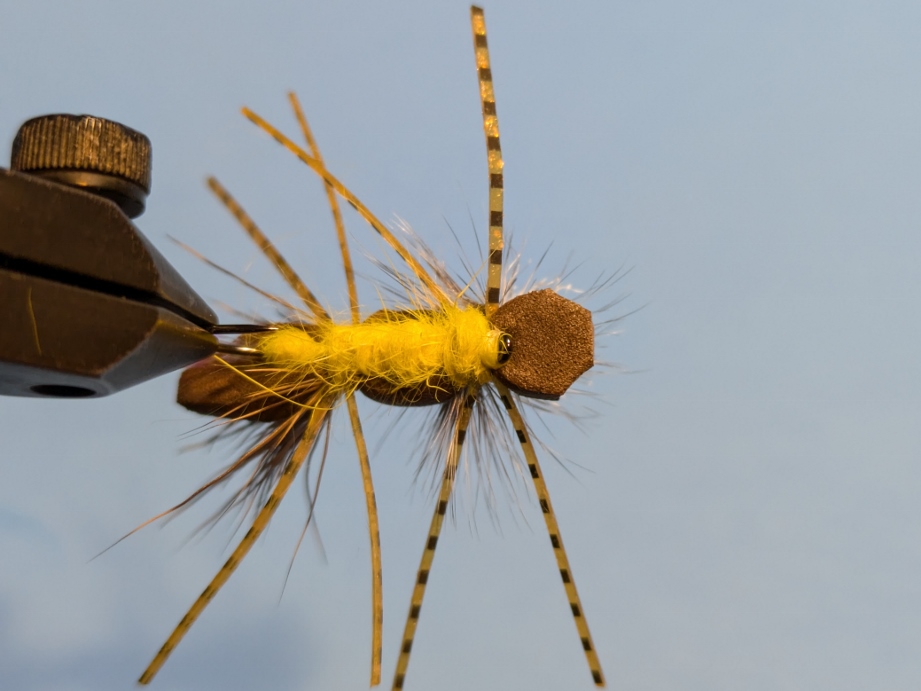
Step 21. Trim the post so it is one hook gape in length.

Clumsy Brown Stone Step 22

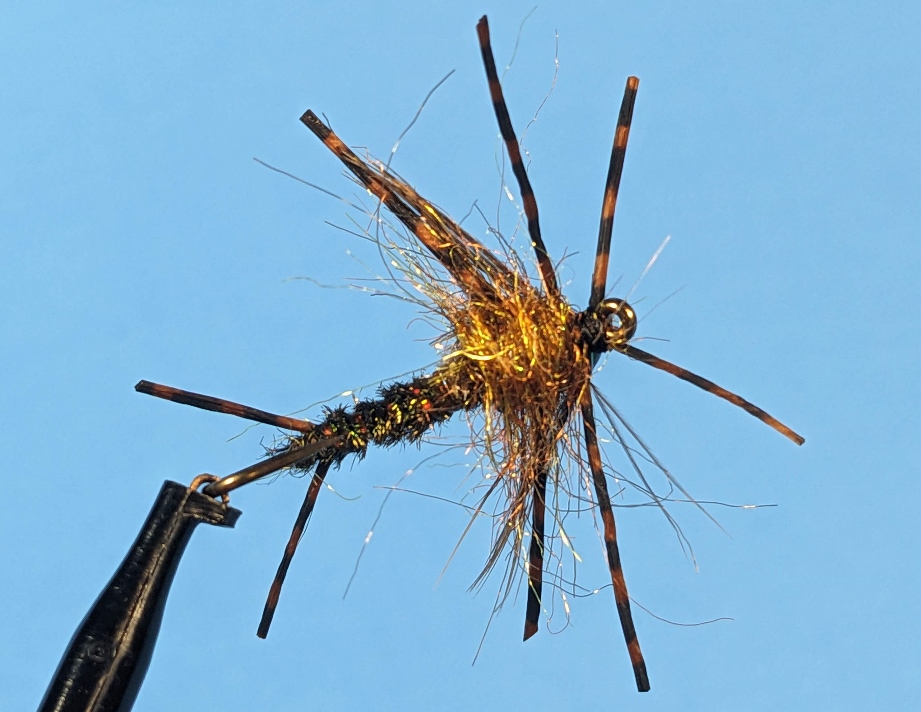
Step 22. Using a brown Sharpie marker, apply a mottled look but be sure to
leave a solid yellow band at the location of the forward legs.

Clumsy Brown Stone Perspective

Step 23. Apply head cement to just behind the eye and at the base of the post.

au sable stonefly pattern, chubby chernobyl, clumsy brown stone, dry fly stone for michigan, Manistee River Stone fly pattern, mattress thrasher stone, medium brown stonefly, Michigan stonefly, midwest stone fly, stonefly dry fly

Twenty Inch Chubby

Posted by Ted Kraimer - December 14, 2023
Twenty Inch Chubby

Twenty Inch Chubby Stone Fly

Large stoneflies are common throughout our local rivers, just not of the same density found in most western rivers. That said, the nymphs are large, and their alien-like appearance gets noticed by fish – particularly steelhead, but don’t dismiss them for trout. 

In late winter stonefly nymphs get active, which could simply be the result of getting flushed downstream as river flows increase with seasonal runoff. Later in mid-fall once the leaves have fallen off the trees, sees another round of activity as the nymphs chomp on decaying leaves making the Twenty Inch Chubby a fly to use during both spring and fall steelhead seasons.

Trout fisherman here in the Midwest and out west will find this pattern effective, especially in June when they are most active, crawling out of the river to emerge into adults.

Twenty Inch Chubby - Natural

Twenty Inch Chubby and natural stonefly nymph

If fishing them for trout, you can alternatively wrap a lead underbody in the middle of the hook shank.

The Twenty Inch Chubby blends elements of two great stonefly nymph patterns that have been around and catching fish for years – Ed Engle’s Twenty Incher and Hogan Brown’s Chubby Cousin. The rubber legs give movement and add to the profile, while the lighter thorax region exaggerates the difference between it and the abdomen. Lastly, peacock always seems to offer that natural iridescence that looks good in the vise, fly box and water. It looks best in a fish’s mouth.


Recipe

Twenty Inch Chubby - Steelhead

Steelhead eat more than small, black stoneflies

Hook: Daichi 1720 #6
Thread: Uni 6/0 – Black
Tail: Barred Sexi-Floss Copper Medium
Dubbing: AZ Synthetic Peacock Dubbing
Abdomen: Peacock Herl
Rib: Holographic Flashabou – Copper
Wingcase: Thin Skin – Mottled Bustard Natural
Legs: Barred Sexi-Floss Copper Medium
Thorax: Senyo’s Fusion Dub – Tobacco
Antennae: Barred Sexi-Floss Copper Medium


Tying Instructions


Twenty Inch Chubby - Step 1Step 1. Place hook in vice and wrap a thread base from behind the eye above the hook point and barb.

Twenty Inch Chubby - Step 2Step 2. Dub a very small amount of the peacock dubbing.

Twenty Inch Chubby - Step 3Step 3. Tie in the tail along the shank and up against the dubbing ball on both sides to help splay the material.

Twenty Inch Chubby - Step 4Step 4. Tie 7-9 strands of peacock herl by the tip and wrap down to the tail tie in.

Twenty Inch Chubby - Step 5Step 5. Tie in the ribbing like you did the peacock.

Twenty Inch Chubby - Step 6 Twenty Inch Chubby - Step 6.5Step 6. Wrap the herl around the thread to strengthen it.
Then, wind it forward stopping about a hook gape’s distance from the hook eye.

Twenty Inch Chubby - Step 7Step 7. Wrap the rib in the opposite direction that you wound the peacock.
Be careful not to pull too hard and stretch/thin the flashabou.

Twenty Inch Chubby - Step 8Step 8. Cut a strip of Thin Skin about 3/16-1/4” wide and tie in at thorax area.

Twenty Inch Chubby - Step 9Step 9. Tie in a Hen Saddle or Grouse Feather by the tip and upside down on top of the Thin Skin tie in. Then, tie in the antenna on each side of the shank forming a forward facing loop that extends beyond the hook eye.

Twenty Inch Chubby - Step 10Step 10. Tie in two strands of leg material – perpendicular to the shank and evenly spaced apart.

Twenty Inch Chubby - Step 11Step 11. Dub the thorax area which will help you position the legs where you want them.

Twenty Inch Chubby - Step 12Step 12. Pull the feather over the thorax and tie off.

Twenty Inch Chubby - Step 13Step 13. Pull the Thin Skin over the thorax to create the wingcase.

Twenty Inch Chubby - Step 14Step 14. Whip Finish the thread.

Twenty Inch Chubby - Step 15Step 15. Cut the loop of Sexi-Floss to create antennas and trim to the even and appropriate size.

Twenty Inch Chubby - Side ProfileTwenty Inch Chubby Side Profile


Twenty Inch Chubby - UndersideTwenty Inch Chubby Underside


black stone fly pattern, chubby cousin, michigan steelhead guide, michigan steelhead nymphs, senyo steelhead, senyo's fusion dub, steelhead fishing, stonefly for steelhead, stonefly nymph, trout fishing stonefly nymph, twenty incher

Back Half Baitfish

Posted by Ted Kraimer - December 21, 2022

The Back Half Baitfish is a relatively simple pattern to tie with a great profile that can be used to represent a number of different baitfish species in both rivers and lakes to target various fish, just by changing up colors.

After years of increasing the size of our streamer patterns and bombarding the fish, these larger patterns are becoming less effective as angling pressure has increased. While these large patterns still work on some days, more attention has been placed on smaller streamer patterns. If we have learned anything over the years, we need to adapt to fish wants, and sometimes that means downsizing the pattern and modifying our presentation.


Back Half Baitfish - Log PerchAlso receiving additional attention is how prolific various baitfish species are in our waters thanks to Kevin Feenstra’s book, Matching Baitfish. This broad, in-depth and eye-opening project has highlighted the importance of the baitfish throughout our rivers and their nuances in behavior and color schemes.

As trout anglers, the concept of matching the hatch is a familiar one. Fishing baitfish is no different in concept – we are simply trying to imitate the natural species, which is the natural forage for predator species like trout and smallmouth bass.


Back Half Baitfish - Yellow with triggerThe design of this pattern came about serendipitously. I was developing a larger, articulated streamer pattern, and after some sketches I started tying. Once I completed tying the back half of the pattern, I set it aside and began the forward section/hook. As I glanced at the back half laying on my desk, the different profile intrigued me.  With various adjustments to the design and development, and time on the water, I came up with the “Back Half Baitfish.” The name came about from a lack of creativity.  And, no, I never did complete the front half of the original tandem pattern.

Fishing the Back Half Baitfish

I like to fish this pattern on a number of different fly lines depending on the targeted species, depth and flow of the water, water temps, and weather conditions. Some days it’s on a slow sink-tip line, floating line, intermediate sink tip or even tied as a dropper on a big, heavy sinking line as a secondary pattern.

Back Half Baitfish - Olive with triggerWhen retrieving, think of it being twitch-striped – a combination of the “twitch” retrieve and stripping a streamer. Cast down and across the current and add some short twitches, a pause, then a steady pull/strip. Because it doesn’t sink fast, we can slowly bring the fly back, making it not only behave more like the baitfish it’s imitating, but more attractive to fish that might not be aggressively interested in hammering a hard striped fly. Like always with streamer fishing, if the fish aren’t showing you the love, change up the retrieve a little to see if that makes a difference.

Tie these up in various colors and densities. Have some tied with a tungsten bead for additional weight and/or use lead wire under the body, add a trigger of UV material like Ice Dub.  And for sure, tie in a variety of colors to match different baitfish and conditions.

The red thread identifies which patterns are tied with lead wire for additional weight.

Recipe:

Hook: Gamakatsu B10s #6
Thread: Flymaster Plus – Tan
Bead: 3/16” – Brass
Tail: Extra Select Craft Fur – Tan and Golden Olive
Flash: Lateral Scale – 1/69″ Opal Mirage
Wing ‘N Flash or Angel Hair – Gold
Body: Dubbing made from Craft Fur
Head: Deer Body Hair – Tan

This pattern was developed for trout and bass, but should you be interested in using it for larger fish, consider a using a heavier hook like the Daiichi 2451 #6 or heavier Gamakatsu L11S-3H #6

Tying Instructions

Step 1. Slide bead onto the hook and place in vise.

Back Half Baitfish - Step 2Step 2. After wrapping a layer of thread from behind the bead to above
the barb, select a clump of craft fur, a little less than the diameter of a pencil.

Back Half Baitfish - Step 3Step 3. Pinch the longer fibers of the craft fur and separate the shorter fibers
that add to the bulk of the fur. Do not discard the shorter fibers, save them for step 7.

Back Half Baitfish - Step 4Step 4. Tie in the craft fur with the tips extending back
approximately 2 ½ times the length of the hook.

Back Half Baitfish - Step 5Step 5. Tie in the second color of craft fur on top of the lighter, matching the length, then tie
in one strand of lateral scale on each side the craft fur, and trim so it’s the same length as the craft fur.

Back Half Baitfish - Step 6Step 6. Tie in a sparse amount of Wing ‘N Flash or Angel Hair on each side
of the darker craft fur and trim so it doesn’t extend beyond the length of the craft fur.

Back Half Baitfish - Step 7bBack Half Baitfish - Step 7a


Step 7. Using the shorter craft fur saved from step 3, make dubbing by mixing the orientation of the fibers.


Back Half Baitfish - Step 8
Step 8. Dub a body forward stopping about a bead’s distance behind the bead.
Pick out the dubbing with a bodkin, brush, or tip of scissors to get a nice, buggy appearance.

Back Half Baitfish - Step 9Step 9. Select a thinner chunk of the darker craft fur, separate the shorter fibers and tie these in to
help taper the profile of the fly. If tying with a “Trigger” or “Hot Spot”, replace this portion of craft fur with Ice Dub.

Back Half Baitfish - Step 10Step 10. Comb out and stack about a pencil’s diameter of deer hair.

Back Half Baitfish - Step 11Step 11. Between the bead and craft fur, tie the deer hair in around the hook
so the tips extend just beyond the hook bend. Any shorter than this
and the craft fur is likely to get fouled around the hook bend.

Back Half Baitfish - Step 12Step 12. After winding the thread carefully through the butt
ends of the deer hair, whip finish behind the bead.

Back Half Baitfish - Step 13Step 13. Trim the butt ends of the deer hair around the hook slightly tapering
from the diameter of the bead to transition the profile to the deer hair tips.

Back Half Baitfish - Step 14Step 14. Using a black Sharpie marker, color the top of the craft but by pulling the craft fur with one hand
and lightly running the marker along it. You just want to add a little dimension, not completely blacken it.

Back Half Baitfish - Step 15Step 15. By pulling the craft fur with one hand, apply some vertical stripes on each side with a marker.
Here, a metallic gold Sharpie is used. I also mark some with black or brown when I want a pattern with less flash.


Back Half Baitfish - Tan OliveFinished Back Half Baitfish

Back Half Baitfish UndersideUnderside profile of the Back Half Baitfish

Tied with optional 3-D Eyes

baitfish streamer, fly pattern for log perch, gamakatsu streamer hook, kevin feenstra, log perch, matching baitfish, smallmouth bass, trout fishing streamer

Hex Nymph for Trout and Steelhead

Posted by Ted Kraimer - March 20, 2019
Hex Nymph Final

Hex nymphs are important to Michigan fly fishers because their distribution density is vast, the physical size is easy to see and calorie-rich, and the realistic swimming movement all contribute to its success. Steelhead anglers know this pattern to work extremely well fall through spring just as trout anglers know its importance come June when the nymphs get active just prior to the celebrated hex hatch.

There is no shortage of existing hex nymph patterns that any search engine query will turn up, however a number of requests from customers asked if I would demonstrate this pattern after their success using it. This version is mostly a slight adaptation to Andy Burke’s Hex Nymph that I first learned to tie in Randall Kaufmann’s book Tying Nymphs in the early 90’s.

Hex Nymph with Antron Dubbing

Feel free to make variations of this pattern for your needs – ideas include tying some with lead wire, using different dubbing materials, altering the hook and the thorax region to make it an emerger pattern for trout.

The materials offer a lot of movement to imitate the natural’s “swimming” motion – in fact, I tie a slightly longer tail to enhance the movement. The gills provide another element of realism while the silhouette also suggests a goby. Tying some hex nymphs using Antron dubbing offers a little sheen to the hex nymph but you will find both color variations in my fly box when fishing both steelhead and trout.


Hex Nymph Natural

While I like the curve/bend of the original Tiemco 200R hook for trout fishing, I find that when fishing steelhead the hook sometimes bends or breaks when lifting the fish at the side of the boat. The Daiichi 1720 has been a great substitute but without the good looking curved shank. For an emerger (see photo at the bottom of page), the Tiemco 5212 is a light wire model that helps it float/sit in the film.

An advantage fly tyers have is they can tie variations not available commercially. Since hex nymphs reside in lakes and rivers for two years, they range in size, yet fly shops pretty much only offer large patterns. Try tying this in smaller sizes – say as small as #10 – to imitate the juvenile hex nymphs, but will also suggest other decent sized nymphs also found in the river.

Recipe

Hook: Daichi 1720 #6
Thread: Uni 6/0 – Tan
Tail: Gray Marabou from Pheasant or Grouse skin
Back: Turkey Tail treated with Flex Seal
Gills: Aftershaft feather from Pheasant or Grouse
Rib: Gold Wire – Small
Abdomen: Rabbit Dubbing – Cream
Thorax: Rabbit Dubbing – Cream
Wingcase: Turkey Tail treated with Flex Seal
Legs: Hen Saddle Feather – Grizzly
Eyes: Mono – Black, Small

Tying Instructions


Hex Nymph Step 1

Step 1. Place hook in vise and wrap thread base from behind eye to above barb.


Step 2. Select a small natural marabou feather from a pheasant or grouse skin and tie in
above barb so the natural tips extend rearward one hook shank’s length.

Hex Nymph Step 2.5

Step 2.5 Optional. If you want a lead underbody, wrap .025” wire about 1/3rd of the way behind hook eye.

Hex Nymph Step 3
Hex Nymph Step 3.5

Step 3. Cut a narrow piece of turkey tail feather that has been treated with Flex Seal.
Tie in the narrow end with the treated side of the feather facing up. An non-recommended alternative
to using a treated turkey feather is using Thin-Skin.

Hex Nymph Step 4

Step 4. Tie in wire.

Hex Nymph Step 5
Hex Nymph Step 5.5

Step 5. Tie in aftershaft feather at its base. These are delicate so use care.

Hex Nymph Step 6

Step 6. Dub a slightly tapered abdomen stopping about one hook gape’s distance from the hook eye.

Hex Nymph Step 7

Step 7. Carefully lay the aftershaft feather over the abdomen and tie down and trim.

Hex Nymph Step 7

Step 8. Pull the turkey tail over the aftershaft and tie down. Do not trim the excess feather.

Hex Nymph Step 9

Step 9. Wind the rib through the abdomen being careful not to trap the aftershaft feather fibers. Tie off and trim.

Hex Nymph Step 10

Step 10. Fold the turkey tail over the back and secure with a few wraps – this will be your wingcase.

Hex Nymph Step 11

Step 11. Dub a short section but large diameter thorax. This should be thicker than the abdomen.
Tie in mono eyes just behind hook eye.

Hex Nymph Step 12

Step 12. Tie in Hen Saddle Feather by the tip

Hex Nymph Step 13

Step 13. Dub the rest of the thorax but not up against mono eyes.

Hex Nymph Step 14

Step 14. Wind Saddle Feather about 2 times through thorax and tie off, trim.

Hex Nymph Step 15

Step 15. Lightly dub around the mono eyes.

Hex Nymph Step 16

Step 16. Pull pheasant tail over the thorax making sure the
saddle feather is evenly distributed to each side. Tie off and trim.

Hex Nymph Final

Finished Hex Nymph

Hex Nymph Quigley Cripple Emerger

This version of a Quigley Cripple adds a sparse amount of Z-lon to the tail and omits the wingcase.
In the thorax region, use stacked deer hair and a brown and grizzly hackle.

Print This Page
burkes hex nymph, fly tying hex nymph, fly tying hex nymphs, hex nymph, hex nymph pattern, hexagenia nymph pattern, michigan hex nymph pattern, steelhead hex nymph, trout fishing hex nymph

Hendrickson Hair Wing Dun

Posted by Ted Kraimer - March 20, 2018
Hendrickson Hairwing Dun Final

Hendrickson Hair Wing Dun

When some of the local rivers maintain temperatures in the mid-50s, you can expect to see Hendrickson mayflies (Ephemerella subvaria) emerging, especially in the afternoon after the sun has had a chance to warm up the water. It’s also a chance to take advantage of fish that haven’t necessarily been pressured for a while as they come out of hibernation and start feeding on the first significant mayfly to emerge in late April and into May. It might be safe to say that Hendrickson’s are the first sign of spring to an avid dry fly angler.

This version of Rene Harrops’s classic Hair Wing Dun floats well, sits in the film and represents the insect’s profile very nicely.

Hendrickson Hairwing Dun Emerger

Hendrickson Hair Wing Emerger

Since Henies can struggle to get off the water in the cooler temperatures common in the early season, they tend to be vulnerable to feeding fish. This pattern – with Its Elk Hair Caddis-like wing – allows you to skitter it on the surface just above a selectively feeding fish for added realism that can be just enough to convince a fish that has already refused your previous presentation.

By changing the tail materials to Gadwall Flank and some Z-lon, you can create an effective emerger. With the water often stained in the early season, I have a few of these ties with a piece of micro opal Flashabou as a rib to bring just a little attention to the pattern as it floats downstream.

Don’t limit this pattern just to just Hendricksons. With some minor adjustments to color and size, this pattern can be tied to represent most the mayflies found emerging in May and June.Tie some up and think Spring!

Hendrickson Hairwing Dun With Rib

Hendrickson Hair Wing Dun with Rib

Recipe

Hook:                    Gamakatsu S10 #14
Thread:                 Uni 8/0 or equivalent – Tan or Camel
Tail:                       Moose Body or Coque De Leon
Dubbing:              Custom blend of 1/3rd Olive &
:                            1/3rd Cinnamon Fine ‘N Dry dubbing
:                            and 1/3rd Muskrat Fur – hand mixed.
Hackle:                 Grizzly Dyed Dun Dry Fly
Wing:                   Medium Coastal Deer Hair


Tying Instructions

Hendrickson Hairwing Dun Step 1Step 1. Wrap a thread base from behind the hook eye to above the barb.

Hendrickson Hairwing Dun Step 2Step 2. Apply a very slight amount of dubbing to the thread
and create a very small and compact ball above the hook barb.

Hendrickson Hairwing Dun Step 3Step 3.  Using a hair evener/stacker, prepare 4 to 6 moose body hairs and tie on top of the shank
– mid way- so the natural tips extend one hook shank’s length beyond the hook.
Divide the hairs on either side of the small dubbing ball to help split/spread the hairs.

Hendrickson Hairwing Dun Step 4Step 4. Dub a slightly tapered body to the half-way point up the hook shank.

Hendrickson Hairwing Dun Step 5Step 5. Choose a hackle feather that is one size too large and
tie in the hackle by  the stem up against the dubbing.
To help secure the feather, trim some of the barbules close to the stem.

Hendrickson Hairwing Dun Step 6Step 6. Dub the thorax area stopping about one hook eye’s length shy of the hook eye itself.

Hendrickson Hairwing Dun Step 7Step 7. Wind the hackle fully through the thorax area and tie off between dubbing and hook eye.

Hendrickson Hairwing Dun Step 8Step 8. Prepare, clean and stack a clump of deer hair that is a little thicker than a coffee stir stick/straw.
Tie in the deer hair so the tips – when laid down – extend the length of the dubbed body.
Use a couple of loose lasso-wraps of thread before securing and flaring the deer hair.
The tips of the hair should be pointed back and upwards.

Hendrickson Hairwing Dun Step 9Step 9. Trim the deer hair off the front of the fly so that it sticks up a little.
Think of how an elk hair caddis is tied. Whip finish.|

Hendrickson Hairwing Dun Step 10Step 10. Trim the hackle on the underside of the fly, flat, so that it is doesn’t extend beyond the hook point.

Print This Page
dry fly fishing, Ephemerella subvaria, hair wing dun hendrickson, hairwing dun emerger, hendrickson emerger, hendrickson mayfly pattern, hendrickson pattern, henies, renne harrop
123›»
Guide Trips - Fly Fishing Float Trips

Guide Trips & Pricing

Testimonials

Lessons - Learn to Fly Cast or Improve

Casting Lessons

About Ted Kraimer Fishing Guide

About Your Guide, Ted Kraimer

Fish & Seasons

King Salmon Fly Fishing - Betsie River Near Traverse City

Salmon

Fall Steelhead Manistee River

Steelhead

Carp Fishing West Grand Traverse Bay

Golden Bones / Carp

Bluegill, Panfish and Bass Fly Fishing on Local Lakes Near Traverse City

Bluegill / Panfish / Bass

Trout Fishing Manistee River near Traverse City Michigan

Trout

Fly fishing for smallmouth bass Manistee River and Northern Michigan Lakes

Smallmouth Bass

Ted Kraimer • Current Works, LLC • PO Box 333 • Traverse City, Michigan 49685 • (231) 883-8156

© 2024 Current Works, LLC — All rights reserved
  • Home
  • Guide Trips & Pricing
  • Fishing Report
  • Fish & Seasons
  • Rivers & Hatches
  • Fly Tying
  • Articles
  • Gallery
  • About
  • Sitemap