Current Works Guide Service
  • (231) 883-8156
  • ted@current-works.com
  • Book a trip
  • Subscribe to Newsletter
  • Home
  • Guide Trips & More
    • Guide Trips & Pricing
    • Casting Lessons
    • Gift Certificates
    • Book a Trip
  • Fishing Report
  • Fish & Seasons
    • Steelhead
    • Trout
    • Smallmouth Bass
    • Salmon
    • Bluegill / Panfish / Bass
    • Golden Bones / Carp
  • Rivers & Hatches
    • Upper Manistee River
    • Lower Manistee River
    • Betsie River
    • Boardman River
    • Hatch Chart
  • Fly Tying
  • Articles
  • Gallery
  • About
    • About Your Guide
    • Testimonials
    • Newsletter
    • Area Information

Fly Tying

Tar Baby

Posted by Jeanne Kraimer - March 14, 2012

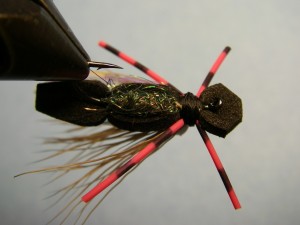
Tar Baby Fly Pattern

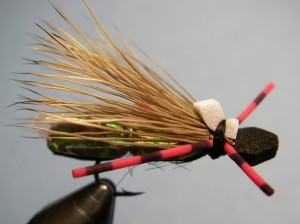
This is my twist/version of the Tar Baby fly pattern which borrows elements from the Mutant Ninja Cicada originated by Emmett Heath – famed guide of the Green River in Utah. Used primarily as a cicada imitation this large terrestrial pattern offers a large profile and bright, kicking rubber legs serving as an attractor when there isn’t much on the water’s surface to bring fish up.

During warm summers in northern Michigan the loud and often obnoxious buzzing sound coming from trees is that of a Cicada. While the insect doesn’t have an abundant population in this region, they are worthy of having in your box as an attractor – if not an imitation of the bug itself.

Tar Baby - Underside

Tar Baby – Underside

Floating high because of its foam body and elk hair wing, this fly works well as a indicator fly where a second fly is tied to the bend of the hook – either a nymph or a smaller, hard to see dry fly like a beetle or Trico. Fish it solo like any large terrestrial like a grasshopper – close to the bank, over deeper runs and all water that appears promising. A little twitch or even some skating/skittering often brings fish’s attention to it.

Consider tying the same fly using different color pieces of foam…. tan, khaki, chartreuse, or olive as it can suggest grasshoppers and play around with different leg colors. Don’t limit yourself to using this fly just for trout – it has taken its fair share of bass, too.


Tar Baby Recipe

Hook:           Dry Fly Hook – Size 10 (Gamakatsu S10)
Thread:         Uni 6/0 – Black
Body:           Black Foam – 1/8″
Underbody:    Ice Dub – Peacock
Underwing:    Pearlescent Sheet
Wing:            Elk Body
Legs:            Grizzly Barred Rubber Legs – Med – Red
Indicator:      White Foam – 1/8″

Tying Instructions
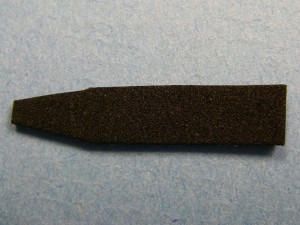
Tar Baby - Step 1Step 1. Cut body from foam sheet approximately 1/4-inch wide 1-1/2 inch long and make a tapper on one end.
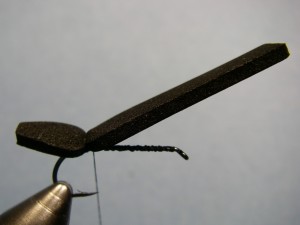
Tar Baby - Step 2Step 2. Place hook in Vise and wrap base layer from behind eye to above hook barb. This is where
you will tie the foam down with the tapered end extending beyond the hook bend.
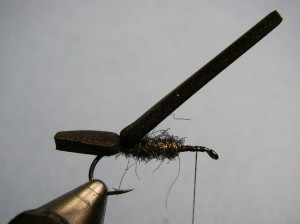
Tar Baby - Step 3Step 3. Once tied down, dub the under body to provide some iridescence to the body.
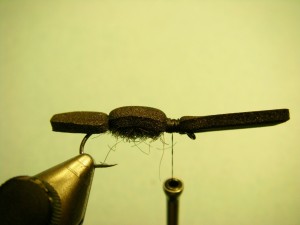
Tar Baby - Step 4Step 4. Tie the foam down again behind the hook eye with the additional foam extending forward.
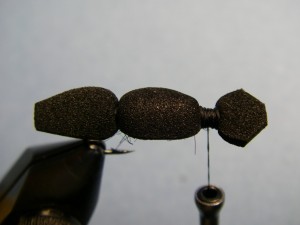
Tar Baby - Step 5Step 5. Trim the extending foam the length of the hook shank and then cut the corners off.
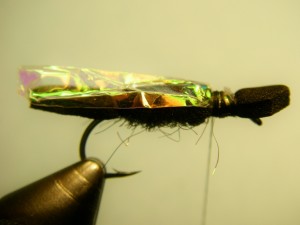
Tar Baby - Step 6Step 6. Tie in a piece of pearlescent sheet on top of the foam that just extends beyond the body.
Too large of an under wing will tend to twist/helicopter thin tippets when casting.
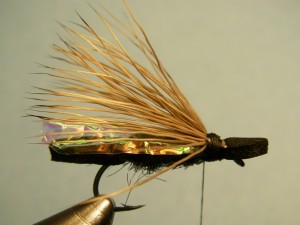
Tar Baby - Step 7Step 7. Clean and even/stack a sparse amount of elk hair and tie in over the
under body with the tips extending the same length as the under wing.
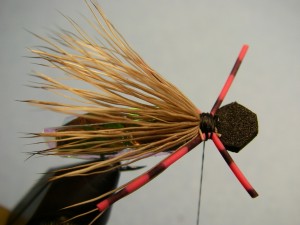
Tar Baby - Step 8Step 8. Tie the rubber legs in on each side of the body forming the fish loving “X” and trim so the front legs are
shorter than the back legs. If the rear legs foul in the bend of the hook when fishing, trim streamside.
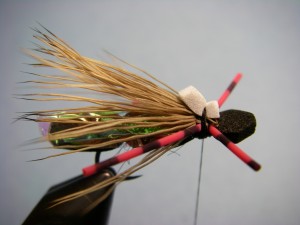
Tar Baby - Step 9Step 9. Use a piece of white foam which should be slightly narrower than the body and tie
above the elk hair to reinforce the elk hair and keep it extending backwards
without excessive flaring. Whip finish and apply two coats of head cement.

To address any potential misunderstandings of the name Tar Baby, Wikipedia defines it as:

“The Tar-Baby is a doll made of tar and turpentine used to entrap Br’er Rabbit in the second of the Uncle Remus stories. The more that Br’er Rabbit fights the Tar-Baby, the more entangled he becomes. In modern usage according to Random House, “tar baby” refers to any “sticky situation” that is only aggravated by additional contact.”

 

Print This Page
attractor, cicada, emmet heath, fly, green river, ninja mutant cicada, pattern, tar baby fly pattern, terrestrial

Fin Clip

Posted by Jeanne Kraimer - March 14, 2012
Fin Clip Streamer Fly Pattern

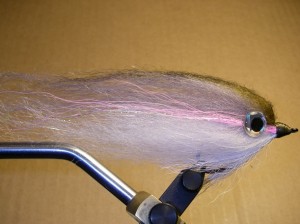
Fin Clip – Imitates Stocked Rainbow Trout and Steelhead

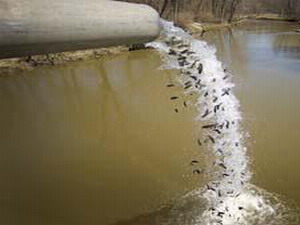
Each year DNR fish stocking trucks back up to the river to subsidize fish populations on many of our rivers. The beeping noise these trucks make when in reverse is like a dinner bell to the larger fish in the river – they know that the next two months is a perfect time to get a mouthful of easy prey.

The Fin Clip was designed to imitate naïve hatchery rainbow trout put into the wild where the natives take note and eat big. I first started tying this as a small baitfish pattern but it soon became “super-sized” after seeing some large fish eat the stockers. After I tied some for a few fellow guides it didn’t take long to become a favorite of both anglers and fish looking
for something big.

Fin Clip - Stocking Trout

Stocking Hatchery Fish Becomes A Food Source

I like to tie the Fin Clip in a few sizes to replicate the size of the fish stocked in the river. Hatcheries sometimes have various size planters and as anglers, we are always trying to imitate the common food source – it’s no different here – match the naturals.

Tie this pattern in other color schemes to imitate chubs, brown trout, suckers and bass for not only trout but other predatory species. While it doesn’t imitate anything in particular, Chartreuse and White makes a great attractor which fish often crush.

The primary material used in the Fin Clip is Icelandic Sheep Hair because of its inherit qualities. First, it moves, slinks and wiggles when the fly is paused between strips and the current has its way with it. Second, it offers neutral buoyancy allowing the fly to suspend in the water column on the pause. Third, Icelandic sheep hair comes in a wide variety of colors. Fourth, when wet, it fills out and maintains a realistic profile. Fifth and lastly, it sheds water with one good false cast making it easier to cast than you might think.

How To Fish the Fin Clip

Fin Clip Streamer and How to Fish

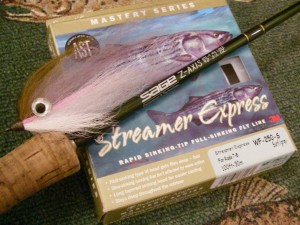
Unlike a lot of streamers used for trophy trout, this fly doesn’t need to be in the “zone” for a fish to eat it. Rather, fish can see this large profile pattern and when fished with long strips and 2 -4 second pauses (depending on the depth of water), it gives the appearance of a disoriented stocked fish that isn’t swimming all that well and creates a perfect predator-prey relationship and gets the fish to move long distances to eat. I cast this fly with 6 and 7 wt. rods and heavy sink-tips like Scientific Anglers 250 grain Streamer Express. This 30’ sinking section of line keeps the fly in the optimum water column throughout the retrieve. Leaders should be short – 5 to 6 feet long and Maxima Ultragreen in 8 and 10 pound-test is preferred.

Not perfect

While effective, the Fin-Clip is not perfect and has some drawbacks to it. While it’s a good thing that the sheep hair sheds water to ease in casting, those that might be around you if fishing from a boat will notice the isolated showers it creates.

Don’t rush – cast slow with a long casting stroke and don’t try to force or punch a cast – it will cause the materials to foul in the hook bend loosing it’s profile and action.

It’s a fly for big aggressive fish which usually key in on the eye (notice the oversized eyes?) and attack at the head. This can create some broken hearts with fish that “nip” at the tail or attack the head and miss the hook. I have tried to incorporate a stinger hook for some of those tentative takes, but haven’t found a method that doesn’t compromise the action of the pattern nor get tangled up with the connection .

This pattern does take a little time to tie, but since it doesn’t sink like a rock, it doesn’t hang up too much on the bottom. When it does, it is easy to see and often get back without donating.

The Fin Clip is predominately used for those fish that are not only big and eat big too– it’s a pattern that is meant for the alpha-fish that have given up on snacking and prefer to eat large meals with one bite.

Fin Clip - Stocked Trout Eating Brown Trout

Fin Clip Recipe

Hook:           Gamakatsu B10S, SZ  1/0 or 2
Thread:        Uni 6/0 – Olive Dun
Tail:             White Bucktail
Body:           Icelandic Sheep Hair/Streamer Hair – White, Shad Gray, Silver Gray & Olive Brown  Pink Bucktail
Throat:         Calf Tail
Flash:           Shrimp Pink Krystal Flash and a subtle flash like Wing ‘N Flash or Angel Hair and Shrimp
Eyes:            SZ. 1/0: 3/8”, SZ. 2 : 1/4” 3-D Molded
Other:           Flex Seal, Black Indelible Marker, Super Fabric Textile Adhesive, Sally Hansen Clear Nail Polish

Tying Instructions

Fin Clip - Step 1Fin Clip - Step 1.5


Step 1. Cut lead wire to build a keel – .035 for sz. 1/0, .025 for sz. 2. Wrap one
piece of lead at a time along each side of the shank and downward making an
upside-down triangle until you have all 5 pieces securely wrapped. Then apply
a few drops of Zap-a-Gap. The feel keeps the fly tracking relatively straight and right side up.

Fin Clip - Step 2Step 2. Tie in a clump of Bucktail that will extend almost as long as the
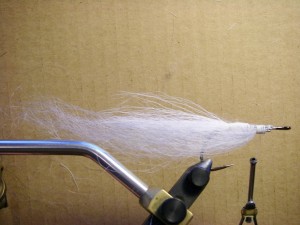
body material – Aprox. 3 times the shank’s length. This under tail helps
maintain the ideal profile and discourages the material fouling in the hook bend.

Fin Clip - Step 3Step 3. Tie in the bottom body hair – this is Shad Gray from Wapsi. Start with
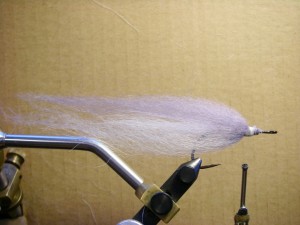
a good clump and remove some of the under fur. Also, pull out any of the long
hairs. Tie in above the hook point leaving a little bit of the ends and then wrap
up into the hairs to get a good purchase on the materials. Take note of the hair length.

Fin Clip - Step 4Step 4. Tie in Silver Gray (Hareline) Sheep Hair on the top
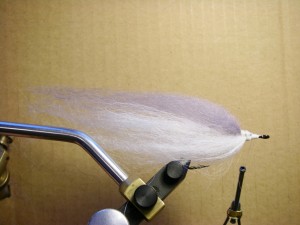
of the hook using the same techniques as in step 3.

Fin Clip - Step 5Step 5. Tie in the second section of Sheep Hair on the underside – white.
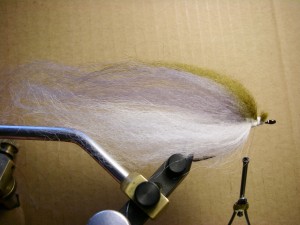
Fin Clip - Step 6Step 6. Tie in the second Section of Sheep Hair on top of the hook – a mix of Silver Gray and Olive Brown.
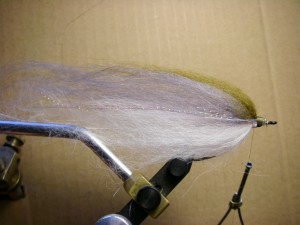
Fin Clip - Step 7Step 7. Tie in a strand or two of Krystal Flash and some subtle flash material like Angel Hair
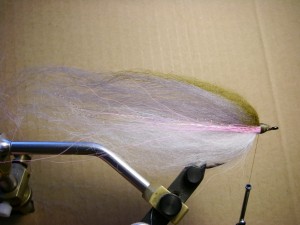
to add just a hint of sparkle – Most stocked fish are pale for the first few months after being planted.

Fin Clip - Step 8Step 8. Tie in a small section of pink deer hair on each side. Not only does this give
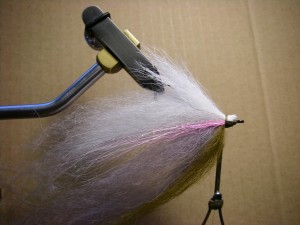
the Fin Clip a light pink hue, but also helps keep the sheep hair in place when fished.

Fin Clip - Step 9Step 9. Tie in a clump of White Calf Tail for a throat. The tips should extend downward
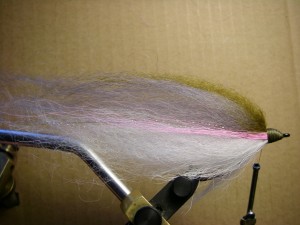
just beyond the hook point and helps prevent the body material from fouling.

Fin Clip - Step 10Step 10. Build a large head of thread to behind the hook eye and whip finish a few times to secure.
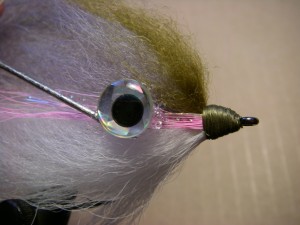
Fin Clip - Step 11Step 11. Apply Super Fabric Textile Adhesive with a bodkin just above center on the material and
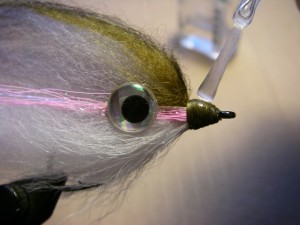
half way back between the hook point and hook eye. This should also cover the flash and pink bucktail.
Apply eye so that it assists in building up a heavier front profile rather than a long, streamlined shape.
Use more adhesive than you might think to acheive this “upward bulk” appearance. Thie eye and adhesive helps
keep the various materials in place in addition to reinforcing them. Repeat on other side. Allow adhesive to dry.

Fin Clip - Step 12Step 12. With the hook in the vise, apply a light coat of nail polish and then dry on a drying wheel. If you don’t
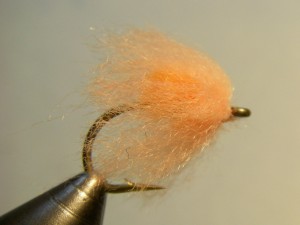
have one, set the hook point so the fly is vertical and apply very light coats. Make sure the head is completely
cured before applying a second coat. Once dry, take a marker and lightly darken the very top of the sheep hair.
In the past I have made vertical parr marks on the side of the fly with a black Sharpie marker.

Tying Notes

To speed up the process, I like to sit down and keel a number of hooks at one time and then come back to them after the Zappa Gap has dried before the next step. This is also true with applying Flex Seal to the bucktail tail, applying the eyes and finishing the head. Super Fabric Textile Adhesive is the only product I have used that keeps the eyes attached to flies – it has some flexibility which keeps it from sheering off.


Print This Page
big baitfish fly pattern, big streamer patterns for big trout, fin clip streamer, rainbow trout pattern, sheep hair, stocked fish, streamer hair

Nuke Egg Fly

Posted by Jeanne Kraimer - March 13, 2012
Nuke Egg Fly Pattern

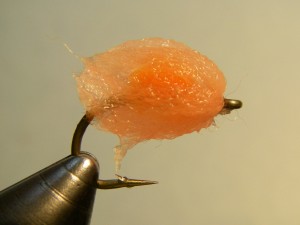
Nuke Egg

The Nuke Egg is one of the first egg fly patterns to be considered “advanced” – that is, one that goes beyond the single dimension and solid-looking Glo Bug. The veil of egg yarn over the nucleus is what gives the Nuke Egg its translucent appearance and separates this fly from so many other egg patterns.

The color combinations are endless, but some favorites are: Chartreuse over Flame, or Flame over Cerise – both attractors with realistic combinations including: Egg over Sockeye, Pink Lady over Shrimp Pink, Apricot Supreme over Steelhead Orange, Salmon Egg over chartreuse or everyone’s favorite, spring or fall: Oregon Cheese over Steelhead Orange.

Nuke Egg Fly Pattern - Wet

Wet Nuke Egg

You can choose to use a variety of materials for the nucleus including: dubbing, chenille, Braids, or McFly Foam. By mixing this material up, you can create unique patterns with just the right color or the little sparkle you have been looking for.

Depending on water conditions, whether you are imitating steelhead or salmon eggs and the stage of the egg itself (how long they have been in the water), play around with how sparse you tie this pattern to achieve the right size as well as color and translucency. Notice how natural this fly looks when wet.

This pattern design is responsible for bringing a lot of fish to the net through the years -be sure to have a nice selection of your own in your fly box.

Nuke Egg Fly Recipe

Nuke Egg 0

Hook :          TMC 105 #6-10, TMC 2457 #8-12 Gamakatsu C14S #8-12
Thread:         Uni 6/0  – Lt. Cahill or color to match veil
Nucleus:        Egg Yarn – Steelhead  Orange
Veil:             Egg Yarn – Apricot Supreme

Tying Instructions

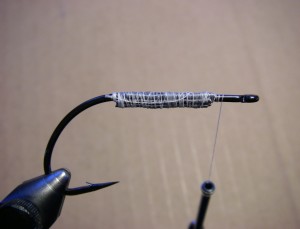
Nuke Egg - Step 1Step 1. Put hook in Vise and wrap a thread base from eye back to just above hook point.
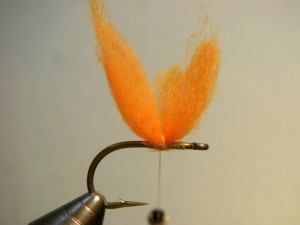
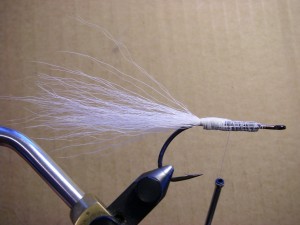
Nuke Egg - Step 2Step 2. Take a very small amount of yarn for the nucleus – aprox. the diameter of your whip
finisher handle. Lay parallel to the hook shank and tie down with a few wraps in the center.

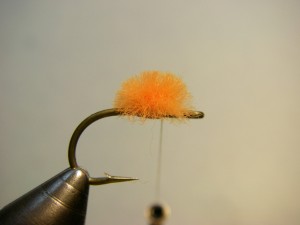
Nuke Egg - Step 3Step 3. Hold both ends of nucleus upward and trim very close to the hook shank – aprox. 1/8”.
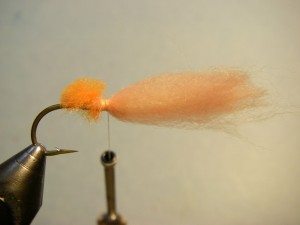
Nuke Egg - Step 4Step 4. Take 1 inch of veil yarn – the amount/thickness should be aprox.
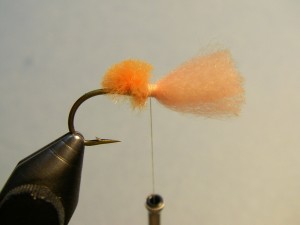
4 times the amount that of what you used for the nucleus and tie in so
yarn extends forward. Be sure to evenly surround the hook shank with yarn.

Nuke Egg - Step 5Step 5. Trim yarn so it is aprox. the length of the hook shank from the tie in point.
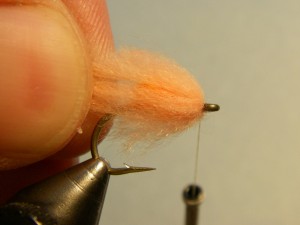
Nuke Egg - Step 6Step 6. Carefully manipulate the veil material backwards – around the thread – evenly surrounding the nucleus.
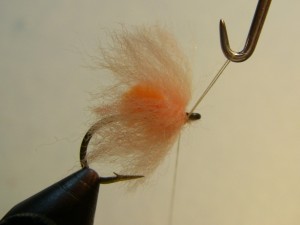
Nuke Egg - Step 7Step 7. Wrap thread a few times between the veil and the hook eye to make
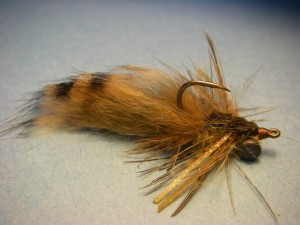
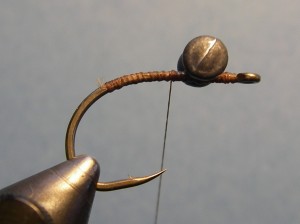
sure veil wants to stay backwards covering the nucleus and then whip finish.


Print This Page
egg pattern for salmon, egg yarn, how to tie egg patterns for steelhead, nucleus egg pattern, nuke egg, nuke fly, steelhead, transparent egg pattern, veil

Swimming Hex

Posted by Jeanne Kraimer - March 13, 2012
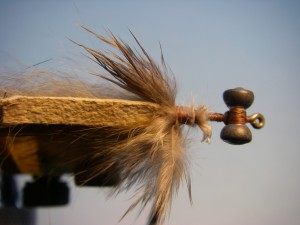
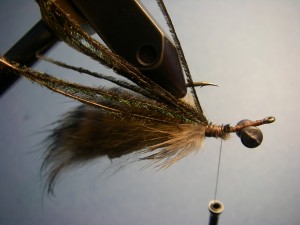
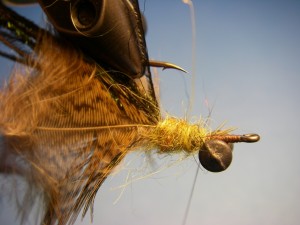
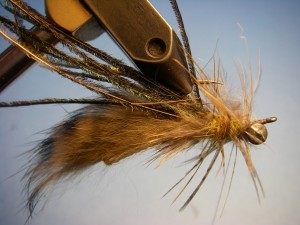
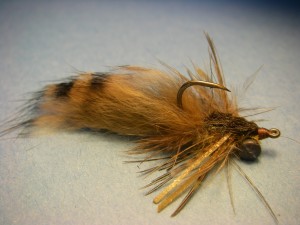
Swimming Hex, Ted's - Fly Pattern

Ted’s Swimming Hex

A number of people have inquired about how to tie my Swimming Hex nymph pattern featured in Fly Tyer Magazine- Spring 2010 as a part of “Rainy’s Newest Flies for 2010.” I know what you are thinking – not another hex nymph pattern? Yep, but this one is a little different than the others out there.

Originally I designed this pattern for carp fishing – weighted eyes tied on the topside of the hook keep the point up and sharp, while a rabbit strip tail creates lots of motion when striped or from wave action. Fished slowly with short strips or “bumps” on the retrieve, this nymph fly does a great job of imitating the burrowing mayflies found in the silt of my favorite carp waters. But there are times when a fast-paced strip to emulate a swimming hex drives both carp and smallmouth bass nuts.

I think “swimming” this pattern does a good job of imitating juvenile gobies which are so prevalent in the Great Lakes. Steelhead anglers will find fishing this pattern under a float to be effective since it has lots of motion due to the rabbit strip tail and looks like the hex nymphs/wigglers swimming in the same waters.

I like to tie this pattern in a variety of different weights (Bead-chain eyes and various lead dumb-bell weights) to get down in a variety of depths and conditions – sometimes when fishing to moving or cruising carp and smallmouth bass, you want to fly to get down quick as you try to intercept them. After you tie this fly on be sure to massage some water into it to help sink it; rabbit hair inherently has lots of air trapped within causing it to float or suspend at first.

Not a fly tier? You can buy these from your local fly shop that sells Rainy’s flies.

Swimming Hex Recipe

Hook:           Mustad C49S #6 or TFS 2500
Thread:        Uni 6/0 Camel
Body:           McLean’s tan/brown barred rabbit strip
Thorax:        Wapsi’s Golden Stone Lifecycle dubbing
Eyes:           Bead chain – med or lead dumbbell eyes – extra small, or small
Hackle:         Pheasant Rump Feather
Legs:           Sili-Legs – pumpkin/black
Wing Case:   Peacock Herl
Gills:            Gray fibers from the base of pheasant feather

Tying Instructions

Swimming Hex - Step 1Step 1. Wrap thread base layer and tie in eyes on top of hook using figure-8 wraps.

Swimming Hex - Step 2


Step 2. Cut a piece of rabbit strip about three times the length of hook shank. Remove hook
from vise and poke the hook point through it so that the eyes are down and the fur is up.
Tie it down so it’s slightly on the curved part of the shank encouraging an upright position.

Swimming Hex 3 - StepStep 3. Tie in gills – taken from the bottom part of a pheasant rump feather.
Tie them so they flare on both sides of the rabbit strip.

Swimming Hex 4 - StepStep 4. Take a clump of peacock herl and tie in by the tips.

Swimming Hex 5 - StepStep 5. Tie in Pheasant feather by the tip and Dub a thorax that is just thicker than the rabbit strip.

Swimming Hex 6 - StepStep 6. Palmer hackle and tie off behind eyes.

Swimming Hex - Step 7Step 7. Figure-8 some Sili-Legs.

Swimming Hex - Step 8Step 8. Sparsely dub around eyes to cover thread wraps.

Swimming Hex - Step 9Step 9. Pull peacock herl over the back dividing the pheasant fibers
evenly and tie off just behind the hook eye. Whip finish.


Print This Page
carp fly, grand traverse bay, mayfly, pattern, rabbit strip hex, rainys flies, teds swimming hex, tying instructions, weighted hex nymph

Flashtail Whistler – Fire Tiger

Posted by Jeanne Kraimer - March 12, 2012
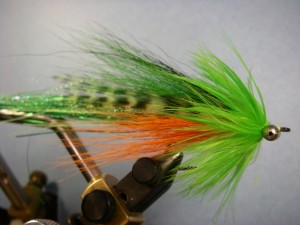
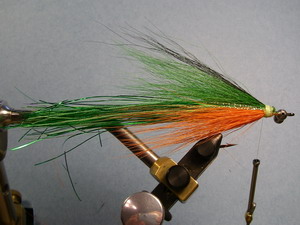
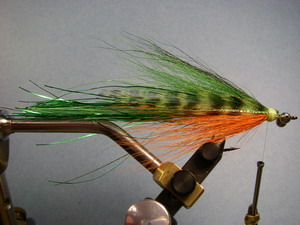
Whistler Fly Pattern - Fire Tiger

Fire Tiger Whistler

Originally this pattern was designed by Dan Blanton for saltwater use, but over the years it has been adopted by freshwater anglers for its versatility and effectiveness. This pattern is one of the must-have flies that will work in various colors for various species – if it is a predator, it will eat the Whistler.

Beyond pike and musky, I have found various sizes and colors to work well for trout, bass and salmon. The color choices are endless and this particular scheme is a favorite of salmon when they first are in the river. Anglers using lures for these fresh salmon have an affinity for Storm Thunderstick lures in Fire Tiger and it’s effectiveness has led me to tying this fly pattern in a similar color scheme. Make sure your fly box is filled with yellow/red, white/red, chart./olive, olive/yellow, orange/olive, and gray/white to be
equipped and ready for various species in various situations.

Whistler - Blanton's - Assorted Colors

Assortment of Colors for an Assortment of Species

Like the name suggests, there is a liberal amount of flash tied into the tail that not only provides flash, but also action.

The bead-chain eyes “whistle” as you cast the fly through the air. The physical weight of this pattern makes it easy to cast and it retains little water helping to keep it light weight. The thin profile of this pattern causes it to sink slowly which is ideal for shallow water and floating lines while it allows for decent penetration of the water column when fished with sink-tips. Further, you can mitigate the bead chain eyes with other, heavy sinking eyes if you are looking to get the fly even deeper.

Recipe:

Hook:        Gamakatsu B10S, TMC 811S, 600SP; Size: 3/0 – 6
Thread:      Fly Master + or Uni 3/0 – Chartreuse
Tail:           Flashabou – A mix of Kelly Green, Green Glow-in-the-dark, and Chartreuse
Body:         Bucktail – Flo. Orange, Kelly Green and Black
Wing:         Chartruese Grizzly Saddle hackle. Krystal Flash – Chartreuse
Throat:      Red Dubbing (I like Pseudo Seal, Angora Goat or Simi-Seal) or Red Chenille
Collar:       Highlander Green Schlappen
Eyes:          X-Large Bead Chain – Stainless Steel

Tying Instructions

Whistler - Step 1Step 1. Wrap a thread base to above the hook point and take thread back to
behind the hook and tie in bead-chain eyes on the underside of the hook.

Whistler - Step 2Step 2. Tie in Flashabou tail – 3 times hook shank length. [The pictured fly’s
tail is a little shorter which was done for photographing reasons]

Whistler - Step 3Step 3. Invert hook and tie in orange bucktail so tips extend one hook shank length behind the bend
of the hook. Trim excess and wrap in between butts to get a good purchase and secure.

Whistler - Step 4Step 4. Return hook to normal position. Tie in top bucktail to same length as
bottom section, but slightly denser to ensure the fly swims right side up. Majority
of the top color is Kelly Green with some black on top to match the color scheme.
Trim excess and secure. Tie in a few strands of Krystal Flash on each side.

Whistler - Step 5Whistler - Step 5.5


Step 5. Prepare saddle hackle by trimming some of the fibers, but leaving the butts to
allow for a secure mount. Pinch the stem of the feather flat with smooth faced hemostats or
pliers to keep the feather from rotating when mounted. Mount on each side of the fly with
natural feather curves bending in. The tips should be the same length as the bucktail. Tie in
additional Krystal Flash over the hackle wings extending aprox. the same length as the hackle.

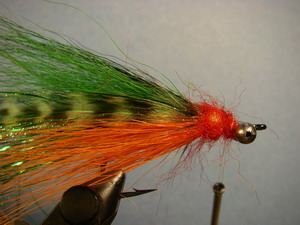
Whistler - Step 6Step 6. Loosely dub over the thread wraps with some red dubbing. This not only helps to protect the
materials, but also gives an appearance of gills. The original pattern was tied with red chenille, but I
prefer the low profile of dubbing which also makes for a textured surface to tie in the schlappen feathers.

Whistler - Step 7Step 7. Tie in 2 or 3 large Schlappen feathers by their tips between the dubbing and eyes. Be sure
to tie schlappen in where fibers are long enough (aprox. just larger than a hook gape).

Whistler - Step 8Step 8. Wind all the feathers together forward to just behind the eyes and tie down. Whip finish and tie off.

Whistler With Action DiscOptional: When fishing, try using a Wiggle Fin Action Disc on the line in front of the fly. This plastic
dish creates a unique wobble and imparts a lot of action when pulled slowly. The resulting wiggle/motion
of the fly and the flashabou tail is seductive. Click here for the Wiggle Fin website.

Print This Page
bass, dan blantons flashtail whistler pattern, effective and verstile streamer pattern, firetiger, how to tie, instructions, salmon, steelhead, streamer, trout, whistler recipe, wiggle fin action disc
«‹5678›
Lessons - Learn to Fly Cast or Improve

Casting Lessons

Testimonials

Guide Trips - Fly Fishing Float Trips

Guide Trips & Pricing

Gift Certificate

Gift Certificates

Fish & Seasons

Trout Fishing Manistee River near Traverse City Michigan

Trout

Carp Fishing West Grand Traverse Bay

Golden Bones / Carp

Fly fishing for smallmouth bass Manistee River and Northern Michigan Lakes

Smallmouth Bass

Fall Steelhead Manistee River

Steelhead

King Salmon Fly Fishing - Betsie River Near Traverse City

Salmon

Bluegill, Panfish and Bass Fly Fishing on Local Lakes Near Traverse City

Bluegill / Panfish / Bass

Ted Kraimer • Current Works, LLC • PO Box 333 • Traverse City, Michigan 49685 • (231) 883-8156

© 2024 Current Works, LLC — All rights reserved
  • Home
  • Guide Trips & Pricing
  • Fishing Report
  • Fish & Seasons
  • Rivers & Hatches
  • Fly Tying
  • Articles
  • Gallery
  • About
  • Sitemap