Current Works Guide Service
  • (231) 883-8156
  • ted@current-works.com
  • Book a trip
  • Subscribe to Newsletter
  • Home
  • Guide Trips & More
    • Guide Trips & Pricing
    • Casting Lessons
    • Gift Certificates
    • Book a Trip
  • Fishing Report
  • Fish & Seasons
    • Steelhead
    • Trout
    • Smallmouth Bass
    • Salmon
    • Bluegill / Panfish / Bass
    • Golden Bones / Carp
  • Rivers & Hatches
    • Upper Manistee River
    • Lower Manistee River
    • Betsie River
    • Boardman River
    • Hatch Chart
  • Fly Tying
  • Articles
  • Gallery
  • About
    • About Your Guide
    • Testimonials
    • Newsletter
    • Area Information

Smallmouth Bass

Flashtail Clouser Minnow

Posted by Ted Kraimer - July 3, 2012
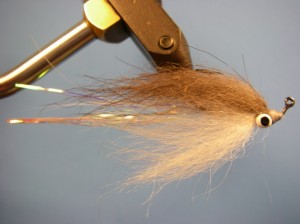
Flashtail Clouser

Flashtail Clouser

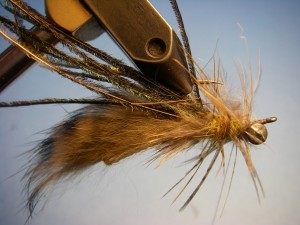
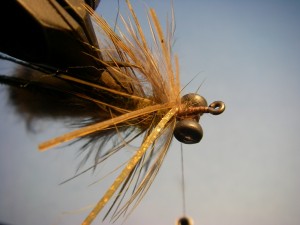
Most anglers are familiar with the Clouser Minnow — a highly effective fly created by smallmouth bass angler and guru Bob Clouser. With its lead eyes and streamlined bucktail construction, the fly acts similar to a bucktail jig and can effectively be fished in a variety of colors for a variety of species, making it one of the most versatile patterns for both fresh and saltwater fish.

The Flashtail Clouser was influenced by the original Clouser Minnow pattern and Dan Blanton’s rendition — the Flashtail Deep Minnow. Notable differences in this pattern include a tail of reflective Flashabou, a body of  synthetic dubbing to add some bulk and transparency, and a belly and wing made from soft, natural materials that have more movement in the water. The result is more durable than bucktail.

Flashtail Clouser - Smallmouth

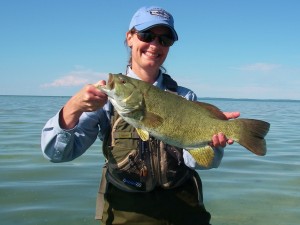
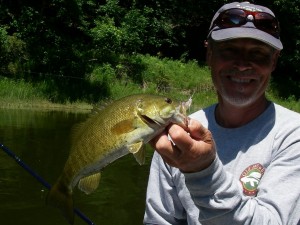
Smallmouth Bass caught on a Flashtail Clouser

You can fish the Flashtail Clouser in both rivers and lakes with both floating lines and sink-tips. I suggest tying these flies using various sized eyes from bead-chain to a few different sizes of painted dumbbell to allow fishing various depths and current flows.

With floating lines, use leaders around 9 feet in length to allow the fly to sink. When stripped, the jig-style hook and a floating line create a fleeing “hop” while moving forward, imitating a spooked and fleeing baitfish — something predatory fish often key-in on.

Fish this pattern with varying speeds and pauses on sink-tip lines when you need to get the fly deeper and/or in swift moving currents.

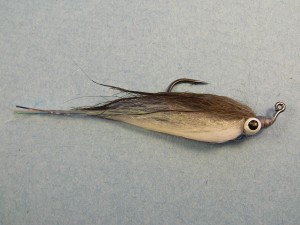
Flashtail Clouser - Wet

Flashtail Clouser – Wet

Easy to tie, highly effective and very versatile, tie this pattern in sizes that range from a few inches up to 8 inches in length. You can change the color profile to match any particular baitfish that is prevalent to your favorite fishery or even in attractor color schemes.

Trout • Pike • Salmon • Smallmouth Bass •  Bluegill • Largemouth Bass • Walleye • Steelhead

Flashtail Clouser Minnow Recipe

Hook:           U555 Jig 6,  or TFS 5440 1/0 – 6
Thread:         Gray Uni 6/0
Tail:              50/50 mix of Mirage Opal/silver and Flashabou Pearl
Body:            Hareline Polar Dub – White
Eyes:             S.S. Bead Chain or painted dumbbell – sized accordingly
Belly:            Sheep Hair/Sculpin Wool – White
Wing:            Silver Fox Tail
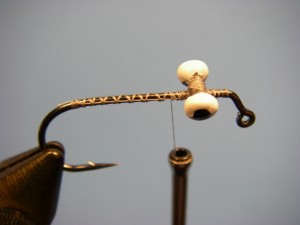

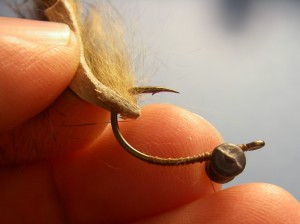
Flashtail Clouser - Step 1Step 1.
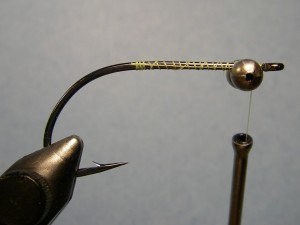
After wrapping a base layer of thread from behind the angled hook shank to above
the hook barb, tie eyes using figure-8 wraps, leaving room to tie in the belly and wing.
Some people prefer to add a drop of Zap-A-Gap to the wraps at this point (optional).
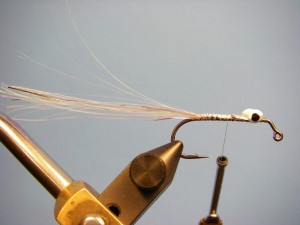
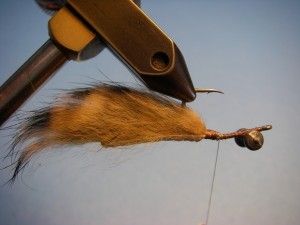
Flashtail Clouser - Step 2Step 2.  Tie in the tail material so it extends backwards twice the length of the hook shank.
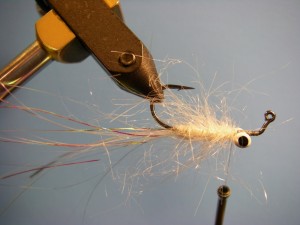
 

Flashtail Clouser - Step 3Step 3.  Very loosely dub clumps of Polar Dub from the tail tie in area to just
behind the eyes. Pick out with scissor point or bodkin.
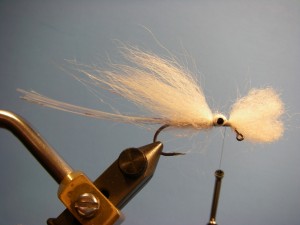
Flashtail Clouser - Step 4
Step 4.
Tie in a sparse clump of sheep hair behind the eyes so the tips extend halfway down the tail.
After secure, wind your thread between the eye and hook eye. Pull sheep hair over the eyes and tie down.
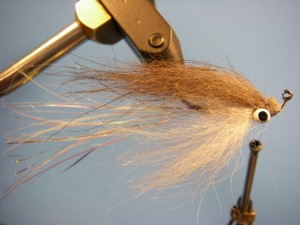
 

Flashtail Clouser - Step 5
Step 5.
 On the opposite side of the white belly hair, tie in a clump of Silver Fox tail for
a wing that is slightly longer than the belly.  Trim, tie off and apply two coats of head cement.

Print This Page
blantons flashtail, clouser minnow, fly tying, pattern, recipe, smallmouth bass fly

Tips For Better Streamer Fishing

Posted by Jeanne Kraimer - March 16, 2012

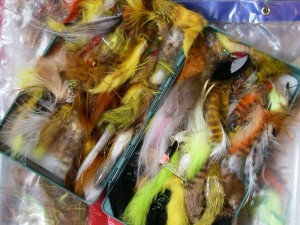
Streamer Fly Fishing For TroutStreamer fishing has really evolved over the past 15 years, from fishing small patterns like Mickey Finns and Grey Ghosts fished swung and quickly stripped back on floating lines, to flies commonly ranging from 4-6 inches long, often with lots of bulk, a large profile, shimmer and flash, weight and other accessories and fished on a heavy sink-tips. By doing so, we take big flies to big fish and break-up those periods where surface action is nil but we still want success on the water.

This is not the “gentleman’s” way to present a fly. Often, this presentation triggers a pure territorial response, getting the fish to eat; other times, they just want to eat something big and go back under a log for a while. That’s how they get bigger. This isn’t necessarily a new style of fishing for many, for others it is. Regardless of your experience or the species you cast a streamer to (trout, salmon, steelhead, smallmouth bass), the following tips are suggestions for improving your streamer fishing and scoring big.

Mix it up

Streamers

Fish can be particular from one day to the other and even throughout the day – not so much to fly sizes, but color and movement. Anyone who has been fishing on “the day” knows that streamer fishing can be some of the most exhilarating and successful ways to catch big fish. But it can turn on and off quickly and/or the fish can have an attitude change and decide something else looks good. Sunlight can make a fly look different, so if the light changes, consider how your once-hot fly might appear in the new conditions and change it if need to be.
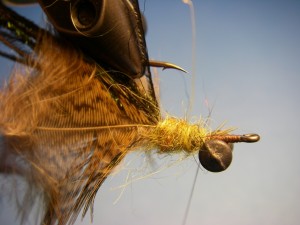
Mix up not only your patterns with respect to their colors, size, profile, action, amount of weight, but also how you fish them: faster, slower, deeper, jig-like, lots of pause/suspension, quickly, jerkily; in the heavy structure, in the middle of the river, perhaps the inside seams with little structure. Mix it up, look for a behavioral pattern and always assess. The more you fish the more you will develop your favorite patterns for certain conditions. Let your gut dictate what you should try, but don’t be stubborn and stick with something that isn’t working.

Don’t Recast

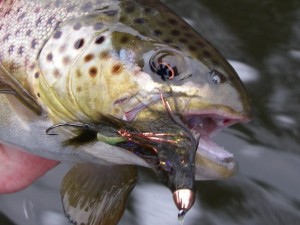
Streamer Fishing Tips for Trout

If your cast fails to hit the target and falls a little short, rather than pick it up and attempt to get that extra 2 feet of length, let it go and fish it – that is, unless it’s going right into a snag or something else ominous. Here’s why: If you pull that fly out, you may have pulled out of the water just as a fish was about to smash it. Further, if you recast it will you really hit the target the second time? Lastly, when you pull the fly out to recast, you often spook fish and alert them that something isn’t right so your second cast comes through disturbed water with an educated fish in it. Make your cast and fish it out.
 

Feel The Fish

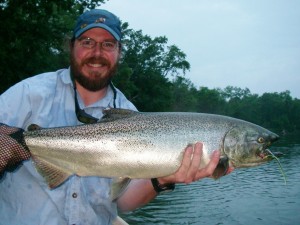
Streamer Fishing Tips for Salmon

Set the hook when you feel the fish, not see the fish eat. It has happened too many times – a brown trout into the mid-20s or a 15-pound salmon comes up to eat, mouth opens and the fly rips through the water thanks to a premature hook set. Strike one – you’re out. Keep that fly moving, and when you feel the tug, set the hook as hard as the equipment will allow you to. If you do everything right, the hook fails to stick and the fly comes up and out of the water, cast it right back in there immediately. The fish is typically committed and is now pissed that they ate but didn’t get it in their mouth and are looking around for the “escapee.” I have witnessed fish chasing and eating a fly a number of times before it all connects and the fish is on. Really, cast it in their again and move the fly.

Present Your Fly, Not Your Line & Leader

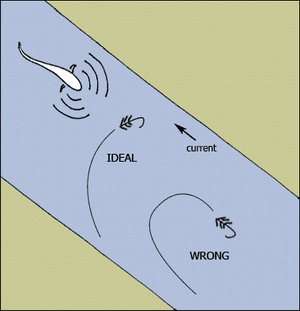
Streamer Presentation

If fishing with a streamer, you want your fly to be what the fish see, not your line and/or leader. Because we often use such short, stout leaders to dark color sink-tips, we can do things incorrectly with ease. Since fish mostly look upstream, cast your fly at an angle to the river that will keep your fly moving slightly across the current and broadside, exposing the fly to more fishy looking water. With streamer fishing being a predator/prey scenario, keep in mind that the prey (the fly) will use the current of the river flow to escape the predator (fish) rather than move upstream and fight the current to escape the danger. When the cast gets swept downstream and turns to go upstream, strip it back upstream once or twice, but not in completely – it’s time to recast.

When we cast the correct angle, we need to be sure we keep the fly moving the right direction but not too swiftly where the fly is streaking across and downstream too fast and without enticing action. To help with this, mending goes a long way to slow the speed and present more of the fly to good looking structure and hopefully fish, too.

Multi-Task

You have two eyes – use them both. Keep one eye on your fly and your line and how it is moving through the water, adding mends, looking for response from fish and avoiding snags. With the second eye, look downstream for your next target. Rather than cast out immediately after you strip your fly back in, it might be prudent to move a little downstream before casting so the fly gets as close to the structure as possible.

Choose Your Leader

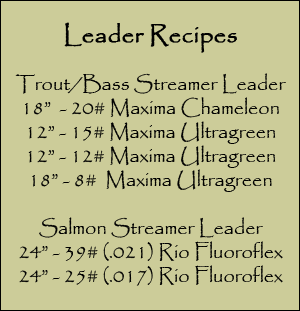
Streamer Leader Recipe

Use a short leader, not a long one with sink-tips. The sinking section of the line is used to penetrate the water column and present the fly at the depth we desire. A short leader keeps the fly close to the sinking line, whereas a long leader can end up riding higher in the column due in part to the current forces and any buoyancy characteristics of the fly. I prefer a leader no longer than 5 ft. in length.

Use a long leader, not a short one with floating line (7 to 9 feet). We do this for the opposite reason as above. If we want the fly to sink and get deep, we need enough leader that will allow separation of fly from floating line. Make sure the fly has some weight to it when using a floating line, unless you aren’t looking to fish it deep.


Keep It Moving

Streamer Fishing Tips for Smallmouth Bass

As we strip that fly through the water, yet again, sometimes that big fish appears from nowhere tracking the fly. Too often anglers stop moving the fly to let the fish “catch-up.” Don’t – keep it moving! By stopping, it’s typically a game-over situation as the fish recognizes something is wrong and goes back to where he came from – why would something fleeing for its life just give up? Anglers’ shoulders slump, jaw opens and some profanity slips out.

Keep the fly moving — maybe slower or more erratically to entice the bite, but keep it moving. It’s not a guarantee that the fish will eat but you should know there are no guarantees in the sport just experience to learn from. As such, sometimes smallmouth bass like the fly stopped when they follow it. Try it – if it doesn’t work after a few attempts of pausing it, go back to keeping it moving.

big streamers for trout, fly fishing, flyfishing, leader recipe for streamer fishing, leaders, presenting streamers, rivers, salmon, sink-tips, smallmouth bass, Streamer fishing for trout, streamer patterns, streamers, trophy trout streamers

Goblin

Posted by Jeanne Kraimer - March 15, 2012
Goblin

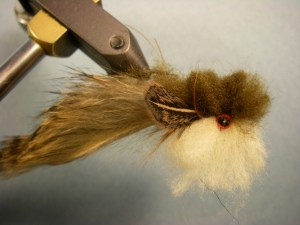
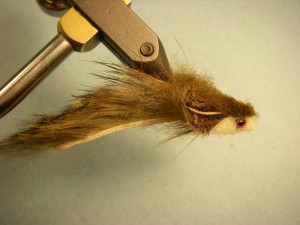
The Goblin – A Sculpin and Goby Streamer Pattern

The Goblin is a pattern that does a good job of imitating two important food sources to fish in the Great Lakes region: the Goby and Sculpin. This large profile fly provides a great silhouette as well as action and with its inverted hook, it’s ideal when fishing either on the lake or river bottom and when fished around structure. The two-tone color perspective makes is very realistic and the barring of the rabbit helps create that illusion of food.

When fishing in Grand Traverse Bay and Lake Michigan, I find the Goblin works very well on smallmouth bass since there is a dense population of goby; carp have been known to eat it too. With it’s weighted eyes and saturated rabbit strip it sinks fairly well and is paired with a floating line and long leader. Once it sinks, strip it fast, but with very short pops with the rod tip and watch for the fish to take. Strip sets common with saltwater fishing is a great way to make sure the fish is hooked. Sculpins make up a key component of a trout’s diet. The Goblin can be fished “trophy-style” – that is, with a large sink-tip, typically from a boat and striped through the deep holes near and around structure before recasting.

Goblin Sculpin and Goby Fly Pattern for Smallmouth Bass

Smallmouth Bass

Goblin Sculpin and Goby Fly Pattern for Trout

Another way to fish this pattern effectively is by wading with a smaller sink-tip line and fished slowly near all the structure that is likely to hold fish – primarily, the secondary structure that many of the “trophy” anglers skip. These slots, tail-outs and inside bends often provide that fish who is not hiding, but rather feeding. Rather than taking the approach of getting a territorial response from the fish, this softer approach is more like matching the natural food source and presents a pattern that wanders near a fish looking to eat. This pattern has also caught steelhead when fished with both a floating line or swung on a two-handed rod.

The fly isn’t easy to tie, but it’s not difficult either. The stacking of two colors of sculpin wool can be tricky, and if you don’t get it right the first time, cut off the wool and try again. Reminiscent of the Mad Pup, this pattern’s head is different by being trimmed short and broad to not only give the better profile, but create a more realistic swimming motion.

Goblin Recipe

Hook:           Daiichi 2451 #4
Thread:         Uni-6/0 Camel and Flymaster+ Tan
Tail:              Black Barred Rabbit Strip Gold Variant
Collar:           Rooster Saddle – Natural Brown
Fins:             Hen Saddle – Speckled Brown
Head:           Sculpin Wool – Cream and Sculpin Olive
Eyes:            Dumbbell – Red, Extra Small or Small

Tying Instructions

Goblin - Step 1Step 1. Insert hook into vise, wrap base layer and dub a small body from some rabbit strip.


Goblin - Step 2Step 2.
Take a piece of rabbit strip and trim off the end to a tapered point.
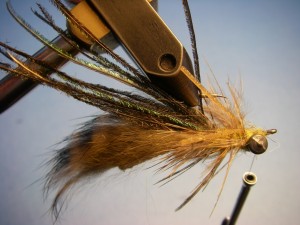
 

Goblin - Step 3Goblin - Step 4


Step 3. Poke the rabbit strip with the hook so the end of the other end of the rabbit
strip is at the end of the dubbed under body which is the tie down point.

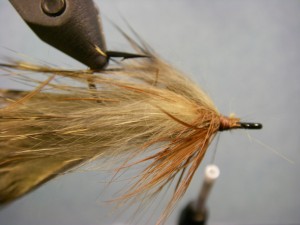
Goblin - Step 5Step 4. Tie in the collar feather and wrap a few times and tie off. Trim the fibers on the
top of the fly. This feather helps support the pectoral fins that will be tied later.

Goblin - Step 6

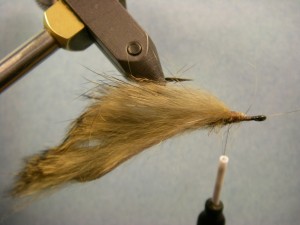
Step 5. Tie a small patch of rabbit hair on top to cover up the collar.

Goblin - Step 7

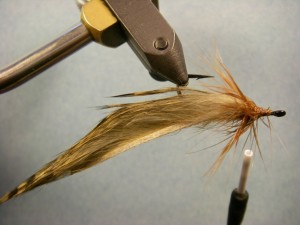
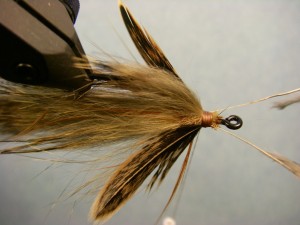
Step 6. Tie in hen saddles to represent the pectoral fins on each side
of the body as shown. Tie one at a time and then whip finish.

Goblin - Step 8

Step 7. Change your thread to the heavier and stronger Fly Master+ and tie the thread in just
behind the hook eye and tie in the dumbbell eyes with figure-8 wraps.

Goblin - Step 9

Step 8. Position the thread between the fly body and the lead eyes. Tie in a small clump of sculpin
wool by cinching down in middle of the hair like you would stacking deer hair.

Goblin - Step 10

Step 9. Rotate the vise or re position the hook in the jaws and repeat the previous step with the cream wool.

Goblin - Step 11

Step 10. Advance the thread to between the hook eye and dumbbell
eyes and tie in the second clump of dark wool.

Goblin - Step 12

Step 11. Tie in the second clump of light colored wool on the underside . Tie off and whip finish.

Goblin - Step 13Step 12. It’s time to trim the wool. Work in a two-dimension approach by trimming
the top and the bottom of the head first. Once you get the profile you are looking
for, rotate the vise and trim from the top view to get the desired profile.

Print This Page
goby pattern, grand traverse bay, how to tie, sculpin pattern, small mouth bass pattern, smallmouth bass, trout

Swimming Hex

Posted by Jeanne Kraimer - March 13, 2012
Swimming Hex, Ted's - Fly Pattern

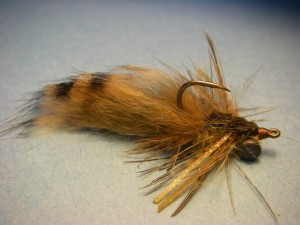
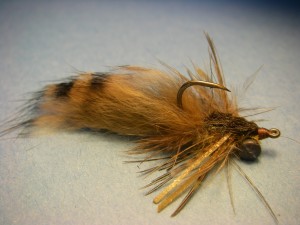
Ted’s Swimming Hex

A number of people have inquired about how to tie my Swimming Hex nymph pattern featured in Fly Tyer Magazine- Spring 2010 as a part of “Rainy’s Newest Flies for 2010.” I know what you are thinking – not another hex nymph pattern? Yep, but this one is a little different than the others out there.

Originally I designed this pattern for carp fishing – weighted eyes tied on the topside of the hook keep the point up and sharp, while a rabbit strip tail creates lots of motion when striped or from wave action. Fished slowly with short strips or “bumps” on the retrieve, this nymph fly does a great job of imitating the burrowing mayflies found in the silt of my favorite carp waters. But there are times when a fast-paced strip to emulate a swimming hex drives both carp and smallmouth bass nuts.

I think “swimming” this pattern does a good job of imitating juvenile gobies which are so prevalent in the Great Lakes. Steelhead anglers will find fishing this pattern under a float to be effective since it has lots of motion due to the rabbit strip tail and looks like the hex nymphs/wigglers swimming in the same waters.

I like to tie this pattern in a variety of different weights (Bead-chain eyes and various lead dumb-bell weights) to get down in a variety of depths and conditions – sometimes when fishing to moving or cruising carp and smallmouth bass, you want to fly to get down quick as you try to intercept them. After you tie this fly on be sure to massage some water into it to help sink it; rabbit hair inherently has lots of air trapped within causing it to float or suspend at first.

Not a fly tier? You can buy these from your local fly shop that sells Rainy’s flies.

Swimming Hex Recipe

Hook:           Mustad C49S #6 or TFS 2500
Thread:        Uni 6/0 Camel
Body:           McLean’s tan/brown barred rabbit strip
Thorax:        Wapsi’s Golden Stone Lifecycle dubbing
Eyes:           Bead chain – med or lead dumbbell eyes – extra small, or small
Hackle:         Pheasant Rump Feather
Legs:           Sili-Legs – pumpkin/black
Wing Case:   Peacock Herl
Gills:            Gray fibers from the base of pheasant feather

Tying Instructions

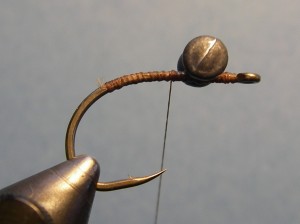
Swimming Hex - Step 1Step 1. Wrap thread base layer and tie in eyes on top of hook using figure-8 wraps.

Swimming Hex - Step 2


Step 2. Cut a piece of rabbit strip about three times the length of hook shank. Remove hook
from vise and poke the hook point through it so that the eyes are down and the fur is up.
Tie it down so it’s slightly on the curved part of the shank encouraging an upright position.

Swimming Hex 3 - StepStep 3. Tie in gills – taken from the bottom part of a pheasant rump feather.
Tie them so they flare on both sides of the rabbit strip.

Swimming Hex 4 - StepStep 4. Take a clump of peacock herl and tie in by the tips.

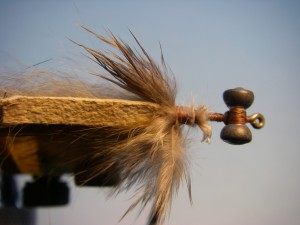
Swimming Hex 5 - StepStep 5. Tie in Pheasant feather by the tip and Dub a thorax that is just thicker than the rabbit strip.

Swimming Hex 6 - StepStep 6. Palmer hackle and tie off behind eyes.

Swimming Hex - Step 7Step 7. Figure-8 some Sili-Legs.

Swimming Hex - Step 8Step 8. Sparsely dub around eyes to cover thread wraps.

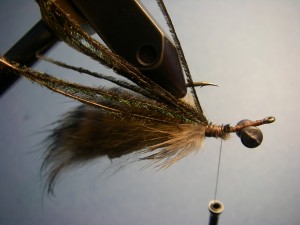
Swimming Hex - Step 9Step 9. Pull peacock herl over the back dividing the pheasant fibers
evenly and tie off just behind the hook eye. Whip finish.


Print This Page
carp fly, grand traverse bay, mayfly, pattern, rabbit strip hex, rainys flies, teds swimming hex, tying instructions, weighted hex nymph

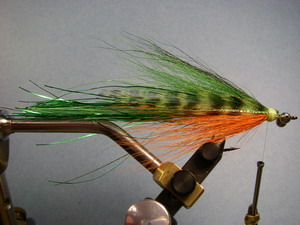
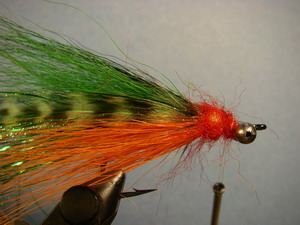
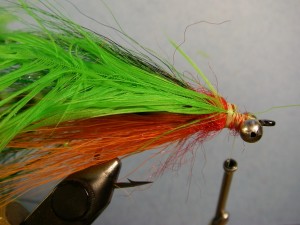
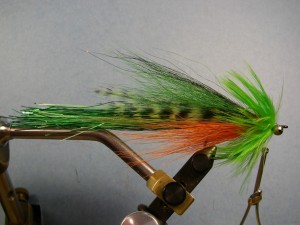
Flashtail Whistler – Fire Tiger

Posted by Jeanne Kraimer - March 12, 2012
Whistler Fly Pattern - Fire Tiger

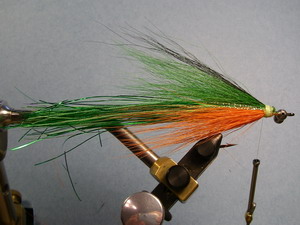
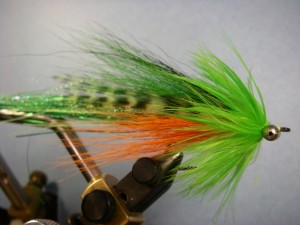
Fire Tiger Whistler

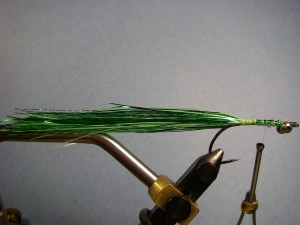
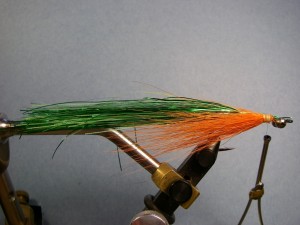
Originally this pattern was designed by Dan Blanton for saltwater use, but over the years it has been adopted by freshwater anglers for its versatility and effectiveness. This pattern is one of the must-have flies that will work in various colors for various species – if it is a predator, it will eat the Whistler.

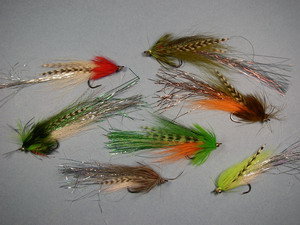
Beyond pike and musky, I have found various sizes and colors to work well for trout, bass and salmon. The color choices are endless and this particular scheme is a favorite of salmon when they first are in the river. Anglers using lures for these fresh salmon have an affinity for Storm Thunderstick lures in Fire Tiger and it’s effectiveness has led me to tying this fly pattern in a similar color scheme. Make sure your fly box is filled with yellow/red, white/red, chart./olive, olive/yellow, orange/olive, and gray/white to be
equipped and ready for various species in various situations.

Whistler - Blanton's - Assorted Colors

Assortment of Colors for an Assortment of Species

Like the name suggests, there is a liberal amount of flash tied into the tail that not only provides flash, but also action.

The bead-chain eyes “whistle” as you cast the fly through the air. The physical weight of this pattern makes it easy to cast and it retains little water helping to keep it light weight. The thin profile of this pattern causes it to sink slowly which is ideal for shallow water and floating lines while it allows for decent penetration of the water column when fished with sink-tips. Further, you can mitigate the bead chain eyes with other, heavy sinking eyes if you are looking to get the fly even deeper.

Recipe:

Hook:        Gamakatsu B10S, TMC 811S, 600SP; Size: 3/0 – 6
Thread:      Fly Master + or Uni 3/0 – Chartreuse
Tail:           Flashabou – A mix of Kelly Green, Green Glow-in-the-dark, and Chartreuse
Body:         Bucktail – Flo. Orange, Kelly Green and Black
Wing:         Chartruese Grizzly Saddle hackle. Krystal Flash – Chartreuse
Throat:      Red Dubbing (I like Pseudo Seal, Angora Goat or Simi-Seal) or Red Chenille
Collar:       Highlander Green Schlappen
Eyes:          X-Large Bead Chain – Stainless Steel

Tying Instructions

Whistler - Step 1Step 1. Wrap a thread base to above the hook point and take thread back to
behind the hook and tie in bead-chain eyes on the underside of the hook.

Whistler - Step 2Step 2. Tie in Flashabou tail – 3 times hook shank length. [The pictured fly’s
tail is a little shorter which was done for photographing reasons]

Whistler - Step 3Step 3. Invert hook and tie in orange bucktail so tips extend one hook shank length behind the bend
of the hook. Trim excess and wrap in between butts to get a good purchase and secure.

Whistler - Step 4Step 4. Return hook to normal position. Tie in top bucktail to same length as
bottom section, but slightly denser to ensure the fly swims right side up. Majority
of the top color is Kelly Green with some black on top to match the color scheme.
Trim excess and secure. Tie in a few strands of Krystal Flash on each side.

Whistler - Step 5Whistler - Step 5.5


Step 5. Prepare saddle hackle by trimming some of the fibers, but leaving the butts to
allow for a secure mount. Pinch the stem of the feather flat with smooth faced hemostats or
pliers to keep the feather from rotating when mounted. Mount on each side of the fly with
natural feather curves bending in. The tips should be the same length as the bucktail. Tie in
additional Krystal Flash over the hackle wings extending aprox. the same length as the hackle.

Whistler - Step 6Step 6. Loosely dub over the thread wraps with some red dubbing. This not only helps to protect the
materials, but also gives an appearance of gills. The original pattern was tied with red chenille, but I
prefer the low profile of dubbing which also makes for a textured surface to tie in the schlappen feathers.

Whistler - Step 7Step 7. Tie in 2 or 3 large Schlappen feathers by their tips between the dubbing and eyes. Be sure
to tie schlappen in where fibers are long enough (aprox. just larger than a hook gape).

Whistler - Step 8Step 8. Wind all the feathers together forward to just behind the eyes and tie down. Whip finish and tie off.

Whistler With Action DiscOptional: When fishing, try using a Wiggle Fin Action Disc on the line in front of the fly. This plastic
dish creates a unique wobble and imparts a lot of action when pulled slowly. The resulting wiggle/motion
of the fly and the flashabou tail is seductive. Click here for the Wiggle Fin website.

Print This Page
bass, dan blantons flashtail whistler pattern, effective and verstile streamer pattern, firetiger, how to tie, instructions, salmon, steelhead, streamer, trout, whistler recipe, wiggle fin action disc
12

Testimonials

Guide Trips - Fly Fishing Float Trips

Guide Trips & Pricing

About Ted Kraimer Fishing Guide

About Your Guide, Ted Kraimer

Lessons - Learn to Fly Cast or Improve

Casting Lessons

Fish & Seasons

Fly fishing for smallmouth bass Manistee River and Northern Michigan Lakes

Smallmouth Bass

Fall Steelhead Manistee River

Steelhead

Trout Fishing Manistee River near Traverse City Michigan

Trout

King Salmon Fly Fishing - Betsie River Near Traverse City

Salmon

Carp Fishing West Grand Traverse Bay

Golden Bones / Carp

Bluegill, Panfish and Bass Fly Fishing on Local Lakes Near Traverse City

Bluegill / Panfish / Bass

Ted Kraimer • Current Works, LLC • PO Box 333 • Traverse City, Michigan 49685 • (231) 883-8156

© 2024 Current Works, LLC — All rights reserved
  • Home
  • Guide Trips & Pricing
  • Fishing Report
  • Fish & Seasons
  • Rivers & Hatches
  • Fly Tying
  • Articles
  • Gallery
  • About
  • Sitemap