Current Works Guide Service
  • (231) 883-8156
  • ted@current-works.com
  • Book a trip
  • Subscribe to Newsletter
  • Home
  • Guide Trips & More
    • Guide Trips & Pricing
    • Casting Lessons
    • Gift Certificates
    • Book a Trip
  • Fishing Report
  • Fish & Seasons
    • Steelhead
    • Trout
    • Smallmouth Bass
    • Salmon
    • Bluegill / Panfish / Bass
    • Golden Bones / Carp
  • Rivers & Hatches
    • Upper Manistee River
    • Lower Manistee River
    • Betsie River
    • Boardman River
    • Hatch Chart
  • Fly Tying
  • Articles
  • Gallery
  • About
    • About Your Guide
    • Testimonials
    • Newsletter
    • Area Information

Steelhead

Tips for Fighting and Landing Fish

Posted by Jeanne Kraimer - March 16, 2012

Fighting Fish - Tips to Help You Land Fish


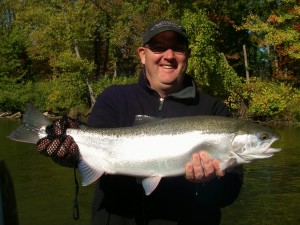
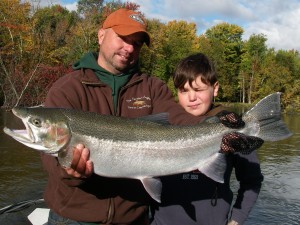
We all fish for different reasons, but one thing remains certain for all of us – when we hook a fish, we want to land it. Whether it’s a trophy steelhead you’ve been determined to catch for years or an 8-inch brook trout, there are certain principles to understand and fundamental skills to use when on the river. Here are some pointers I have picked up through the years by doing, observing and teaching which will increase your chances of telling a fish story that doesn’t start with, “You should have seen the one that got away.”

Under Pressure

Fighting Fish - Keeping a Tight Line

We have all heard it – keep a tight line on the fish. This holds true for almost every conceivable fishing situation – maintain tension and keep the slack out. Not doing so increases two potential pitfalls: 1. Pressure on the hook keeps it in the fish – hopefully buried into the bend of the hook. With slack in the line, the hook can literally fall out of the entry point leaving you with slack line and disgusted look on your face. 2. The longer the fish, the more distance they can move their head. This back-and-forth action coupled with lighter line is similar to how you break thread or a line in your hand – you start with slack and then forcefully jerk it. Think about it – do you pull evenly and smoothly to intentionally break a line? Maintain tension to help prevent the line from snapping.

Being Smooth

Maintain a tight line by reeling and pulling with the rod, but do it smoothly. Have you ever seen a large bull cow with a ring in its nose? Its purpose is to allow the handler to lead the bull around: smoothly draw it in a direction and it will follow, but if yanked or pulled hard it often violently moves in the opposite direction. The same is true with fish. In fact, you can almost make a case for Newton’s Third Law of Physics: for every action there is an equal but opposite reaction – the harder you pull on a fish in one direction, it often wants to go in the other direction that much more. Reel smoothly and bring the fish to you or to a place downstream where you intend to land it.

Fish Judo

Fighting - Fish Judo

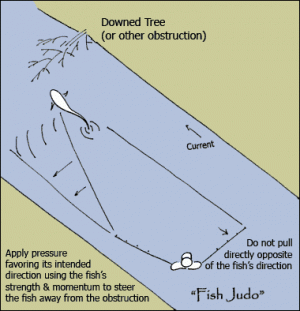
Hooked fish are often easy to steer and control because you have them hooked in the leading part of its anatomy – the mouth. As long as you keep that head moving in the right direction, you have a better chance of dictating and controlling the fight and keeping emotions under control. But, not always. Often the fish tumbles, jumps or quickly changes directions and gets his head going in the opposite direction you want. When this happens the fish is in control and often heads for cover/structure, which more often than not here in Michigan means logs.

Rather than pulling straight back with rod in the opposite direction the fish is headed (which, with larger species only infuriates them more – remember Newton’s Third Law?) – use “Fish Judo” which, in essence, is using their energy to your advantage. With a low rod, lead them away from the ominous structure by pulling the fish to the side, favoring its intended direction and steer it away.

How Much Is Enough?

There can be a fine line between too much pressure and not enough. Often, it isn’t enough. Truly. When anglers hold the rod tip straight up while fighting the fish, they often do so to keep the slack out, but are putting very little pressure on the fish. Does it seem like you’re applying serious pressure or that the rod is maxed out? You might be surprised as I was when my eyes were opened during a tarpon fishing trip.

Try this experiment/exercise: Get a friend (better if it’s a fellow angler) and pull 25 feet of line and leader through the rod. Have your friend pull back on the rod with the tip up and maintain pressure while you hold the end of the leader. How much pressure do you feel? If this isn’t scientific enough for you then get some type of weight scale like a boga grip and tie the line to it. Repeat the experiment and read the scale and read the results. Change places with your friend and repeat — the scale readings will give you a better idea of how much pressure you are applying. Further, move the rod tip down closer to horizontal and see how that affects the amount of pressure on the scale. Remember – it’s the snap or jerk of the line that is more accountable for breaking rather than smooth pressure which is why equipment too, plays a role in protecting lines when applying pressure, i.e., a smooth drag and a rod tip that flexes and acts as a shock absorber.

The Kiss of Death

Fighting - Kiss of Death

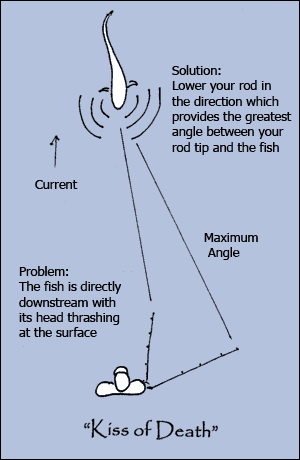
The time, in my opinion, when a fish is most likely to “spit the hook” and send the hook back to you is when it’s down stream, facing you, and shaking its head violently. I hate it. And it happens often. When this occurs, we as anglers often have the rod tip pointed up and the force of the water brings the fish to the surface, thrashing. As soon as you see this happen – or better yet – starting to happen, move your rod down to a horizontal position and to the side furthest away from the fish, creating the maximum angle between your rod tip and the fish. By doing so you gain additional continual pressure on the hook through the headshaking as the current assists by putting a downstream bend in the line. Also, this lowered, sideways pressure encourages the fish to get its head down in the water column where you can tire the fish out instead of holding on and hoping.

Fighting Fish - The One that Got Away

“Let him go, let him go!”

Some days when guiding I seem to say this more than others. When a fish is making a run and is in charge, let him go. By holding your reel handle or grabbing the line, only bad things happen — and it’s usually a fish lost because of line breaking or flies pulling out. When a fish runs, trust your drag setting (you did adjust it at the start of the day didn’t you?) and let him go while incorporating some of the pointers mentioned above.

Reel Fast

If you don’t get the opportunity to fish much and are a little slow at reeling in – practice at home. Put your reel on the bottom section of your rod and just practice “air-reeling.” Make your reeling faster and smother by keeping your elbow and forearm at a 90-degree angle to the face of the reel and using a circular wrist motion to wind – if not, your reeling will be jerky and definitely not as fast.

Water Survey

Fighting Fish - Survey the Water for Potential Obstacles

This often happens sub-consciously, but not always. While fishing, you are reading water to make the best presentation of your ability to the water most likely to be holding fish. Through this process take stock of structure, depth, overhanging trees and water depth. By doing so, when you hook a fish in that particular location, you know where you need to keep that fish from going and where a good location is to land a fish, while remaining safe (and dry).

Giving Them the Wood
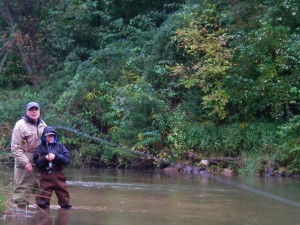
Fighting Fish - Give 'Em The WoodSometimes a fish gets the upper hand on you – that is they are going to break you off on some type of structure or go around the river bend, etc. , and there simply isn’t much you can do – except, “Give ‘em the wood.” This last-ditch effort to get the fish to hand is done by applying the maximum power of the rod through the butt section and trying to slow down, turn, or stop the fish – something to disrupt the pending course of events and keep the fish on the line. By doing this you are taking your equipment to the maximum – testing the strength of rods, tippets and knots – but if you don’t you will lose the fish. Think of this as an all or nothing move – meaning, the fish is going to win/get away unless you stop them so, give ‘em the wood.

The Capture
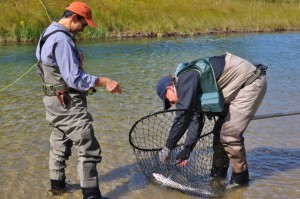
Fighting Fish - Getting the Fish in the Net

Some like to use nets, others like to grab fish with their hand or landing glove. Regardless, you need to get the fish close to you first and second, the grab or sweep of the net needs to be done swiftly and at the right time. When the fish is close, have your rod down low and lift its head up smoothly – but stay committed with lifting until the fish is in the net. If fishing with a friend or guide, this is the time they sweep the net under the fish – head first, with confidence, not hesitation. If using a landing hand on larger species like steelhead or salmon, execute a “Heron Grab” which is done by plunging your hand downward onto the fish’s wrist (the skinny part of the tail) and hold on firmly. Be sure to communicate during the process or the communication after the failed attempt will be colorful and often will test any friendship. If you are by fishing by yourself, get the fish close and have your rod on the opposite side of where you intend to land it. If fishing for smaller fish like a trout, gently grab the fish around its middle or slide the net under it. Never bring a fish up onto the shore or muddy bank as sand, silt and other debris will get into their gill plates, often killing the fish within a few days.

Keep in mind we are out fishing for fun, whereas the fish – once hooked – are fighting for survival. Even though you might follow all of these suggestions and tips as well as some of your own, sometimes it isn’t enough and the fish wins. Rather than be pissed-off – tip your hat in appreciation of that fish and get ready for the next chance at landing what could be even bigger and better; use the tips for fighting and landing fish above to help make that happen.

drag, fighting fish, fly reel, jumping fish, kiss of death fly fishing, landing big fish on a fly rod, landing fish on a fly rod, log jams, use a net to land fish, using a fly rod to catch fish

Fishing Egg Patterns

Posted by Jeanne Kraimer - March 16, 2012
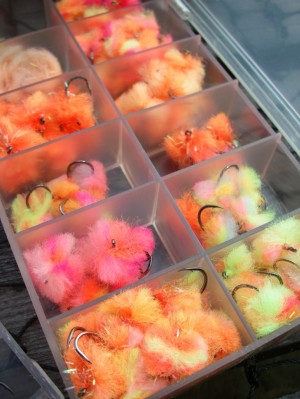
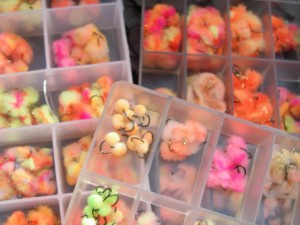
Egg Box

Box of Eggs in Various Color Combinations

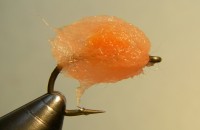
Matching the Hatch is often associated with trout fishing, but not necessarily with Steelhead fishing. Imitating the specific natural insects fish key in on is important to the success of the trout angler however this same approach should be used by steelhead anglers looking to imitate their prey’s primary food source – eggs.

Egg flies have been used for decades not only because they are easy to tie or inexpensive to buy, but more importantly because they are effective. With increased angling pressure, water conditions, as well as factors only known by the steelhead themselves, they often become selective on size and color. This article’s goal is to provide you with a better understanding of what egg to use and when. Of course it’s not guaranteed, but put others’ experience in your corner to optimize your steelhead fishing and hopefully a well-earned steelhead into your net.Egg Fly Patterns for Great Lakes Steelhead
Matching the Hatch

Egg Patterns for Trout and Steelhead

Regardless of when you fish steelhead and what egg you are trying to imitate, know that the eggs themselves change. After being in the water – free drifting or trapped in a selected gravel bed – eggs become less colorful, a bit translucent and eventually opaque. Depending on the timing of your fishing trip in relation to the “egg drop”, color plays a large factor and there are two ways to determine what is ideal:

1. Experience. Fishing and having certain successes or failures can help you Egg - Real Salmon Eggsdefine color combos for particular times. Keeping notes in a journal can help keep track of what can easily be forgotten between seasons and a few beers.

2. When fishing rivers that have a respectable trout population, use their selectiveness as an indication of the right color and size. Catching trout? Proceed. Not catching tout? Change your egg pattern.
When fishing for steelhead in the fall directly behind spawning salmon – color and size becomes more important and is where “matching the hatch” is key. In Egg - Wet Nuke Eggthis case, the eggs are often fresh, having a more realistic color to them.
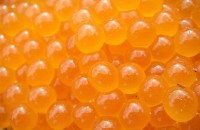
Want to know what a real salmon egg looks like? Look on the ground at access sites or near fish cleaning stations to match your egg patterns – its not that much different than catching a mayfly out of the air and matching it to a fly in your box when trout fishing. The same holds true in the spring when imitating natural steelhead eggs.

Fall Steelhead

Egg - Fall Steelhead

 There are many theories as to “Why do steelhead enter our rivers in the fall?”, but there is no clear, general accepted theory. Some think curious steelhead follow the salmon as they run up the river to spawn, others hypothesize that they are genetically programmed to enter rivers at that time of year. While these might be partially or absolutely correct, I prescribe to the theory that fall weather and wind conditions bring steelhead close to river mouths, and the scent of pheromones and millions of salmon eggs drifting down the river triggers them to follow a gravy train of protein. This is why the water downstream of  the salmon tend to be best for anglers looking for steelhead and having a box filled with egg flies will keep you prepared.


Egg - Rag Pattern

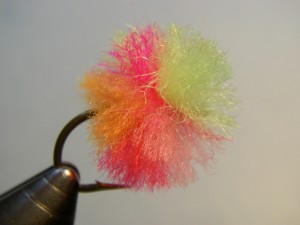
Rag Egg – Clown Color

With this in mind, I like fishing for fall steelhead, the majority of the time with two egg flies; one larger, brighter pattern as an attractor and a second, smaller, more realistic pattern imitating what is coming down the river. Often the top positioned fly is a multicolored pattern like a Clown or two-colored Rag Egg if not a Nuke Egg. I saw my first clown egg while fishing steelhead in Alaska in the mid-1990s and thought it was a joke – it was about the size of a quarter and included more colors than a small package of Crayola crayons. But with time, understanding, and some luck, I have learned that this multi-color configuration and approach can be significant to my success fishing for steelhead right here in Michigan. It’s a good idea to run this egg pattern in a large size when the water is full of leaves
when a smaller pattern could easily be lost in all of the
drifting debris.

Egg - Nuke Egg

Nuke Egg

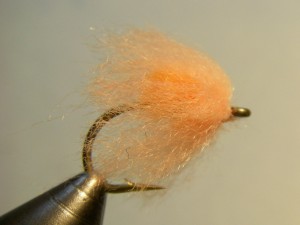
Most anyone fishing steelhead in Michigan recognizes the Nuke Egg as an effective pattern that is an improvement over the original GloBug. The Nuke can be tied as an attractor or natural imitator depending on size and color. One of its key attributes is the veil or shroud of yarn that covers the nucleus of the pattern giving it a natural, transparent look when wet. The advantage of the Nuke Egg is its exacting nature to imitate the natural eggs drifting down the river. Some of these color combinations include: Egg over Sockeye, Pink Lady over Shrimp Pink, Apricot Supreme over Steelhead Orange, Salmon Egg over Chartreuse or Nuke Egg everyone’s favorite – spring or fall: Oregon Cheese over Steelhead Orange. Worthy attractor colors are Chartreuse over Flame, or Flame over Cerise.

Egg - Sucker Spawn

Sucker Spawn

Steelhead in the Great Lakes perform their annual spawning each year during the spring. The largest numbers of fish are in the river sometime in March and April depending on water levels and temperatures. During this time period, the river is also used by walleyes, resident rainbow trout, suckers and carp (typically in that order with steelhead spawning the same time as rainbow trout) as their spawning area. As a result, millions of eggs drift down the river becoming a significant food source for all fish in the river, notably steelhead. The successful angler is often fishing with an egg pattern best imitating the natural egg – its color and shape in addition to how it relates to water conditions.

Spring Steelhead

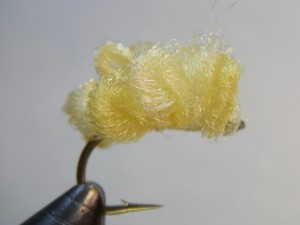
Egg Patterns For SteelheadSpring water conditions are often found to have a stain or be quite high and dirty. When this is the case, I have found patterns larger than naturals to be the most effective. Egg patterns like Rags, Nukes and Glo Bugs tied in various colors and almost as big as a dime, I think, do a better job of grabbing a fish’s attention rather than imitate the food source. But those times of the spring when the absence of rains and thaws leave the water with good clarity, size and color becomes significant. Patterns like sucker spawn in pale yellow imitate that of both suckers and walleye, where the natural characteristics of Nuke Eggs and Glo Bugs in various colors and hues can be identical to those of natural steelhead eggs drifting down the river.

A well stocked fly box for trout fishing is important to success and it’s no different for steelhead. Learn your favorite river, the spawning times of the various species, and what works in particular conditions and key in on what steelhead are eating. Having egg patterns in various sizes, colors and shapes and learning when to use them and why can be the difference between catching steelhead on a consistent basis and catching a steelhead.

Learn how to tie 4 different egg patterns – go to the Fly Tying page and select the pattern you want to tie.


Egg - Steelhead

egg fly patterns, egg patterns for steelhead, glo bug pattern, glo-bugs, imitating natural eggs, match the hatch with eggs, nuke eggs, salmon, steelhead, trout

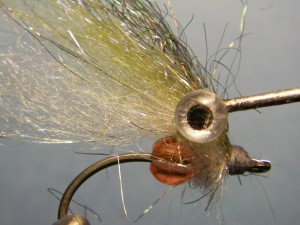
Beaded Alevin

Posted by Jeanne Kraimer - March 15, 2012
Beaded Alevin Fly Pattern

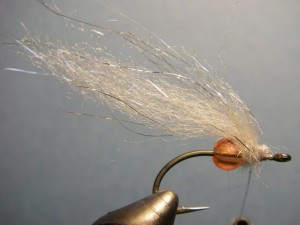
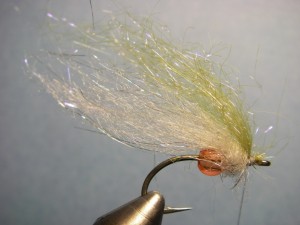
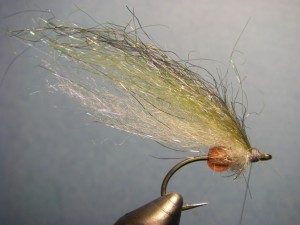
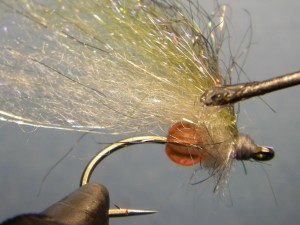
Beaded Alevin

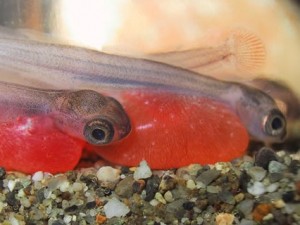
Wherever natural reproduction takes place, juvenile fish call home. After months lying in oxygenated gravel, the fertilized eggs start to evolve into a fish which become a food source to larger fish. This stage, referred to as an “Alevin,” retains its egg as the length and shape of the fish develops.

With its big eyes and bright egg sack, larger fish take advantage of the alevin’s unwary disposition and protein value – we as anglers take note and also take advantage.

Anglers fishing waters that host spawning salmon in the fall and steelhead in the spring should consider this fly a staple from mid-February and into April. Not only does the alevin work well for steelhead, but trout too find them easy prey.

Beaded Alevin - Natural

Natural Alevin

Other species naturally reproducing go through a similar process, and by tweaking coloration you should find this pattern is effective long after the steelhead, walleye and suckers are done spawning. Some fish eat their own, and mixed species don’t pass up a chance to eat others making this an effective pattern that goes beyond just the early months of the year.

Presentation can vary with the alevin pattern.I often fish as a dropper on a nymphing rig for steelhead. As the pattern comes off the bottom and sweeps up and downstream, I strip some line in before recasting. By doing so, the pattern looks like a natural alevin darting along and the takes –with no slack in the line- can’t be mistaken.

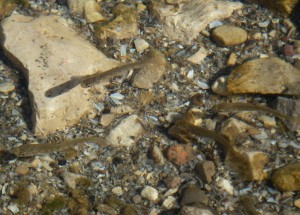
Beaded Alevin - Natural Fry

Immature Salmon

When targeting trout, I like to fish these slightly down and across with twitches created by popping my rod tip on either a slow sink-tip line, sinking leader or floating line if the water is shallow enough. At the end of the drift, let the fly hang down like you would a wet-fly before stripping it back and recasting. Smallmouth bass also like this pattern so be sure to tie one below a larger streamer or even a popper for a top and bottom presentation.

The alevin pattern itself is easy to tie and doesn’t require exotic or expensive materials. The translucent nature of the bead not only adds realism, but also weight and a little wobble when facing directly against the current. Put a bunch of these in your fly box and match a different kind of hatch for a number of species.

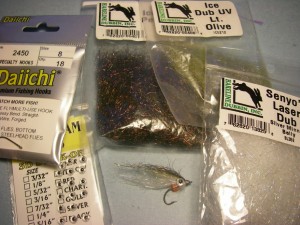
Beaded Alevin Recipe

Beaded Alevin 0Hook:          Daiichi 2450 #8
Thread:       Uni 6/0 – Gray
Bead:          Plastic 4mm – orange/pink
Wire:          Silver Ultrawire – SM or BR
Body:         Senyo’s Laser Yarn Silver Minnow Belly
Wing:          Light Olive Ice Dub
Topping:      Peacock Ice Dub
Eyes:           3-D Molded – Silver 5/32


Tying Instructions:

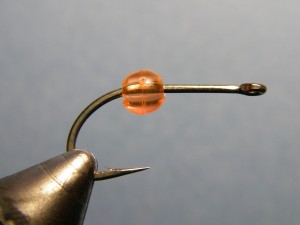
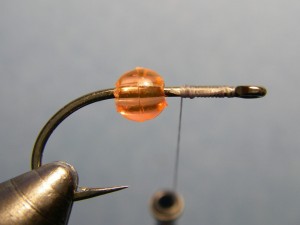
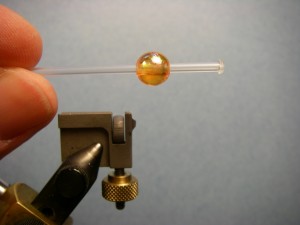
Beaded Alevin - Step 1Step 1. Slide plastic bead over hook and then place in vise

Beaded Alevin - Step 2Step 2. Wrap thread from behind eye to form a base layer.

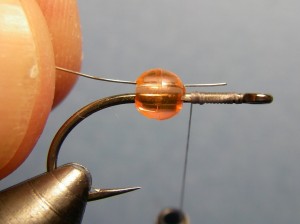
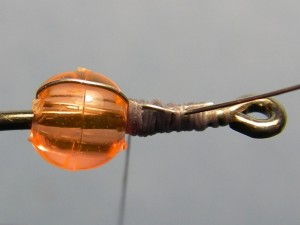
Beaded Alevin - Step 3Beaded Alevin - Step 3.5

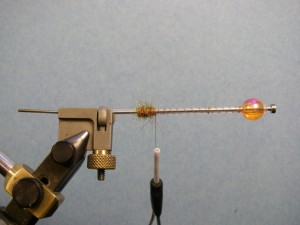
Step 3. Slide a piece of wire through bead and tie down between the hook eye and bead.
Bring the wire over-top of the bead and tie down – this holds it in place.

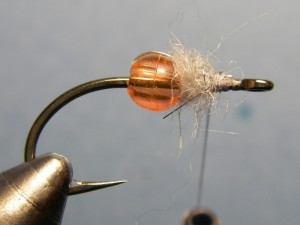
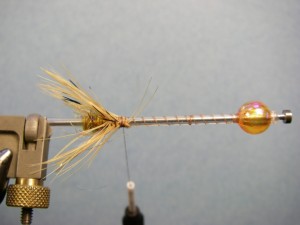
Beaded Alevin - Step 4Step 4. Dub some of the body just in front of the bead.

Beaded Alevin - Step 5Step 5. Take the same dubbing and align the fibers by hand so that you have
a long dubbing/body material. Tie in ahead of the dubbed body.

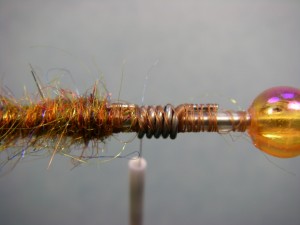
Beaded Alevin - Step 6Step 6. Align some wing material similar to step 5. Tie in on
top so that it is about the same length as the body material.

Beaded Alevin - Step 7Step 7. Repeat a third time with the Peacock Ice Dub and tie off. Apply water-based
head cement (regular head cement typically melts the Ice Dub).

Beaded Alevin - Step 8Beaded Alevin - Step 8.5


Step 8. Install the eyes by placing a drop of Platinum Bond Super Fabric Textile adhesive using
your bodkin. Once applied,use a cleaned off bodkin to pick an eye off its backing sheet and set.
The placement of this eye as demonstrated in the photo is between the bead and hook eye and
slightly elevated and helps sandwich the body/wing material and create the desired profile.


Print This Page
alevin pattern, alevin pattern and how to tie and fish, beaded alevin, easy to tie, egg sack, fly tying, how to fish, how to tie, ice dub, michigan, rivers, salmon, senyo's laser yarn, sink-tip, smallmoth bass, smolt, steelhead, steelhead fry, trout

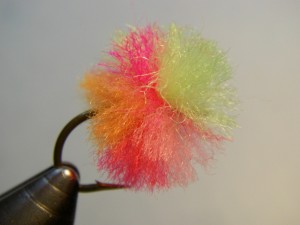
Rag Egg – Clown

Posted by Jeanne Kraimer - March 14, 2012
Rag Egg Fly Pattern - How to Tie

Rag Egg – Clown Color

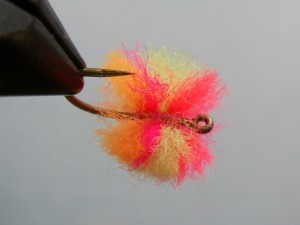
The Rag style egg is a pattern tied loosely which is quite a departure from the very solid Glo Bug. It is translucent and shows multiple colors in a very organic way which is in part why it is so effective at representing eggs in various stages. This rag style also tends to sink when wet as opposed to floating or staying suspended like some of the solid egg patterns tied tightly with egg yarn.

The following directions are for a clown style rag egg, but colors and combinations are endless. Play around and see what works best for you.

Some of my personal favorite combinations are: Oregon Cheese and Steelhead Orange, Egg and Sockeye, Oregon Cheese, Chartreuse, Pink Lady, Steelhead Orange and Egg, Flame and Steelhead Orange (Light Clown).

Egg BoxesNote: When using this rag pattern suspended off of the bottom under floats, I prefer to tie with Daiichi 1640 #6 hooks as they are a little lighter wire but still strong enough for bringing fish to the net.

Egg Eating Fall Steelhead

Dark Clown Rag Egg Recipe

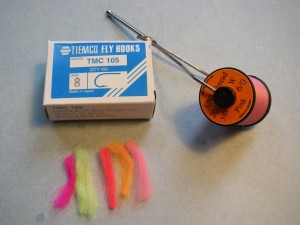
Hook:            TMC 105 # 6-10 or Gamakatsu C14S
Thread:         Uni 6/0 – Color of Choice
Egg Yarn:      Chartreuse, Steelhead Orange, Cerise, Flame, Shrimp Pink

Tying Instructions

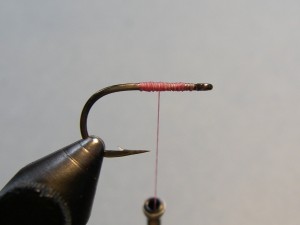
Rag Egg Fly - Step 1Step 1. Cut 1 ¼” pieces of yarn in the various colors and remove parts of the yarn as a full
piece of egg yarn is too much. The amount of yarn varies and depends on hook size and the
amount of translucency desired. A starting point for size 8 hooks is to use just a little less than
the diameter of a pencil. If you want one color to be more prominent, use more of it and less of another.

Rag Egg Fly - Step 2Step 2. Once hook is in the vise, wrap a thread base from behind the eye to above the hook point.

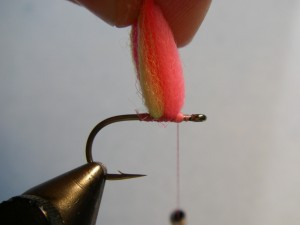
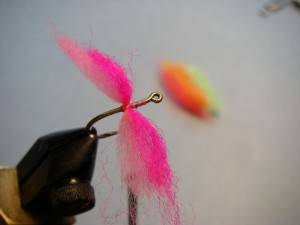
Rag Egg Fly - Step 3Step 3. Separate 2 colors (typically the bolder ones) of yarn and lay them perpendicular
to the hook shank and tie in a crisscross manner similar to tying lead dumbbell eyes.

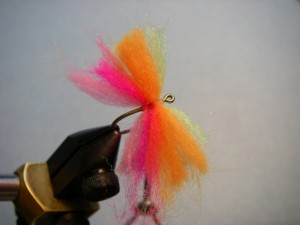
Rag Egg Fly - Step 4Step 4. Advance the thread in front of the yarn and tie in the remainder of the yarn in the same fashion.

Rag Egg Fly - Step 5Step 5. Pull all of the thread up and put a small ball of thread just in front of the yarn.

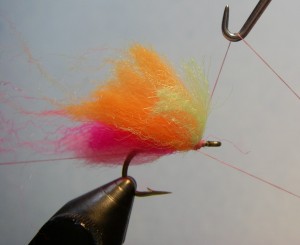
Rag Egg Fly - Step 6Step 6. Whip finish.

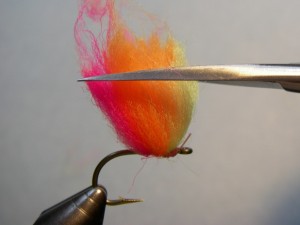
Rag Egg Fly - Step 7Step 7. Pull (not shown) the yarn upward and trim. The length depends on how dense
you want the pattern. A good rule of thumb is the size of the hook gape or a little less.

Rag Egg Fly - Step 8

Rag Egg Fly Pattern - How to Tie

Step 8. Fluff the yarn with your fingers and you should have the finished fly in your hands.


Print This Page
clown egg, clown fly for steelhead, clown rag, how to tie clown egg fly pattern, rag egg pattern

Tube Sucker

Posted by Jeanne Kraimer - March 14, 2012
Tube Sucker Fly Pattern

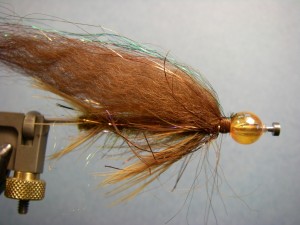
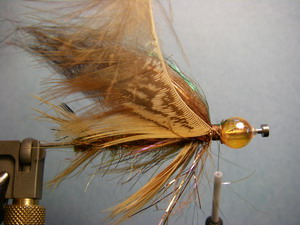
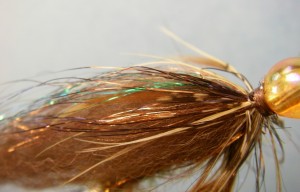
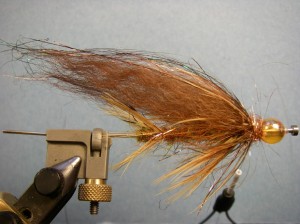
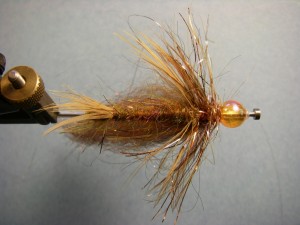
Tube Sucker – Brown

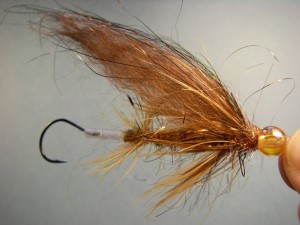
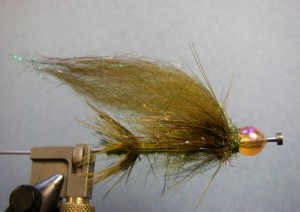
This fly pattern is used when swinging for steelhead, commonly with a sink-tip fly line on either a single-handed or two-handed rod. The Tube Sucker is not a realistic imitation of a particular “thing,” but rather a pattern that suggests sculpins, gobies and small baitfish – all important foods to steelhead. The color spectrum, amount of flash, motion/action and silhouette are key characteristics that make this an effective pattern. The majority of the steelhead showing up in our rivers in the spring for their spawning ritual, or in the fall where they take advantage of the salmon spawning and their eggs dislodged and drifting downstream. With this in mind I have incorporated a plastic bead on the front that suggests and egg while adding a “trigger,” borrowing the idea from the egg sucking leech pattern which has been around for decades.

Tube Sucker - Swinging Flies

Swinging on the Manistee

This style of steelhead fly may be somewhat unique to many of you, since it is partially a streamer/wet/spey fly – different than what you might be accustomed to using for steelhead. Most anglers in the Midwest spend the majority of their angling time drifting nymphs and eggs, as no one will argue their effectiveness. Over the past five years or so, spey or two-handed (including switch) rods have gained popularity and more and more anglers are opting to catch fewer fish by using a more “traditional” presentation – swinging. I don’t dare proclaim which – if any, is a better or superior way to fish, etc. but I will say, this is a great pattern that can be used swinging for steelhead and the feeling of accomplishment after landing a steelhead on a swung fly is beyond satisfactory.

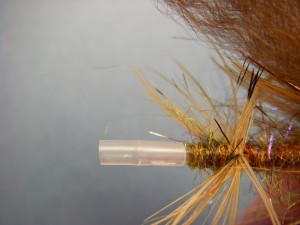
This fly also has a unique characteristic – it is tied on a tube. For those not familiar with the concept of tube flies, the angler runs the tippet/line through the tube which the materials are tied onto (think of a small, clear straw) and then ties on a bare hook. There are some advantages to using tubes including:

Tube Sucker Fly Pattern - Olive

Tube Sucker – Olive

  • The ability to replace dulled or damaged hooks without discarding the fly
  • Using weighted tubes which provide the ability to penetrate the water column
  • Fish a large fly with a short-shank hook eliminating negative leverage
  • Choose to use your preferred hook style to a pre-tied fly
  • Save the fly if you hook a snag loosing only the hook by using particular rigging
  • Being able to adjust the hook placement – to the fly, hanging back, etc.
  • Using “Convertible” or Modular patterns by incorporating various tube sections
  • Painted/colored tubes that minimize tying materials and steps
  • And more……

Try tying on tubes – the blanks/tubes are less expensive than most hooks, and the vise adapter is easy to use and priced fairly – I prefer the HMH Premium Tube Fly Tool. Adapting some of your favorite patterns by tying them on tubes as well as creating new patterns – the possibilities are endless. Tubes are no replacement of traditional hooks, however they offer flexibility for certain situations which make them more than ideal. Have fun.

Tube Sucker Recipe

Tube:             Plastic, 3/32” – aprox. 3 inches in length
Bead:             Pucci – 8 mm Orange/Pearl
Thread:          Uni 6/0 Camel
Tag:               Simi-Seal Dubbing – Canadian Olive
Rear Hackle:    Pheasant – Shoulder Feather
Body:             Simi-Seal Dubbing – Canadian Olive
Weight:          Lead Wire .030
Front Hackle:  Pheasant – Shoulder Feather
Under Wing:     UV Polar Chenille – Rusty Copper
Wing:              Brown Sheep Hair
Flash/Accent:  Wing ‘n Flash – Copper, Kelly Green, Dark Brown
Collar:             Large Pheasant Shoulder Feather
Head:              Ice Dub – Copper

Tying Instructions

Tube Sucker - Step 1Step 1. Cut plastic tube to length – 3 inches. Use a lighter and put a shoulder on the front
end of the tube. Do not touch the  flame to the tube; rather use the heat to melt it, which will
eliminate black carbon in the tube. Insert bead on to tube & slide up to shoulder.

Tube Sucker - Step 2Step 2. Insert mandrel into tube and put into the vise/tube adapter. Wrap a base layer of thread from
behind the bend, back along the tube but not covering the last ½ inch. Dub the tag of about ¼ inch.

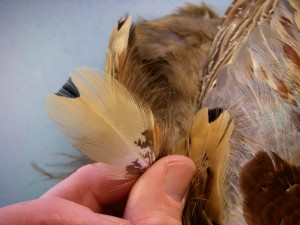
Tube Sucker - Step 3Step 3. Tie in a short, pheasant shoulder feather – it should be gold in color
with a black “V” at the tip. Wrap/fold the hackle forward two turns and tie off.

Tube Sucker - Step 4Step 4. Tie in lead wire about two-thirds of the way towards the bead. Wrap five times. Return your
thread back to the rear hackle and dub a “shaggy” body slightly tapering larger toward the bead.

Tube Sucker - Step 5Tube Sucker- Step 5.5


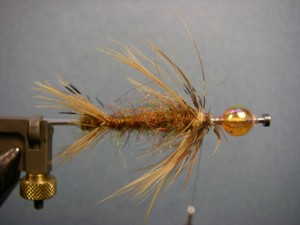
Step 5. Choose a pheasant shoulder feather that is larger than the rear
feather used. Tie this in by the tip and wrap/fold two times. Tie off.

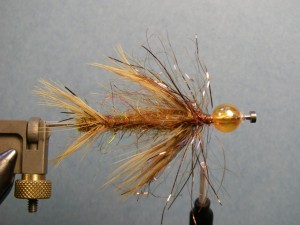
Tube Sucker - Step 6Step 6. Tie in Polar Chenille and wrap twice. Tie off.

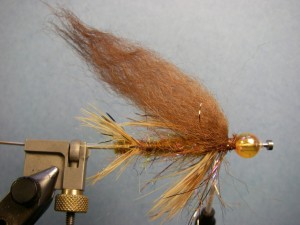
Tube Sucker - Step 7Step 7. Choose a long piece of sheep hair and cut a clump off of the hide. You might find a comb
is helpful to straighten the hair. Cut to length (tip to butt should be slightly longer than the
tube itself) and tie in. If fishing slow water, consider using arctic fox fur rather than sheep.

Tube Sucker- Step 8Step 8. Use just a few strands of copper Wing ‘N Flash and tie in so it extends about the length
of the wing/sheep hair. Repeat with kelly green. I like to use a hint of flash, not a bold swath in
this pattern. If the flash is longer than the wing, trim it so it all isn’t the same length.

Tube Sucker - Step 9Step 9. Tie in another pheasant shoulder feather – this time one that is even larger
than the last. You will tie this in by the tip but you will need to strip the left side of
the fibers off so the hackle is more of a flowing collar. Wrap twice and tie off.

Tube Sucker - Step 10Step 10:  Tie in a few strands of dark brown Wing ‘n Flash as a topping.

Tube Sucker - Step 11Step 11. Loosely dub copper Ice Dub between the fly and the bead. Tie off/whip finish.

Tube Sucker - Step 12Step 12. Turn fly upside down and trip the underside of the
front two pheasant feathers to accentuate pectoral fins.

Tube Sucker - Step 13Step 13. Add junction tubing over the rear of the tube. This will seat the hook to the fly and
when hooked-up with a fish, it pops out offering you the advantage of playing a fish on a short-shank
hook. I prefer silicone tubing as shown. The hook pictured above is a Gamakatsu Finesse Wide Gap – #4
– lately my preference has been a Gamakatsu Drop Shot Hook – #2 or 4.


Print This Page
how to tie, leech, Sculpin and goby pattern for swinging, spey fly, steelhead, tube fly, two handed spey rod
12345
Guide Trips - Fly Fishing Float Trips

Guide Trips & Pricing

Testimonials

Gift Certificate

Gift Certificates

About Ted Kraimer Fishing Guide

About Your Guide, Ted Kraimer

Fish & Seasons

Bluegill, Panfish and Bass Fly Fishing on Local Lakes Near Traverse City

Bluegill / Panfish / Bass

Carp Fishing West Grand Traverse Bay

Golden Bones / Carp

Fall Steelhead Manistee River

Steelhead

Trout Fishing Manistee River near Traverse City Michigan

Trout

Fly fishing for smallmouth bass Manistee River and Northern Michigan Lakes

Smallmouth Bass

King Salmon Fly Fishing - Betsie River Near Traverse City

Salmon

Ted Kraimer • Current Works, LLC • PO Box 333 • Traverse City, Michigan 49685 • (231) 883-8156

© 2024 Current Works, LLC — All rights reserved
  • Home
  • Guide Trips & Pricing
  • Fishing Report
  • Fish & Seasons
  • Rivers & Hatches
  • Fly Tying
  • Articles
  • Gallery
  • About
  • Sitemap