Current Works Guide Service
  • (231) 883-8156
  • ted@current-works.com
  • Book a trip
  • Subscribe to Newsletter
  • Home
  • Guide Trips & More
    • Guide Trips & Pricing
    • Casting Lessons
    • Gift Certificates
    • Book a Trip
  • Fishing Report
  • Fish & Seasons
    • Steelhead
    • Trout
    • Smallmouth Bass
    • Salmon
    • Bluegill / Panfish / Bass
    • Golden Bones / Carp
  • Rivers & Hatches
    • Upper Manistee River
    • Lower Manistee River
    • Betsie River
    • Boardman River
    • Hatch Chart
  • Fly Tying
  • Articles
  • Gallery
  • About
    • About Your Guide
    • Testimonials
    • Newsletter
    • Area Information

Posts tagged "how to tie"

Tilt-Shoot Iso – Isonychia Fly Pattern

Posted by Ted Kraimer - June 14, 2013
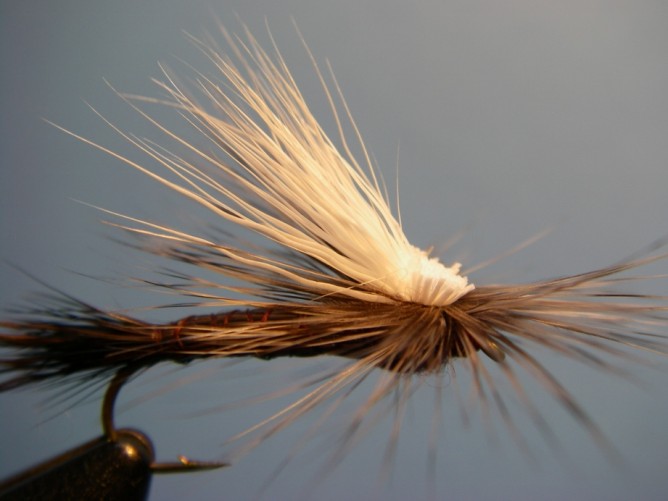
Tilt Shoot Iso Isonychia Fly Pattern

Ted’s Tilt Shoot Iso

While the “hex” mayfly gets the bulk of praise and attention from Michigan anglers, there is another mayfly that gets my praise. The Isonychia emerges over a longer period of time, is easier to cast, and doesn’t wait until dark to show – what’s not to like? Having a number of names Iso, Slate Drake, White Gloved Howdy, Maroon Dun among others, it should be thought of as important and should be found in any Michigan trout angler’s fly box from June through September.

There are two genus of the Isonychia (Salderi and Bicolor) which inhabit many of our local rivers. Each have different characteristics. Rather than give you a taxonomical description or bore you with entomology, let me provide you with the brass tacks:

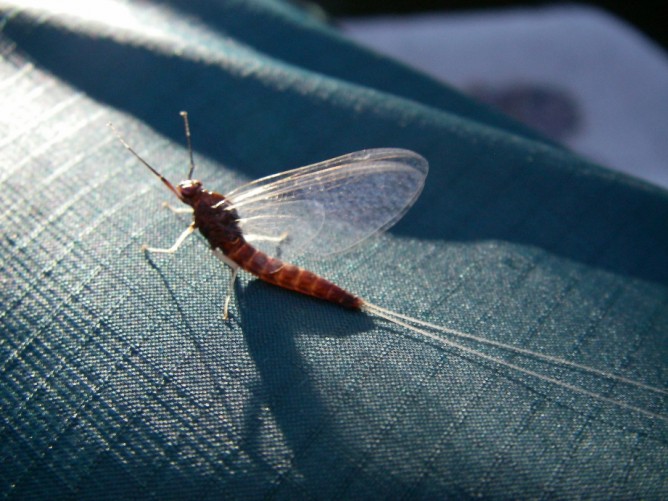
Tilt-Shoot-Iso-Isonychia-Natural-Iso-Spinner.jpg

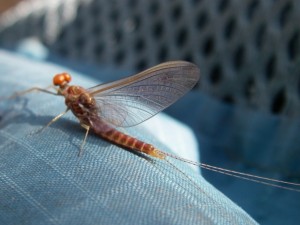
Natural Isonychia Spinner

The nymphs love swift water in gravel sections, adults/duns range in size with the most common being 10-14, adults/duns bodies vary in color between the two genus and the particular river (from a light creamy olive, to tan, to a brown-mahogany color), Adults/duns have deep dun colored wings where spinners have dark maroon bodies with clear wings, and both duns and spinner have distinct white front legs making them easy to identify. The largest concentration and emergence is in June extending through mid-September with the first insects large in size and tend to get smaller through that time period.

The duns typically emerge in the evening, but they can be found on the water at almost all times of the day, especially in the later months and when cloud cover is present.  Spinners, too, typically congregate in swarms in the evening before they fall to the water’s edge to drop eggs in riffle sections of rivers. For years it was thought that Iso nymphs only climb onto shore before emerging, but it is now accepted that they emerge in mid-stream as well – trout have known that for years.

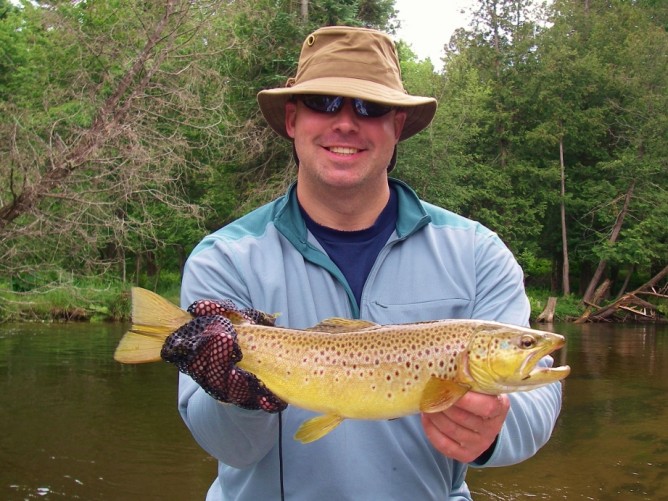
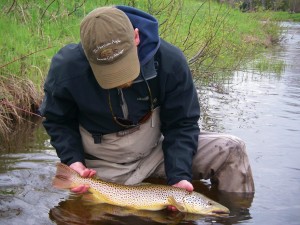
Tilt Shoot Iso Isonychia Brown Trout

Brown Trout caught on a Tilt-Shoot Iso

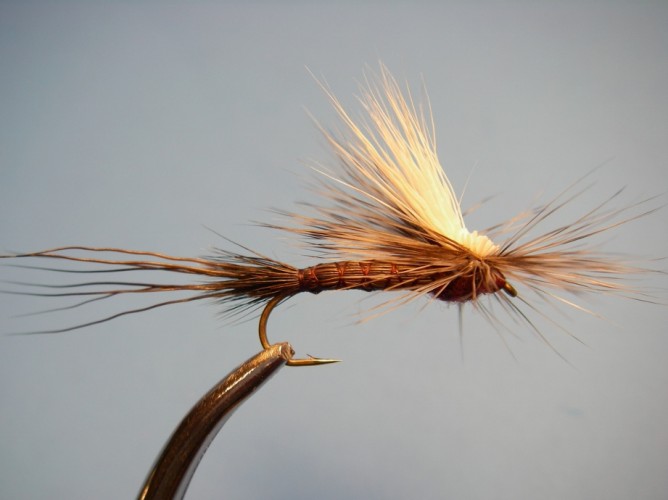
The Tilt-Shoot Iso is a pattern I created and have been using the past 10 years with great success.  While it isn’t the easiest fly to tie for those unfamiliar with hair body patterns, you will find vast improvements after a number of attempts.

This version of a parachute provides a realistic silhouette of the wing while the pattern sits low in the water for fish to easily see — important when fishing broken water. You can change the body color by changing the thread color to tan or olive, and its worth tying some with a more natural gray color wing/post. Tie this pattern in smaller sizes and you will find it will work as an imitation for a number of mayfly spinners.

Ted’s Tilt-Shoot Iso is available from Rainy’s Flies and can be bought in stocking fly shops. Below are tying instructions for you fly tiers.
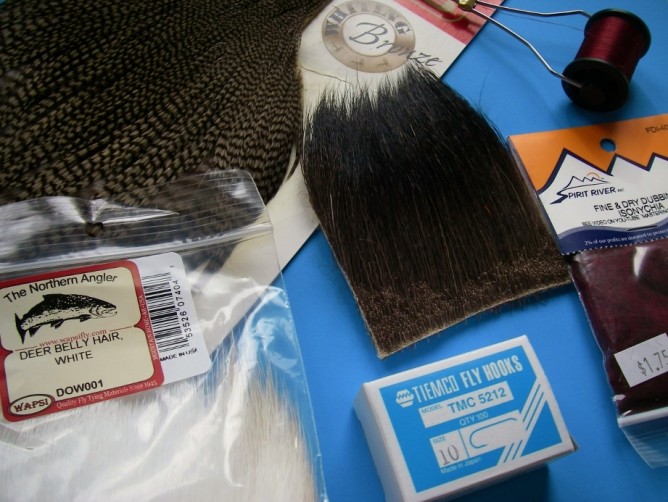
Tilt Shoot Iso Isonychia - Step 0

Tilt-Shoot Iso Recipe

Hook:             TMC 5212 10 – 14
Thread:          Uni-6/0  Wine
Tail:                Moose Body
Body:              Moose Body
Post:               Deer Belly Hair – White
Hackle:           Grizzly Dyed Dun
Thorax:          Fine & Dry Dubbing – Isonychia

Tying Instructions
Tilt Shoot Iso Isonychia - Step 1
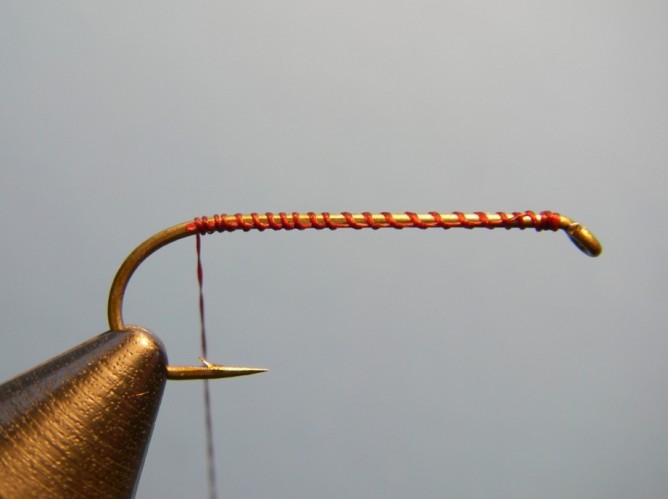
Step 1.
Place hook (size 10) in vise and wrap a thread base from behind the eye to above the barb.
Tilt Shoot Iso Isonychia - Step 2
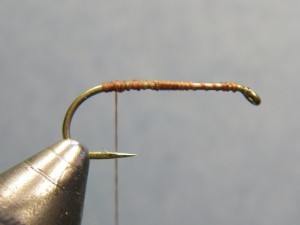
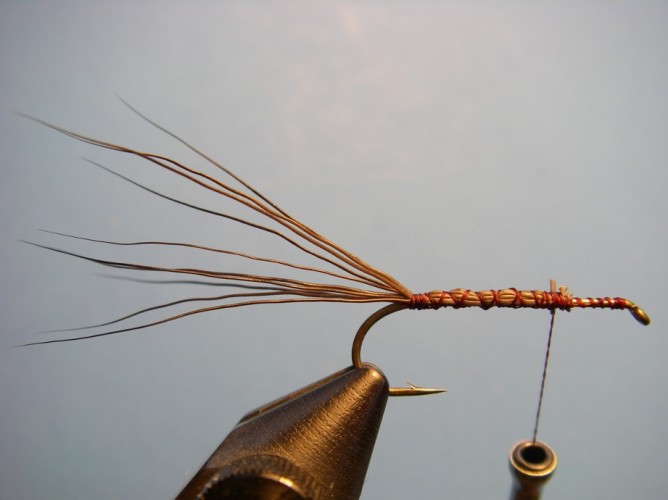
Step 2. Cut 6 – 8 moose body hairs, clean and stack/even them and tie in on top of the hook about
one hook gape’s distance behind the eye.  Tie down along the shank to above the hook barb and back again.
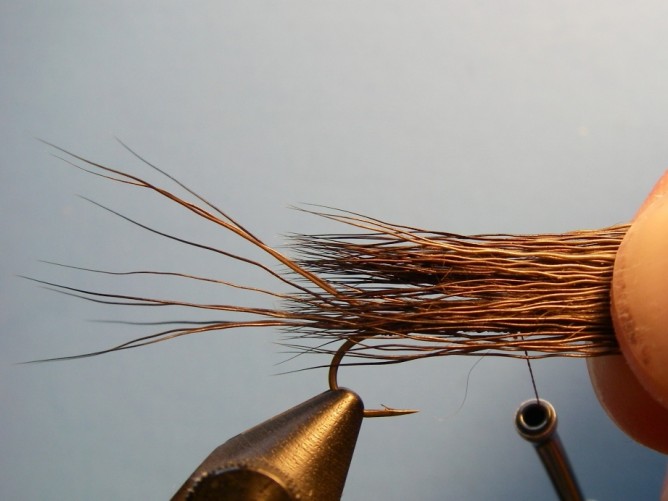
Tilt Shoot Iso Isonychia - Step 3
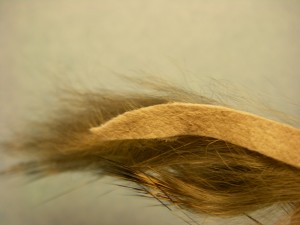
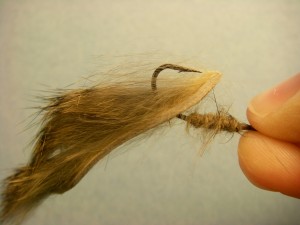
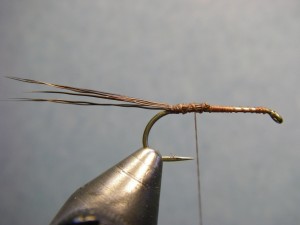
Step 3. Cut a large clump of moose body hair (approx. the thickness of two wooden match sticks), clean and stack/even. Measure the hair by laying the clump along the hook where the tips extend just beyond the hook shank. Trim the butt ends so the body will extend from the where we tied the tail in to just beyond the shank.
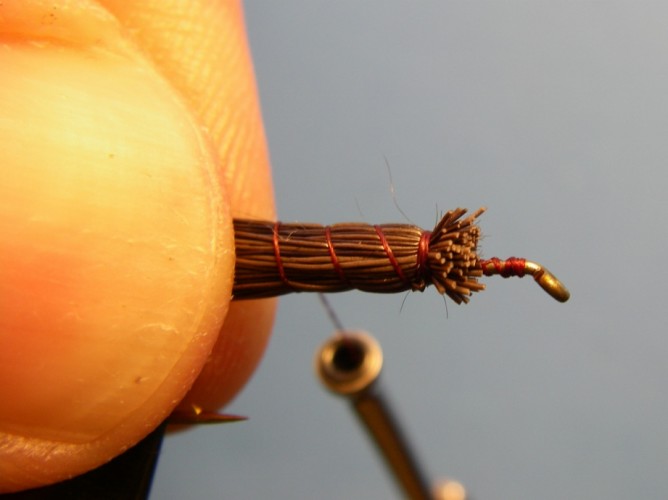
Tilt Shoot Iso Isonychia - Step 4
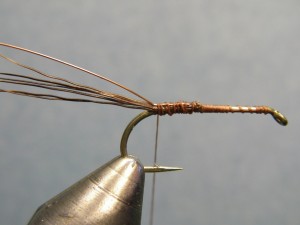
Step 4. Lay the clump of moose along the hook making sure it completely surrounds the hook
shank for complete coverage. After a few wraps to secure it in place, hold the moose taught with your
left hand as you wrap the thread towards the hook bend with the bobbin in your right hand.
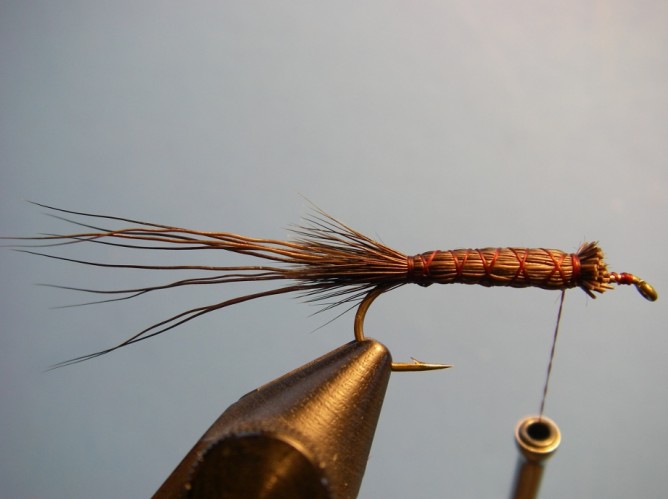
Tilt Shoot Iso Isonychia - Step 5
Step 5.
Take the thread wraps to above the barb and make two tight wraps to secure
and then wrap the thread back toward the hook eye crisscrossing the thread
wraps making an X pattern. Once secured, trim off any excess butt material.

Tilt Shoot Iso Isonychia - Step 6.5Tilt Shoot Iso Isonychia - Step 6

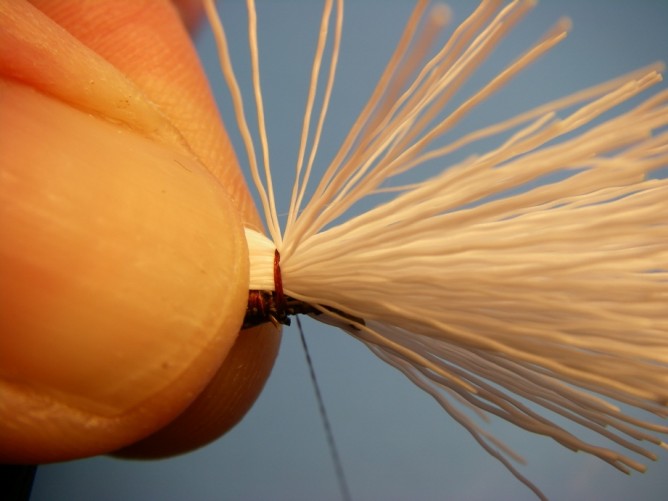
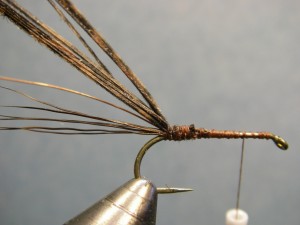
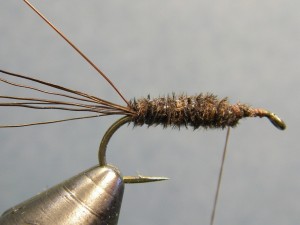
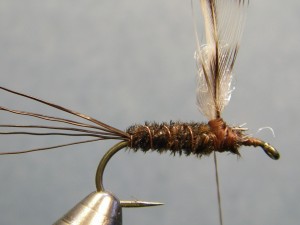
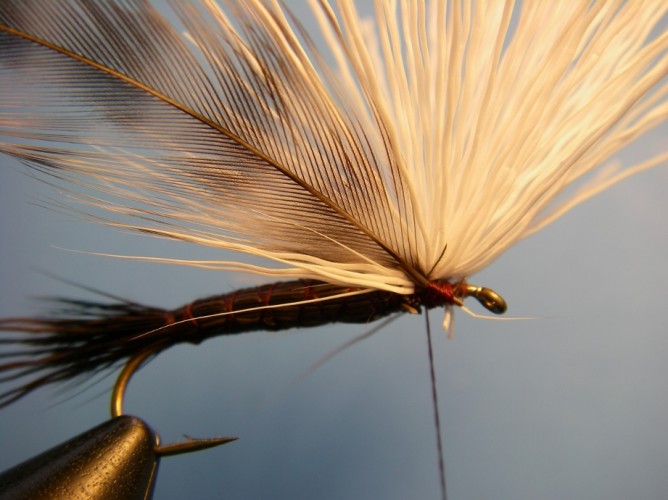
Step 6. Select a clump of deer belly hair for the post/wing (approximately the thickness of three match sticks). Clean and stack/even it.  Lay the hair on top of the hook so the natural points extend to the end of the body.
Tie in the post/wing where the moose body ends and do not trim the butt ends of the hair.
Because the hair is hollow it can easily be cut by too much thread pressure.
Tilt Shoot Iso Isonychia - Step 7
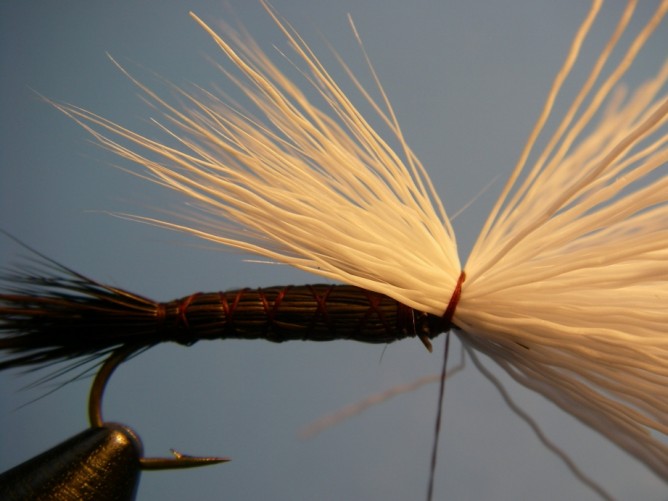
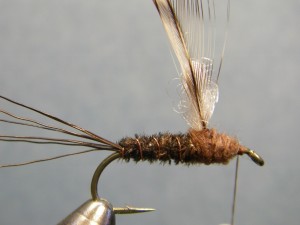
Step 7. Pull both the tips and the butts up and wrap along the shank to encourage the hair to move upward. Tie in a hackle feather at the base of the post/wing with the dull side of the feather facing you. The feather, after being wrapped, should extend to the end of the X-wraps on the body.
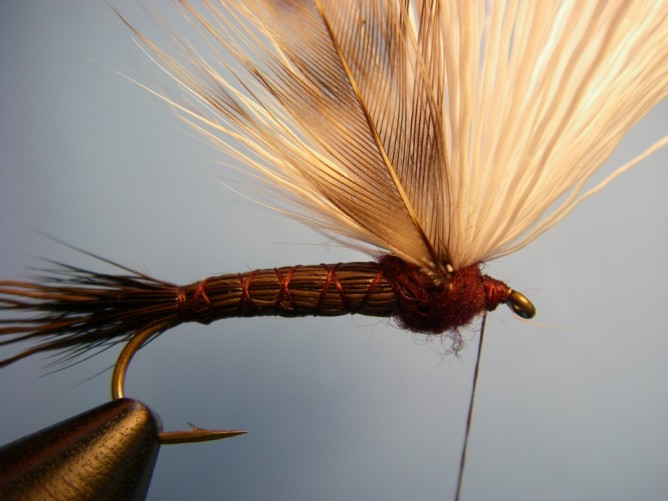
Tilt Shoot Iso Isonychia - Step 8
Step 8. Dub a tight thorax on both sides of the post/wing that is slightly
thicker than the body/abdomen also encouraging the post/wing upward.
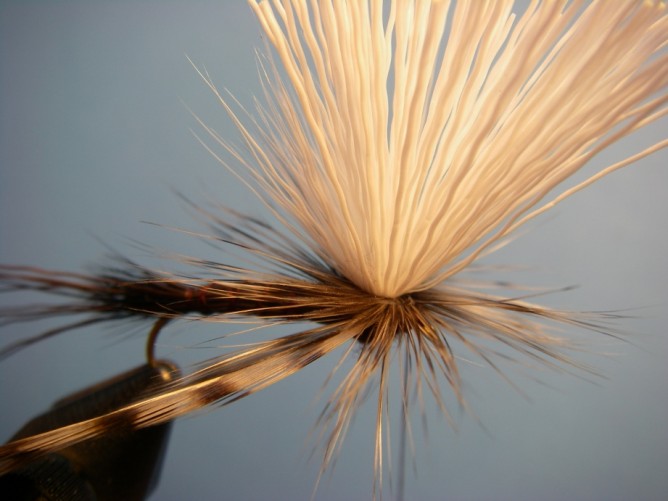
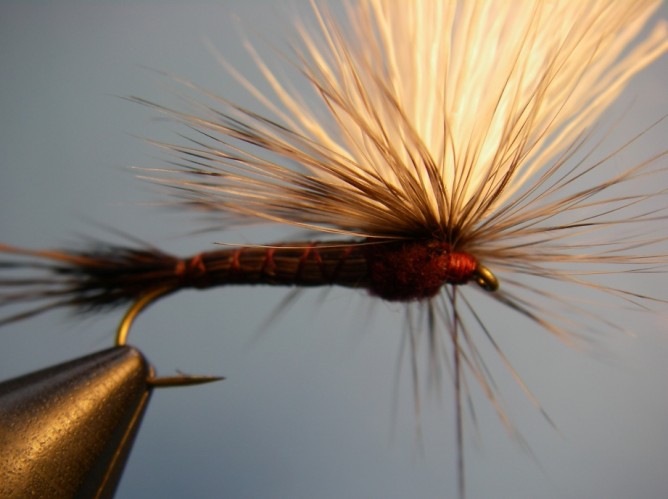
Tilt Shoot Iso Isonychia - Step 9Tilt Shoot Iso Isonychia - Step 9.5

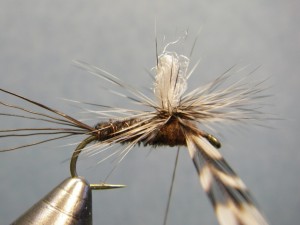
Step 9.
Wrap the hackle parachute style under both the tips and butts of the post/wing.
Wrap the hackle firmly and it will compress and seat nicely against the post
creating a durable hackling. Tie off between the hook eye and dubbing.
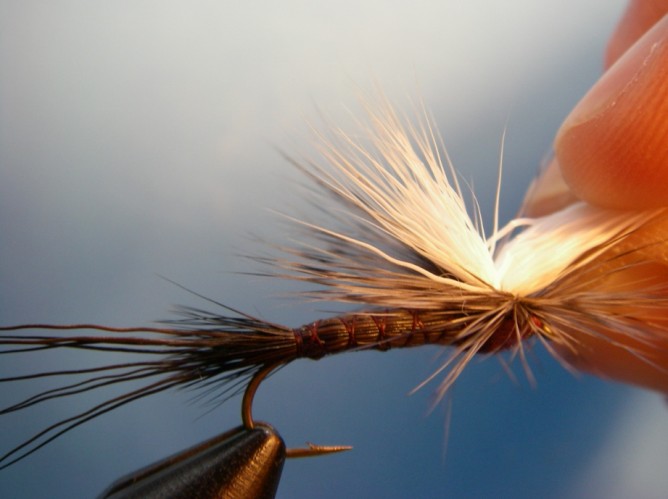
Tilt Shoot Iso Isonychia - Step 10Tilt Shoot Iso Isonychia - Step 10.5

Step 10.
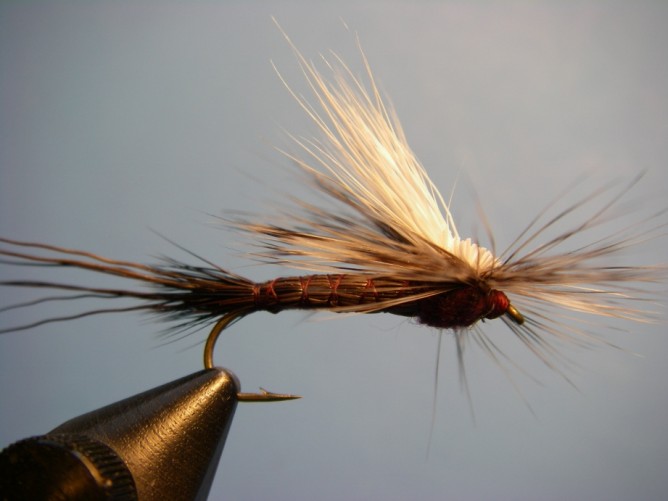
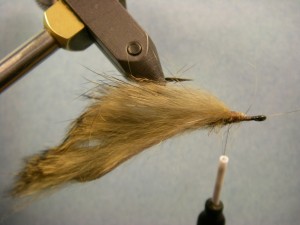
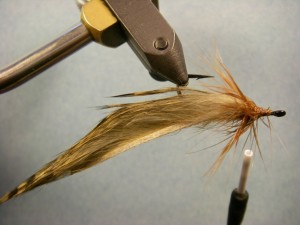
Pull the butt ends of the wing/post forward and trim only the
butts close to the base, just above the hackle.

Tilt Shoot Iso Isonychia - Step 11Tilt Shoot Iso Isonychia - Step 11.5

Step 11. Apply a drop of thin head cement at the base of the post and the thread head.

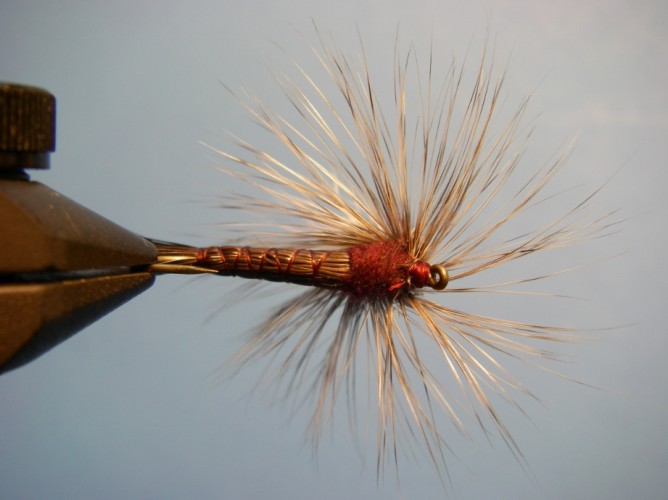
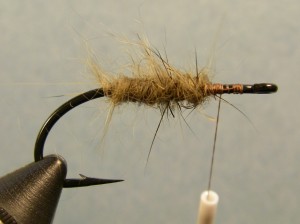
Tilt Shoot Iso Isonychia Fly Pattern

Finished Tilt-Shoot Iso Isonychia fly pattern

dry fly, how to tie, iso, isonychia, isonychia bicolor, isonychia fly pattern, isonychia salderi, michigan, rainys, slate drake, tilt-shoot Iso, white gloved howdy

Goblin

Posted by Jeanne Kraimer - March 15, 2012
Goblin

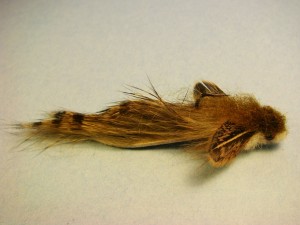
The Goblin – A Sculpin and Goby Streamer Pattern

The Goblin is a pattern that does a good job of imitating two important food sources to fish in the Great Lakes region: the Goby and Sculpin. This large profile fly provides a great silhouette as well as action and with its inverted hook, it’s ideal when fishing either on the lake or river bottom and when fished around structure. The two-tone color perspective makes is very realistic and the barring of the rabbit helps create that illusion of food.

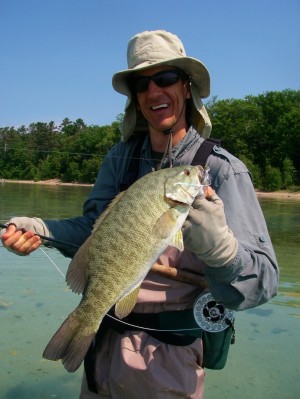
When fishing in Grand Traverse Bay and Lake Michigan, I find the Goblin works very well on smallmouth bass since there is a dense population of goby; carp have been known to eat it too. With it’s weighted eyes and saturated rabbit strip it sinks fairly well and is paired with a floating line and long leader. Once it sinks, strip it fast, but with very short pops with the rod tip and watch for the fish to take. Strip sets common with saltwater fishing is a great way to make sure the fish is hooked. Sculpins make up a key component of a trout’s diet. The Goblin can be fished “trophy-style” – that is, with a large sink-tip, typically from a boat and striped through the deep holes near and around structure before recasting.

Goblin Sculpin and Goby Fly Pattern for Smallmouth Bass

Smallmouth Bass

Goblin Sculpin and Goby Fly Pattern for Trout

Another way to fish this pattern effectively is by wading with a smaller sink-tip line and fished slowly near all the structure that is likely to hold fish – primarily, the secondary structure that many of the “trophy” anglers skip. These slots, tail-outs and inside bends often provide that fish who is not hiding, but rather feeding. Rather than taking the approach of getting a territorial response from the fish, this softer approach is more like matching the natural food source and presents a pattern that wanders near a fish looking to eat. This pattern has also caught steelhead when fished with both a floating line or swung on a two-handed rod.

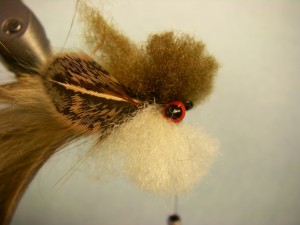
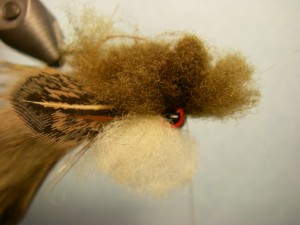
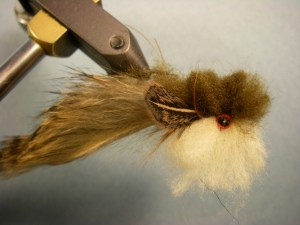
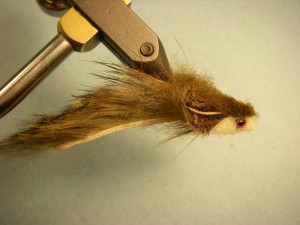
The fly isn’t easy to tie, but it’s not difficult either. The stacking of two colors of sculpin wool can be tricky, and if you don’t get it right the first time, cut off the wool and try again. Reminiscent of the Mad Pup, this pattern’s head is different by being trimmed short and broad to not only give the better profile, but create a more realistic swimming motion.

Goblin Recipe

Hook:           Daiichi 2451 #4
Thread:         Uni-6/0 Camel and Flymaster+ Tan
Tail:              Black Barred Rabbit Strip Gold Variant
Collar:           Rooster Saddle – Natural Brown
Fins:             Hen Saddle – Speckled Brown
Head:           Sculpin Wool – Cream and Sculpin Olive
Eyes:            Dumbbell – Red, Extra Small or Small

Tying Instructions

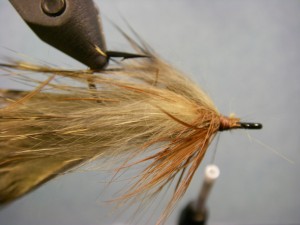
Goblin - Step 1Step 1. Insert hook into vise, wrap base layer and dub a small body from some rabbit strip.


Goblin - Step 2Step 2.
Take a piece of rabbit strip and trim off the end to a tapered point.


Goblin - Step 3Goblin - Step 4


Step 3. Poke the rabbit strip with the hook so the end of the other end of the rabbit
strip is at the end of the dubbed under body which is the tie down point.


Goblin - Step 5Step 4. Tie in the collar feather and wrap a few times and tie off. Trim the fibers on the
top of the fly. This feather helps support the pectoral fins that will be tied later.

Goblin - Step 6

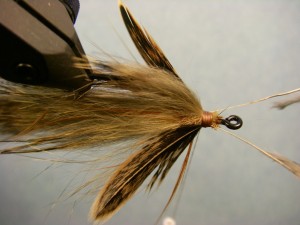
Step 5. Tie a small patch of rabbit hair on top to cover up the collar.

Goblin - Step 7

Step 6. Tie in hen saddles to represent the pectoral fins on each side
of the body as shown. Tie one at a time and then whip finish.

Goblin - Step 8

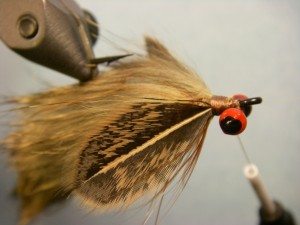
Step 7. Change your thread to the heavier and stronger Fly Master+ and tie the thread in just
behind the hook eye and tie in the dumbbell eyes with figure-8 wraps.

Goblin - Step 9

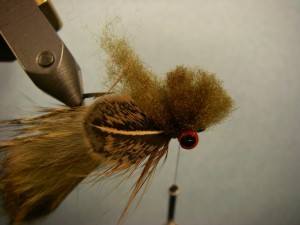
Step 8. Position the thread between the fly body and the lead eyes. Tie in a small clump of sculpin
wool by cinching down in middle of the hair like you would stacking deer hair.

Goblin - Step 10

Step 9. Rotate the vise or re position the hook in the jaws and repeat the previous step with the cream wool.

Goblin - Step 11

Step 10. Advance the thread to between the hook eye and dumbbell
eyes and tie in the second clump of dark wool.

Goblin - Step 12

Step 11. Tie in the second clump of light colored wool on the underside . Tie off and whip finish.

Goblin - Step 13Step 12. It’s time to trim the wool. Work in a two-dimension approach by trimming
the top and the bottom of the head first. Once you get the profile you are looking
for, rotate the vise and trim from the top view to get the desired profile.

Print This Page
goby pattern, grand traverse bay, how to tie, sculpin pattern, small mouth bass pattern, smallmouth bass, trout

Beaded Alevin

Posted by Jeanne Kraimer - March 15, 2012
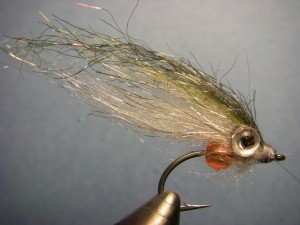
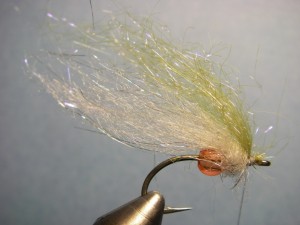
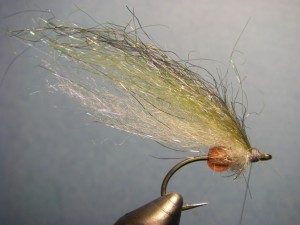
Beaded Alevin Fly Pattern

Beaded Alevin

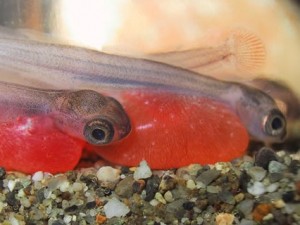
Wherever natural reproduction takes place, juvenile fish call home. After months lying in oxygenated gravel, the fertilized eggs start to evolve into a fish which become a food source to larger fish. This stage, referred to as an “Alevin,” retains its egg as the length and shape of the fish develops.

With its big eyes and bright egg sack, larger fish take advantage of the alevin’s unwary disposition and protein value – we as anglers take note and also take advantage.

Anglers fishing waters that host spawning salmon in the fall and steelhead in the spring should consider this fly a staple from mid-February and into April. Not only does the alevin work well for steelhead, but trout too find them easy prey.

Beaded Alevin - Natural

Natural Alevin

Other species naturally reproducing go through a similar process, and by tweaking coloration you should find this pattern is effective long after the steelhead, walleye and suckers are done spawning. Some fish eat their own, and mixed species don’t pass up a chance to eat others making this an effective pattern that goes beyond just the early months of the year.

Presentation can vary with the alevin pattern.I often fish as a dropper on a nymphing rig for steelhead. As the pattern comes off the bottom and sweeps up and downstream, I strip some line in before recasting. By doing so, the pattern looks like a natural alevin darting along and the takes –with no slack in the line- can’t be mistaken.

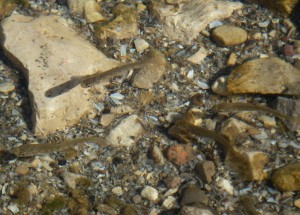
Beaded Alevin - Natural Fry

Immature Salmon

When targeting trout, I like to fish these slightly down and across with twitches created by popping my rod tip on either a slow sink-tip line, sinking leader or floating line if the water is shallow enough. At the end of the drift, let the fly hang down like you would a wet-fly before stripping it back and recasting. Smallmouth bass also like this pattern so be sure to tie one below a larger streamer or even a popper for a top and bottom presentation.

The alevin pattern itself is easy to tie and doesn’t require exotic or expensive materials. The translucent nature of the bead not only adds realism, but also weight and a little wobble when facing directly against the current. Put a bunch of these in your fly box and match a different kind of hatch for a number of species.

Beaded Alevin Recipe

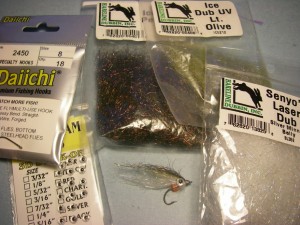
Beaded Alevin 0Hook:          Daiichi 2450 #8
Thread:       Uni 6/0 – Gray
Bead:          Plastic 4mm – orange/pink
Wire:          Silver Ultrawire – SM or BR
Body:         Senyo’s Laser Yarn Silver Minnow Belly
Wing:          Light Olive Ice Dub
Topping:      Peacock Ice Dub
Eyes:           3-D Molded – Silver 5/32


Tying Instructions:

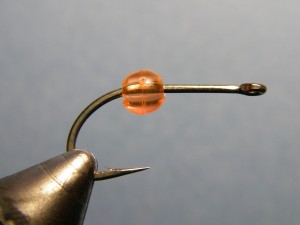
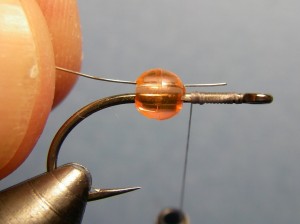
Beaded Alevin - Step 1Step 1. Slide plastic bead over hook and then place in vise

Beaded Alevin - Step 2Step 2. Wrap thread from behind eye to form a base layer.

Beaded Alevin - Step 3Beaded Alevin - Step 3.5

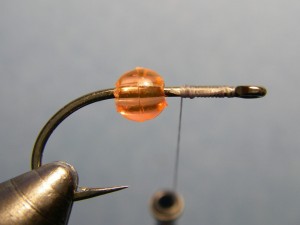
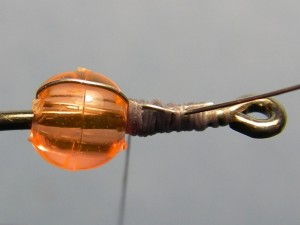
Step 3. Slide a piece of wire through bead and tie down between the hook eye and bead.
Bring the wire over-top of the bead and tie down – this holds it in place.

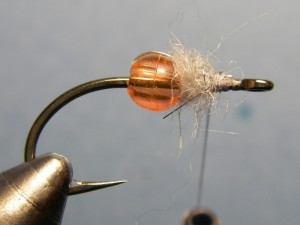
Beaded Alevin - Step 4Step 4. Dub some of the body just in front of the bead.

Beaded Alevin - Step 5Step 5. Take the same dubbing and align the fibers by hand so that you have
a long dubbing/body material. Tie in ahead of the dubbed body.

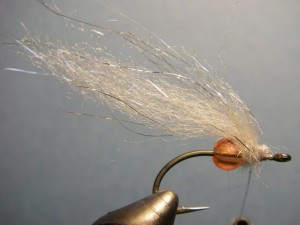
Beaded Alevin - Step 6Step 6. Align some wing material similar to step 5. Tie in on
top so that it is about the same length as the body material.

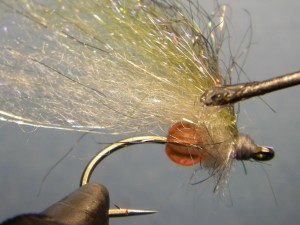
Beaded Alevin - Step 7Step 7. Repeat a third time with the Peacock Ice Dub and tie off. Apply water-based
head cement (regular head cement typically melts the Ice Dub).

Beaded Alevin - Step 8Beaded Alevin - Step 8.5


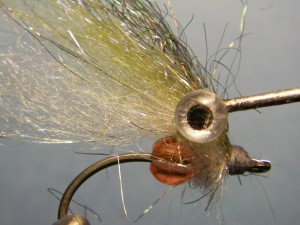
Step 8. Install the eyes by placing a drop of Platinum Bond Super Fabric Textile adhesive using
your bodkin. Once applied,use a cleaned off bodkin to pick an eye off its backing sheet and set.
The placement of this eye as demonstrated in the photo is between the bead and hook eye and
slightly elevated and helps sandwich the body/wing material and create the desired profile.


Print This Page
alevin pattern, alevin pattern and how to tie and fish, beaded alevin, easy to tie, egg sack, fly tying, how to fish, how to tie, ice dub, michigan, rivers, salmon, senyo's laser yarn, sink-tip, smallmoth bass, smolt, steelhead, steelhead fry, trout

Borcher’s Drake – Parachute

Posted by Jeanne Kraimer - March 15, 2012
Borchers Drake Fly Pattern - Parachute

Borcher's Drake - Parachute

The Borcher’s Drake represents a number of different flies that hatch in the region, not just one particular mayfly making it not only versitle, but also effective. You will want to tie this pattern in various sizes to imitate many of our early mayfly patterns which include but are not limited to: Hendricksons, Mahoganies, March Browns, Black Quills, Sulphurs & Isonychias. This list of mayflies vary in color however this pattern does a good job of imitating the spinner stage of the aforementioned mayflies which all tend to be dark in color, often a mahogany/rusty color.

The original drake pattern was tied with condor feather and was more of a traditional Cat-Skill style hackle with up-right wings. The recipe and directions for the drake pattern below uses easy to find materials and is tied in a parachute style.

Borchers Drake - Hendrickson

Parachutes are my favorite style of dry flies because they sit low in the water, have an excellent silhouette and provide an easy to see post. I also like how parachutes tend to land properly on the water and are – in my opinion – much easier to tie than the original.

Originally tied by Ernie Borcher of the Grayling area in the mid 1900’s, the drake pattern has been recognized as one of a few that should be in every angler’s fly box when fishing Michigan rivers in May and June. It’s easy to tie, effective to fish and a staple in my fly box. Not into fly tying? The Northern Angler in Traverse City stocks this custom-tied drake pattern in a variety of sizes.


Borcher’s Drake Recipe

Hook:              TMC 100 12 – 16
Thread:           Uni-8/0  Camel
Tail:                Moose Body
Body:              Cinnamon Tip Turkey Tail
Rib:                 x-small copper wire
Post:               Hi-Vis or Para-Post
Hackle:           Grizzly
Abdomen:       Brown Dry Fly Dubbing


Tying Instructions

Borchers Drake - Step 1Step 1. Wrap thread base from behind eye to above barb.

Borchers Drake - Step 2Step 2. Stack/even 4-5 moose body hairs and tie in so the
pointed ends extend 1 ½ times the length of the hook shank.

Borchers Drake - Step 3Step 3. Tie in rib/copper wire extending backward.

Borchers Drake - Step 4Step 4. Take a clump of turkey tail and remove/pull it from the stem. Tie in by the tips at the rear
of the hook where the rib is tied in. (Approximately ¼ -inch of fibers for a size 12)

Borchers Drake - Step 5Step 5. Tightly wrap the turkey forward slightly building a tapered body that gets thicker as
you approach the eye. Stop wrapping and tie off 1/3rd of the way back from the eye.

Borchers Drake - Step 7Step 6. Wrap the ribbing through the body in the opposite direction that you did the body material for
reinforcement. Then tie in your post material where the body ends. I like to make
a small loop out of the synthetic post material to keep a wing like profile.

Borchers Drake - Step 7Step 7. Tie in a hackle feather along the base and up the post.

Borchers Drake - Step 8Step 8. Dub a thorax that is slightly larger than the body. Most mayfly spinners
have a thin abdomen and a large thorax – keep that in mind when dubbing .

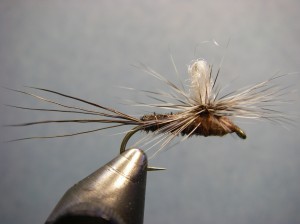
Borchers Drake - Step 9Step 9. Wrap a generous parachute wing with the hackle feather and tie off.

Borchers Drake Fly Pattern - ParachuteStep 10. Whip finish being careful not to trap any of the hackle in the process.


Print This Page
Au Sable Drake, Black Quill, borchers drake pattern, how to tie, how to tie a borchers drake, pattern

Tube Sucker

Posted by Jeanne Kraimer - March 14, 2012
Tube Sucker Fly Pattern

Tube Sucker – Brown

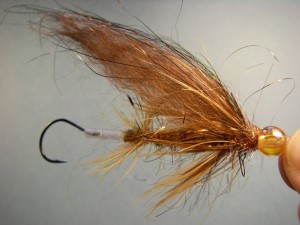
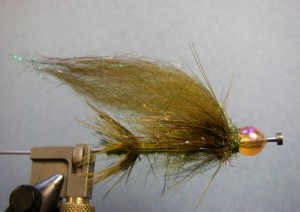
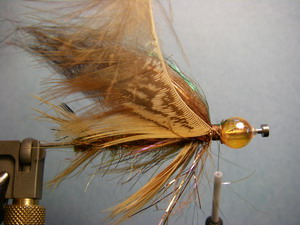
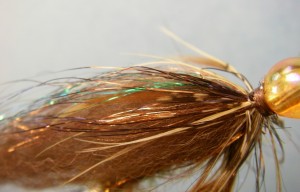
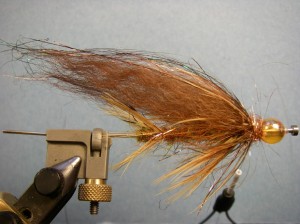
This fly pattern is used when swinging for steelhead, commonly with a sink-tip fly line on either a single-handed or two-handed rod. The Tube Sucker is not a realistic imitation of a particular “thing,” but rather a pattern that suggests sculpins, gobies and small baitfish – all important foods to steelhead. The color spectrum, amount of flash, motion/action and silhouette are key characteristics that make this an effective pattern. The majority of the steelhead showing up in our rivers in the spring for their spawning ritual, or in the fall where they take advantage of the salmon spawning and their eggs dislodged and drifting downstream. With this in mind I have incorporated a plastic bead on the front that suggests and egg while adding a “trigger,” borrowing the idea from the egg sucking leech pattern which has been around for decades.
Tube Sucker - Swinging Flies

Swinging on the Manistee

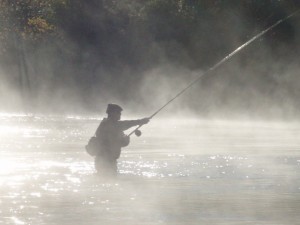
This style of steelhead fly may be somewhat unique to many of you, since it is partially a streamer/wet/spey fly – different than what you might be accustomed to using for steelhead. Most anglers in the Midwest spend the majority of their angling time drifting nymphs and eggs, as no one will argue their effectiveness. Over the past five years or so, spey or two-handed (including switch) rods have gained popularity and more and more anglers are opting to catch fewer fish by using a more “traditional” presentation – swinging. I don’t dare proclaim which – if any, is a better or superior way to fish, etc. but I will say, this is a great pattern that can be used swinging for steelhead and the feeling of accomplishment after landing a steelhead on a swung fly is beyond satisfactory.

This fly also has a unique characteristic – it is tied on a tube. For those not familiar with the concept of tube flies, the angler runs the tippet/line through the tube which the materials are tied onto (think of a small, clear straw) and then ties on a bare hook. There are some advantages to using tubes including:

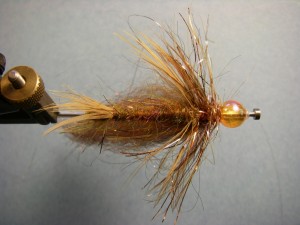
Tube Sucker Fly Pattern - Olive

Tube Sucker – Olive

  • The ability to replace dulled or damaged hooks without discarding the fly
  • Using weighted tubes which provide the ability to penetrate the water column
  • Fish a large fly with a short-shank hook eliminating negative leverage
  • Choose to use your preferred hook style to a pre-tied fly
  • Save the fly if you hook a snag loosing only the hook by using particular rigging
  • Being able to adjust the hook placement – to the fly, hanging back, etc.
  • Using “Convertible” or Modular patterns by incorporating various tube sections
  • Painted/colored tubes that minimize tying materials and steps
  • And more……

Try tying on tubes – the blanks/tubes are less expensive than most hooks, and the vise adapter is easy to use and priced fairly – I prefer the HMH Premium Tube Fly Tool. Adapting some of your favorite patterns by tying them on tubes as well as creating new patterns – the possibilities are endless. Tubes are no replacement of traditional hooks, however they offer flexibility for certain situations which make them more than ideal. Have fun.

Tube Sucker Recipe

Tube:             Plastic, 3/32” – aprox. 3 inches in length
Bead:             Pucci – 8 mm Orange/Pearl
Thread:          Uni 6/0 Camel
Tag:               Simi-Seal Dubbing – Canadian Olive
Rear Hackle:    Pheasant – Shoulder Feather
Body:             Simi-Seal Dubbing – Canadian Olive
Weight:          Lead Wire .030
Front Hackle:  Pheasant – Shoulder Feather
Under Wing:     UV Polar Chenille – Rusty Copper
Wing:              Brown Sheep Hair
Flash/Accent:  Wing ‘n Flash – Copper, Kelly Green, Dark Brown
Collar:             Large Pheasant Shoulder Feather
Head:              Ice Dub – Copper

Tying Instructions

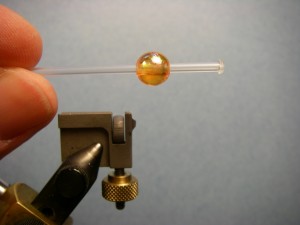
Tube Sucker - Step 1Step 1. Cut plastic tube to length – 3 inches. Use a lighter and put a shoulder on the front
end of the tube. Do not touch the  flame to the tube; rather use the heat to melt it, which will
eliminate black carbon in the tube. Insert bead on to tube & slide up to shoulder.

Tube Sucker - Step 2Step 2. Insert mandrel into tube and put into the vise/tube adapter. Wrap a base layer of thread from
behind the bend, back along the tube but not covering the last ½ inch. Dub the tag of about ¼ inch.

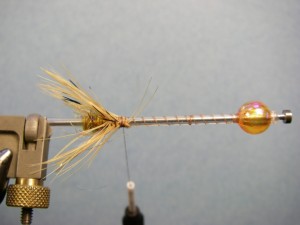
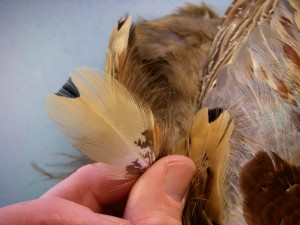
Tube Sucker - Step 3Step 3. Tie in a short, pheasant shoulder feather – it should be gold in color
with a black “V” at the tip. Wrap/fold the hackle forward two turns and tie off.

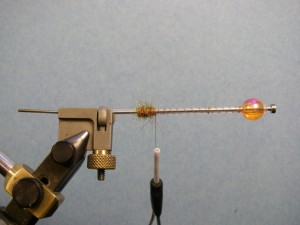
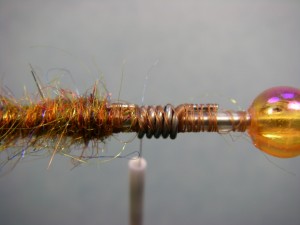
Tube Sucker - Step 4Step 4. Tie in lead wire about two-thirds of the way towards the bead. Wrap five times. Return your
thread back to the rear hackle and dub a “shaggy” body slightly tapering larger toward the bead.

Tube Sucker - Step 5Tube Sucker- Step 5.5


Step 5. Choose a pheasant shoulder feather that is larger than the rear
feather used. Tie this in by the tip and wrap/fold two times. Tie off.

Tube Sucker - Step 6Step 6. Tie in Polar Chenille and wrap twice. Tie off.

Tube Sucker - Step 7Step 7. Choose a long piece of sheep hair and cut a clump off of the hide. You might find a comb
is helpful to straighten the hair. Cut to length (tip to butt should be slightly longer than the
tube itself) and tie in. If fishing slow water, consider using arctic fox fur rather than sheep.

Tube Sucker- Step 8Step 8. Use just a few strands of copper Wing ‘N Flash and tie in so it extends about the length
of the wing/sheep hair. Repeat with kelly green. I like to use a hint of flash, not a bold swath in
this pattern. If the flash is longer than the wing, trim it so it all isn’t the same length.

Tube Sucker - Step 9Step 9. Tie in another pheasant shoulder feather – this time one that is even larger
than the last. You will tie this in by the tip but you will need to strip the left side of
the fibers off so the hackle is more of a flowing collar. Wrap twice and tie off.

Tube Sucker - Step 10Step 10:  Tie in a few strands of dark brown Wing ‘n Flash as a topping.

Tube Sucker - Step 11Step 11. Loosely dub copper Ice Dub between the fly and the bead. Tie off/whip finish.

Tube Sucker - Step 12Step 12. Turn fly upside down and trip the underside of the
front two pheasant feathers to accentuate pectoral fins.

Tube Sucker - Step 13Step 13. Add junction tubing over the rear of the tube. This will seat the hook to the fly and
when hooked-up with a fish, it pops out offering you the advantage of playing a fish on a short-shank
hook. I prefer silicone tubing as shown. The hook pictured above is a Gamakatsu Finesse Wide Gap – #4
– lately my preference has been a Gamakatsu Drop Shot Hook – #2 or 4.


Print This Page
how to tie, leech, Sculpin and goby pattern for swinging, spey fly, steelhead, tube fly, two handed spey rod
12
Gift Certificate

Gift Certificates

About Ted Kraimer Fishing Guide

About Your Guide, Ted Kraimer

Guide Trips - Fly Fishing Float Trips

Guide Trips & Pricing

Testimonials

Fish & Seasons

Trout Fishing Manistee River near Traverse City Michigan

Trout

Fly fishing for smallmouth bass Manistee River and Northern Michigan Lakes
Smallmouth Bass

Bluegill, Panfish and Bass Fly Fishing on Local Lakes Near Traverse City

Bluegill / Panfish / Bass

Fall Steelhead Manistee River

Steelhead

Carp Fishing West Grand Traverse Bay

Golden Bones / Carp

King Salmon Fly Fishing - Betsie River Near Traverse City

Salmon

Ted Kraimer • Current Works, LLC • PO Box 333 • Traverse City, Michigan 49685 • (231) 883-8156

© 2024 Current Works, LLC — All rights reserved
  • Home
  • Guide Trips & Pricing
  • Fishing Report
  • Fish & Seasons
  • Rivers & Hatches
  • Fly Tying
  • Articles
  • Gallery
  • About
  • Sitemap