
” A Fly”
One summer I was struggling to figure out what the trout on the local rivers wanted to eat. Adding insult to injury, the deer flies were feeding better than the trout – but on me as I observed the river thinking of the hundreds of possible fly patterns that might work. Then the light bulb flickered and buzzed like an old fluorescent lamp with a bad ballast- “Hey, what if I fished with a fly that looked like a fly?”
I adapted a few terrestrial patterns and came up with the deer fly pattern that I call “A Fly.” The Brook Trout and Brown Trout noticed all the flies on the water, too, and my pattern to them was no different, at least before they decided to eat it. Other guides and anglers noting our success that summer would often ask what pattern I was using, I simply and honestly replied, “a fly.” I’m not sure they ever caught on.

Brown and Brook Trout like to eat flies
When summer comes along and most of the match-the-hatch problems and puzzles have passed by, have some of these flies in your box. While some bigger fish do take A Fly from time to time, it’s mostly the smaller trout happily feeding in the summer months that this fly is effective with. It’s a great fly to fish on a 3 or 4 weight or to use as an indicator with a Trico attached as a dropper.
Being a smaller, darker fly, it can be tricky to see, so feel free to change the color and size of the “tracker,” but be careful because if it is too large, the fly won’t land right side up.
Headed to Chile this winter? Increase the size to a number 8 and watch what happens as this pattern imitates the local beetles.
Recipe
Hook: Gamakatsu S10-2S, Size 12
Thread: Uni-6/0 – Black
Body: Foam 2mm – Black
Underbody: Peacock Herl
Under wing: Angel Hair – Pear/Gold
Wing: CDC Feathers – Natural Gray
Rubber Legs: Sili Legs – Nymph Size, Olive Barred
Indicator: 2mm Foam, bright color
Tying Instructions:

Step 1. Wrap a thread base from behind the eye to above the barb then back mid-shank.
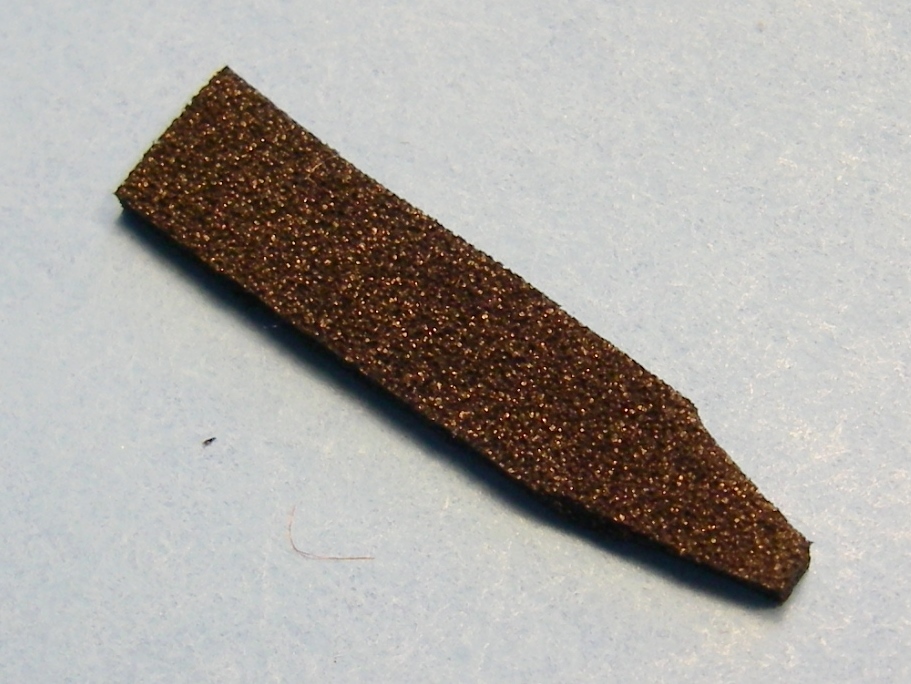
Step 2. Cut a piece of foam about 3/16″ wide and 2″ long.
Taper one end as shown by trimming with your scissors.
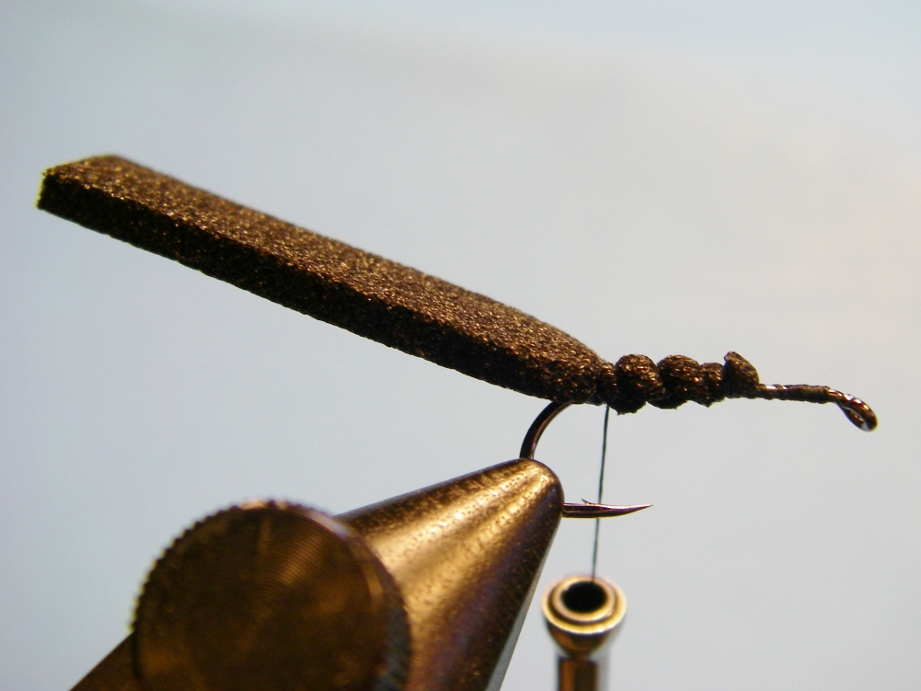
Step 3. Tie the end of the tapered foam on top of the hook from mid-shank and loosely
wrap backwards to above the hook barb – this helps prevent the thread from cutting the foam.
Now, wrap forward with tighter wraps to secure the foam.
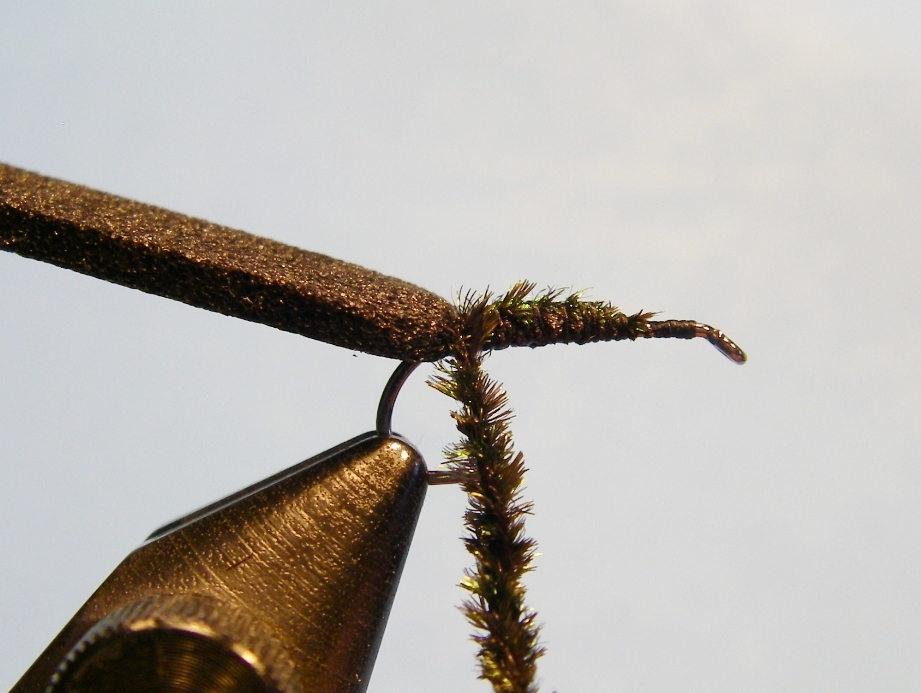
Step 4. Take 5-6 strands of peacock herl and tie the tips in mid-shank and wrap
back to above the barb. Wrap/twist the herl around the thread to strengthen the peacock.
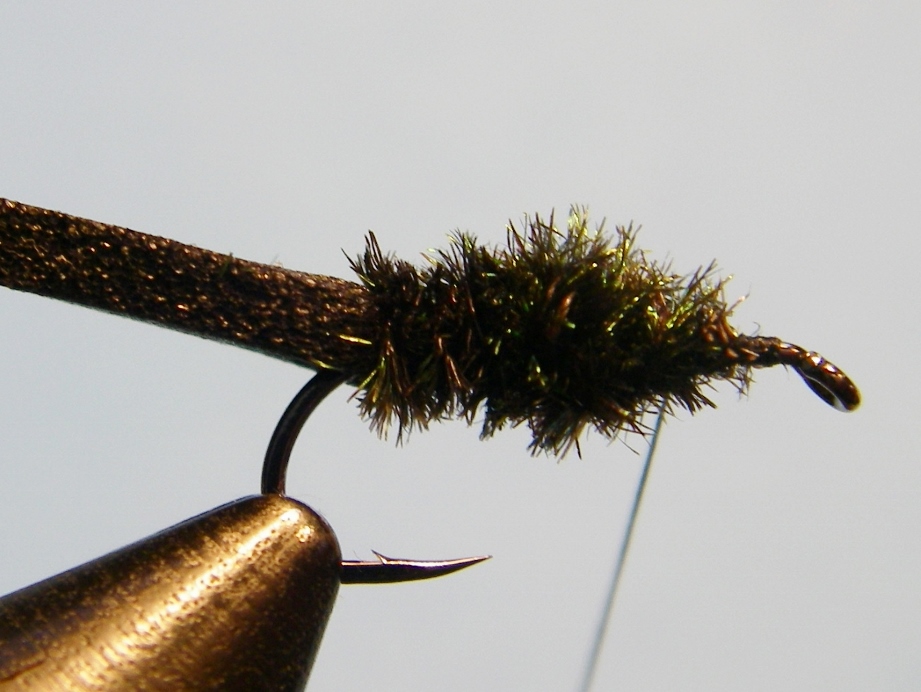
Step 5. Wind the peacock twist forward building a bulbous underbody
ending about 2/3rds up the shank. Tie off excess herl.
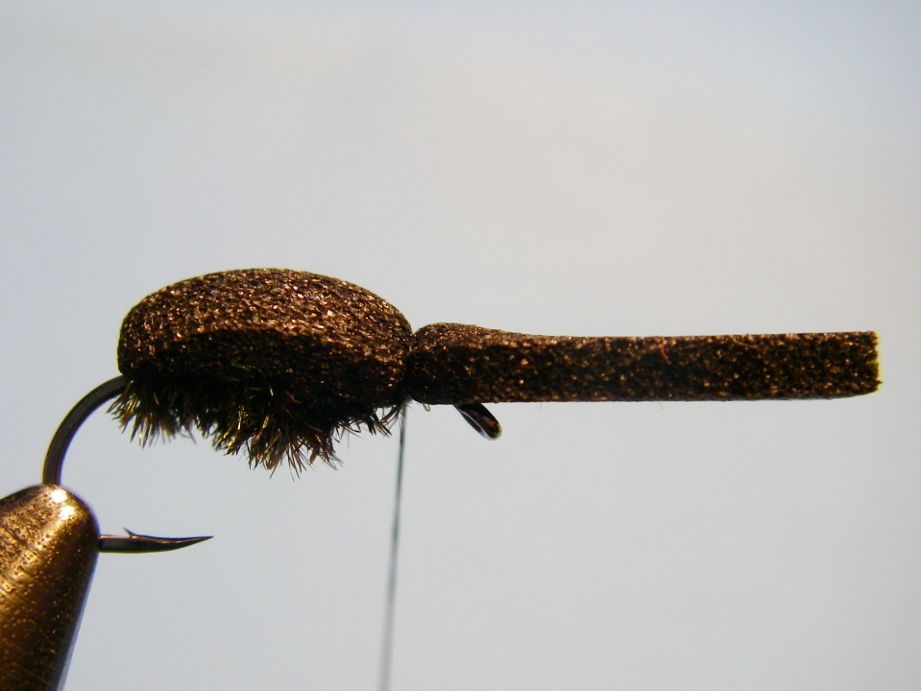
Step 6. Pull the foam up over the peacock underbody and secure with loose wraps all the way to the hook eye.

Step 7. Tie a sparse amount of Angel Hair as an under-wing so it doesn’t extend beyond
the foam back when it is pushed down. I typically pull just a few strands and
double back them over a number of times until I get the desired amount.
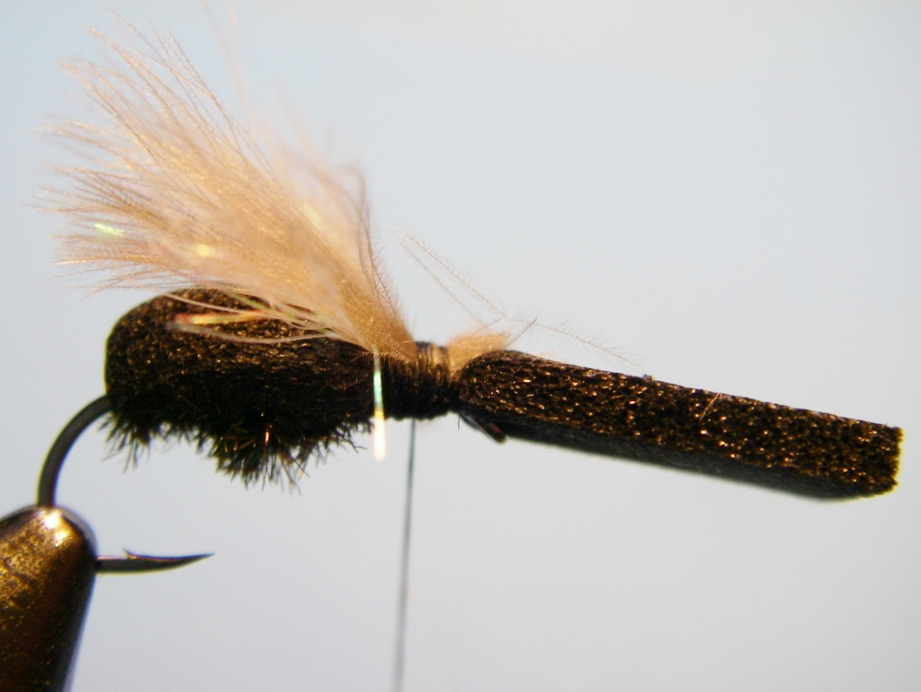

Step 8. Tie 4 to 6 CDC feathers so the natural tips are aligned
and extend to the bend of the hook and broadly fan out.
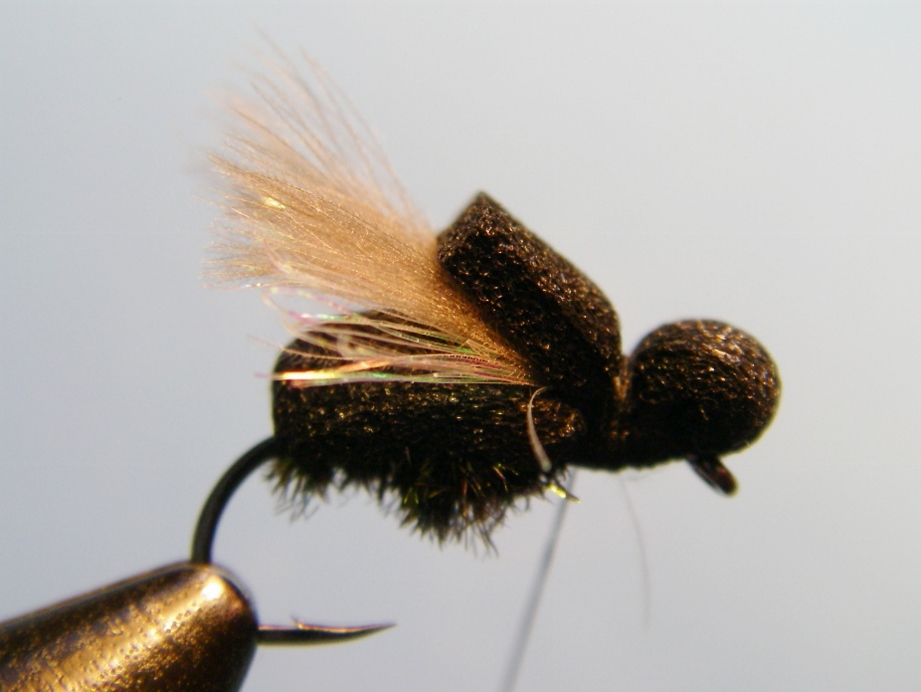
Step 9. Fold the remaining foam backward forming a bulge of foam up front and tie down so the foam
helps lay the wing down. Trim the foam just enough to maintain the pressure on the wing.
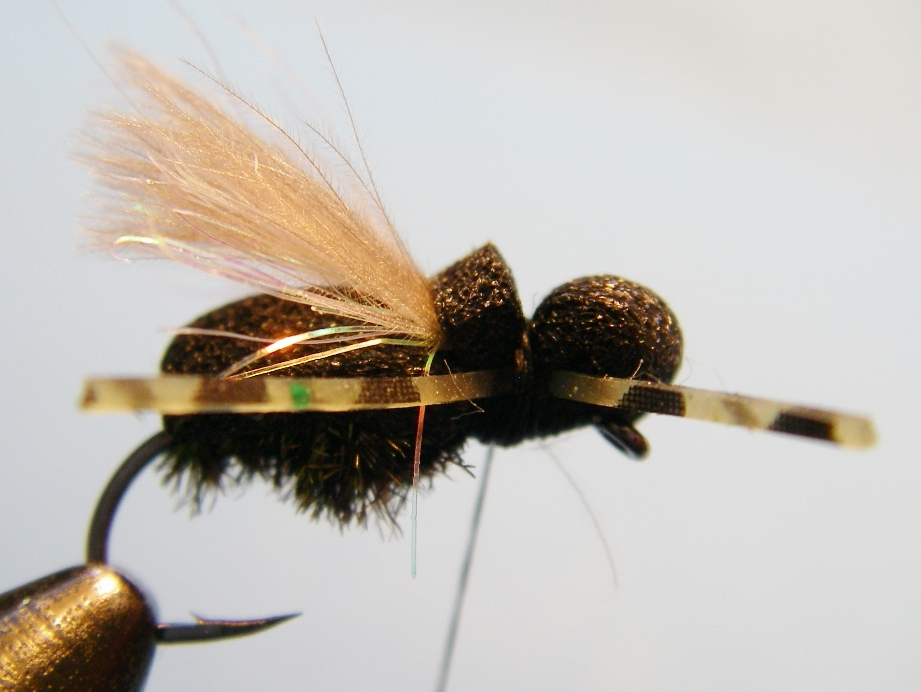

Step 10. Tie a rubber leg in on each side of the fly in the tie down region. It is important to note that these legs
are “Nymph” sized and are smaller in diameter providing adequate motion and maintaining a buoyant fly.
Trim the “X” of the legs so the rear legs are just short of the bend of the hook to avoid fouling.
Trim the front legs so they are shorter than the back legs.
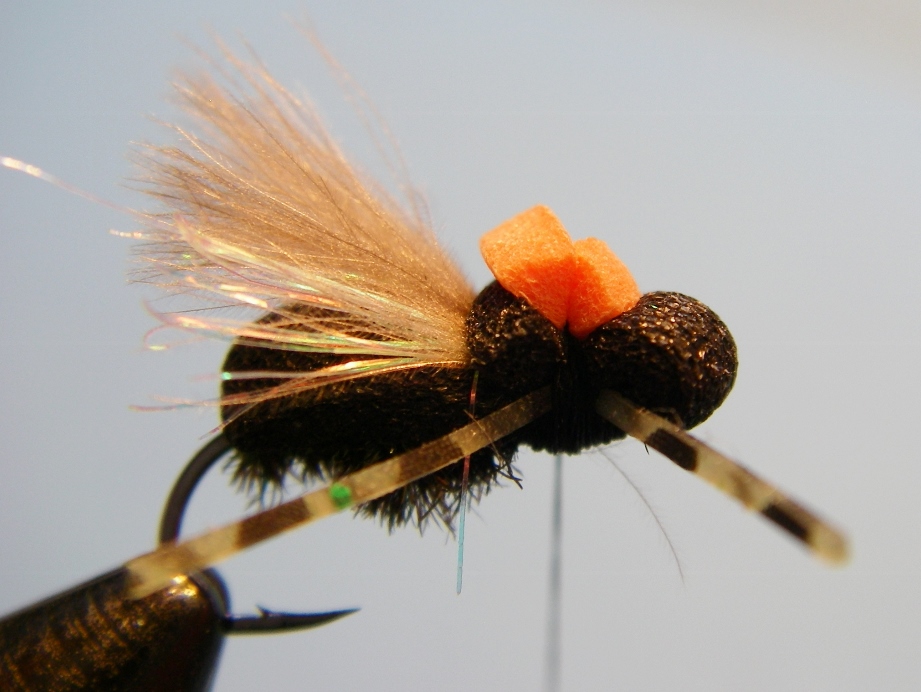
Step 11. Tie in a piece of bright foam – your choice on color – to help you track the fly on the water.
Make this as small as you can but also large enough to help you see it.
Step 12. Whip finish and be sure to add two coats of thin
head cement to protect all of the exposed thread wraps.